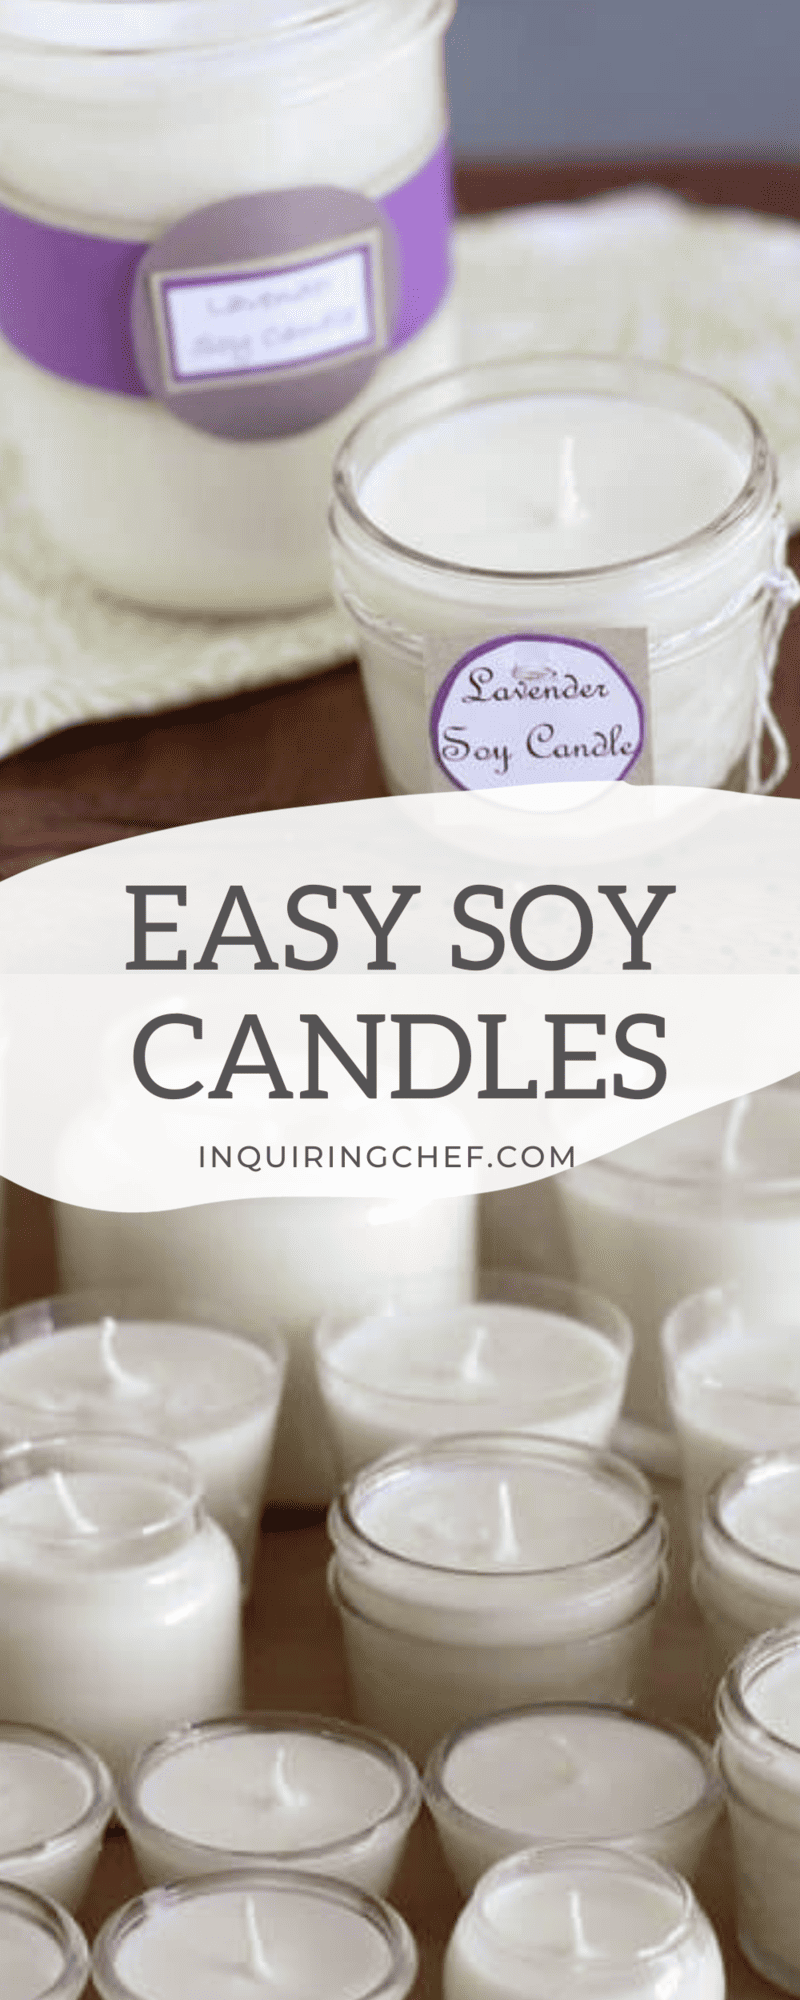
How to Make Soy Candles
Published Dec 01, 2012•Updated Mar 13, 2024
This post may contain affiliate links. Please read our disclosure policy.
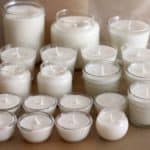
Making homemade soy candles is one of the easiest crafts projects around, and these little beauties make awesome gifts.

In case you ever wondered what $15 worth of soy wax and 30 minutes in the kitchen will get you…
It all starts with a bag of soy wax.

You would be shocked to know how fast we blow through candles around here. I mean fast. I think it’s the coziness factor.

Thanks to all that candle-burning, my collection was looking pretty haggard
But then (probably thanks to Pinterest), I discovered that making soy candles is super easy.
About a month ago, I had friends over and we experimented with making soy candles in all sorts of sizes and “flavors” (using essential oils).
They all worked great, although they don’t project aroma as much as most commercial candles. (Purchasing special oils designed for candles helps to increase the intensity of the scents.)

(Can you spy the candy corns? We made a fall-themed night of it.)
Paraffin vs. Soy Wax
Making these candles is particularly easy because soy wax is not nearly as sticky as the paraffin used in most commercial candles. Soy wax washes right off of everything. If you google paraffin vs. soy wax, there are lots of people out there who will tell you that soy candles burn cleaner than paraffin, but to me, the biggest advantage is how easy and clean these are to make at home.
The Tools
It doesn’t cost a lot of money to make soy candles. All you need are these totally affordable, basic tools.
I often use mason jars like those linked above (especially if making these for gifts), but any jar will work. Candle wicks (also found on Amazon), a wooden skewer (or pencil), scissors, and double-sided tape (or glue) are also good to have around.

The Steps
First, measure a piece of the wick so that it is about 4 inches longer than your jar is tall. Tie a knot in one end. Secure the knot to the bottom of the jar with a piece of double-sided tape. Use a skewer or pencil to push it down and secure it. I get a bunch of these ready at once, so I can pour the melted wax right in.
(Note: you can also buy fancy wicks with a metal piece for the bottom of the jar…not necessary, but makes them a bit easier to secure to the jar.)

Next, melt the wax. The soy wax comes in these nice white flakes.

Melt the wax in a pan over medium heat or in a microwave-safe container and on high (it only takes 90 seconds in my microwave).
4 cups of soy wax flakes = 2 cups melted wax.

When it’s all nice and melted, let it cool just a bit. Then stir in essential oils (about 4 drops per cup of melted wax) to scent the wax.

Pour the warm wax into the prepared jars, leaving about 1 inch of space at the top.
Twist the wick around a skewer or pencil and set it on top of the jar so the wick stays centered.

When the wax is cool (about an hour), trim the wick so about 1 inch of wick remains.

Pretty, aren’t they?

And even nicer once lit…

Wouldn’t these be nice as Christmas gifts?

More Homemade Gift Ideas
How to Make Soy Candles
Ingredients
- Clean, dry containers (any combination of sizes that will hold approximately 16 fluid oz. of liquid; i.e; two 8-oz. or one 12-oz. jar and one 4-oz. jar)
- Candle wicks (I use these)
- Double-Sided Tape
- 4 cups soy wax flakes (I use these)
- Essential Oils (4 drops per cup of melted wax), optional
Instructions
- Set the glass containers on a clean, dry dishtowel. Cut a piece of wick for each container that is 4 inches longer than the container is tall. Place a small piece of double-sided tape in the bottom center of each container. Tie a knot at the end of each wick. Press the knot firmly into the double-sided tape to lightly secure. Leave the free end of the wick hanging over the side of the container.
- Fill a sauce pan to the top with soy wax flakes. Place the pan over medium heat. As the wax begins to melt, after about 5 minutes, gently stir it until all of the wax becomes smooth and pourable. (Alternatively, melt the wax in the microwave.)
- Remove the wax from the heat and let it cool for about 5 minutes. Add essential oils, if using, and stir to combine.
- Pour wax into prepared jars, leaving 1 inch of space at the top of each jar. Center the free end of the wick in the wax. Twist the wick around a pencil or wooden skewer. Let the wax dry for at least an hour. Cut the wick short so that only about 1 inch remains.


Joanne, Eco Soya pillar blend absolutely will work for container candles. Be advised, a second pour will probably be required, so make sure to leave enough wax (about 1/4 cup, depending on the size of the jar.) Soy wax HAS to be heated to 185F so that the little molecules will break down and let the scent combine. Als0, before you put your scent in, try mixing 1 tbsp of Crisco into the wax before adding scent. Add scent around 120F. Stir, stir, stir! Pour after 2 minutes of stirring. S-L-O-W-L-Y
I’ve bought a big bag of eco soya pillar blend. Can I use this for jars and containers too?
Hi! Thanks for the tutorial! I have tried to make a few candles with 464 Golden Foods Soy Wax. They turn out look nice once they cool, and then I burn them. Once I blow out the wicks (still trying to find the right sized wick for the jar sizes), and let the wax cool, I come back to…a dry pit. That is the only way I can describe it. Every single candle after burning (whether the wick has been to large or to small), has become a dry pit. Not extremely attractive. Is this normal for Soy Candles? Or am I doing something utterly wrong? (I have been heating the wax to 165/170 and then adding the scent in, and pouring the candles at about 115/120) Thank you for any help!
Hi
Can I make multiple wick candles of soy wax? What type of wicks must I use for a six or eight wick candle? And how much gap or distance must I leave between each wick?
Distance should be 1 inch from each wick. 6-8 wick candles I’ve never seen ..depends on the diameter of the jar
Hi ….I’m wondering how/when to add scented wax beads rather than essential oils…that’s the route I chose to go. Also, I thought I read somewhere that wicks come in different sizes depending on the diameter of the jar or container you’re using for your candle? Is this true?
Hi Karen – I’ve never used scented wax beads, so I’m afraid I can’t offer any help on this. When to add them might vary depending on their size, so see if there are any instructions specific to the beads you purchased. Some wicks do have recommendations for certain diameter jars and even for the type of candle (soy vs. paraffin vs. other types of wax), so it’s worth reading the label and buying wicks that will work for your size jar. I’ve never had any trouble using a standard sized wick for all my jars, but I’m never using jars that are more than 4 inches in diameter or so.
Karen I’m curious how your candles with the scented beads turned out? I tried that once and the beads didnt melt into my soy wax. It wass if the two couldn’t blend. Please let me know how that turns out.
My candles once they have dried leave like a wet spot on the sides of the jars. Maybe like the soy contracted or something, if that is possible. Also, my soy wax doesn’t smell a lot when I scent it! Should I use vybar?
Hi Jennifer – try letting your wax cool down before you pour it into jars. If the wax is very hot, it sometimes contracts when it cools and leave little air spaces on the sides. It’s worth experimenting with what you use to scent the candles – soy definitely doesn’t hold as much scent as commercial/paraffin candles.
Hi… I have the same problem!
I’ve been making soy candles and I pour at 135 and after drying some will have wet spots and others will not. It’s so frustrating. I’ve also notice after two days of drying in a room I will then move to the hallway and then I will see wet spots. It’s so strange. Please help!
I’ve yet to find an answer Tania, but I do think some of it has to do with the temperature in the room as they are cooling. I think that in a very cool room, the temp of the candles drops so fast that it creates those spots. I notice that, if I’m working in a warmer room and they sit in a warmer space overnight to cool, I have less problems with the spotting. Glad it’s not just me!
Actually you need to warm your containers up so that no wet spots appear. You put them on a cookie sheet in oven under Keep Warm setting.
Jennifer you might have simply overheated your soy wax if its not retaining the scent you put in, try keeping an eye on your temp and it should fix your scent issue. As for your wet spots on sides of jar sounds like you just need to let your soy cool more and evenly. I stir mine constantly but slowly until it reaches pour temp.
Jennifer,
A simple trick to use (though you’ll have to gather materials for it) is insulating your containers prior to pouring your wax. I use thick wool socks that I grab for next to nothing from a thrift store, wash them and cut the closed end so they’re open on both ends. Put your containers on top of a flat surface with a towel or other insulating item on the surface that will still allow your containers to sit flat. Put your containers inside the socks so they’re covered from top edge to bottom, then pour. You can wrap them in small cotton towels with rubber bands to hold them on around top too…You decide. The insulation insures that the candles cool much slower, reducing cracks, sink holes and wet spots. I’ve also prepped them this way on a cookie sheet and placed it in a 125° oven for about 10 min prior to pouring because my kitchen tends to be cooler than the rest of the house in cold temperatures and they will still start off too cold. Good luck & happy pouring!
Hi
I was just wondering is it 15 drops to 4 cups essential oils when melted to 2 cups or is the weight for 4 cups melted?? Just wondering and if you use a microwave how long should you put it in for? Can you burn the soy wax?
Thank you
Hi Tara – great questions. It’s 15 drops essential oil to 2 cups melted soy wax – this is an approximation, so don’t worry if you add a bit more or less. Microwaving the soy wax should be done carefully in short increments. Because microwaves all function at varying heats, there’s no way to know exactly how long it will take. Keep a close eye on it and take the wax out and give it a good stir every 30 seconds or so. It will quickly go from solid to liquid form, so pull it out right when it turns to liquid. (I actually don’t know if you can burn the wax (good question!), but the possibility of that is another good reason to make sure you pull it out as soon as it turns to liquid.)
Very nice tutorial! This may be a dumb question, but did you prime your wick with the wax before hand at all?
Thanks!
Hi Amy – not a dumb question at all – actually sounds like a question of someone who has experience with this. In a couple years of making candles just the way I’ve shown in this tutorial, I’ve never primed the wicks I use. It hasn’t seemed to make any difference for me. Please chime in though if you have advice for those who would like to take that step!
Does the wax have a flashpoint? I’ve read on some instruction pages you should use a thermometer so it doesn’t get too hot.
For Soy Wax the temp should be no higher than 180 degrees and if your using essential oils add at the temp of 100 degrees, for every pound of wax you can use up to 1 1/2 oz. I’m getting ready to make my second batch of soy wax candles, still learning here and found some interesting things about certain types of essential oils that we should NOT use. Also whatever you do, do not use zinc wicks they really don’t work well with soy wax, i use soy wicks you can get these at ur local craft store.
HTH’s
I use zinc core wicks for my soy candles. I make dessert candles. I wish there was a way I could share pictures.
your labels are sooooo cute how did you make them i need to know