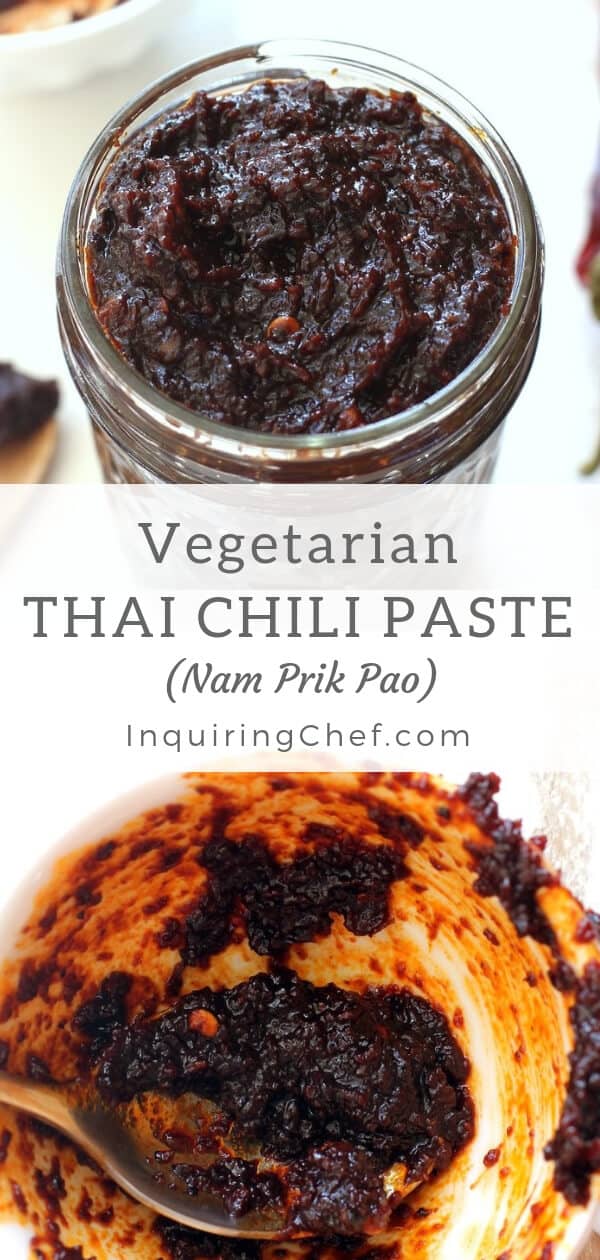
Vegetarian Nam Prik Pao (Thai Chili Paste)
Published Feb 29, 2016•Updated Apr 02, 2024
This post may contain affiliate links. Please read our disclosure policy.
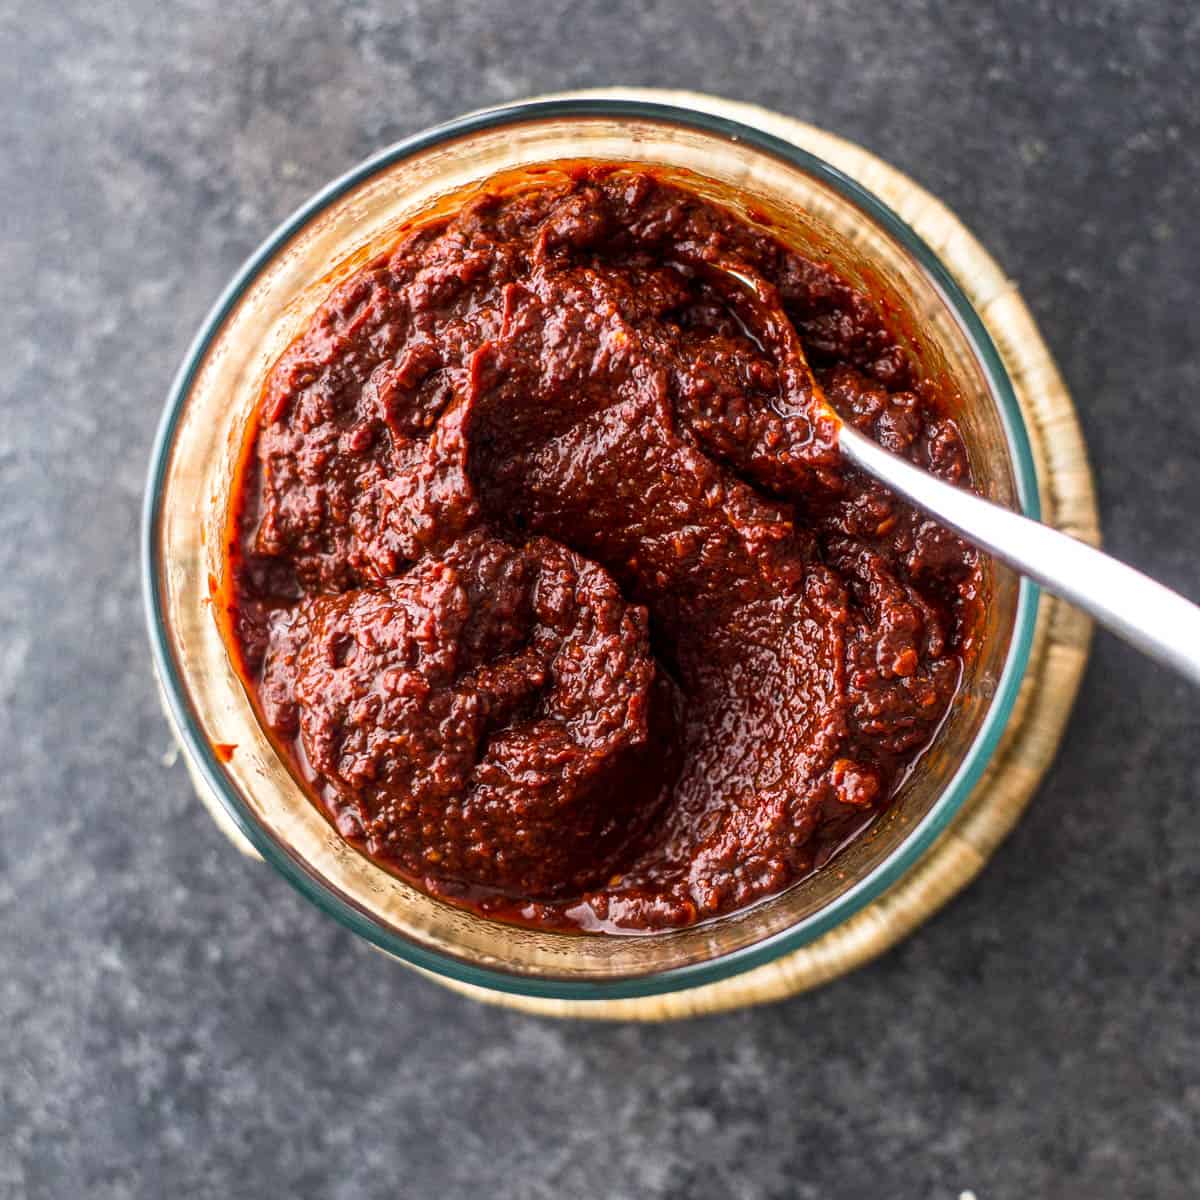
Smoky, sweet, tart and spicy, Nam Prik Pao (Thai Chili Paste) has a flavor-packed punch that is a secret weapon in Thai kitchens. It is super easy to make at home, keeps in the fridge for weeks, and just a spoonful will turn you into a Thai chef overnight.
I wrote about my vegetarian version of Thai Chili Paste years ago and it remains one of the most popular recipes on this site. I’m bringing the recipe back with all new step-by-step photos and detailed instructions.
Step 1: Prepare the Chilis
I use dried New Mexico Chilis which are are widely available in the United States and work great. They are about 6 inches / 15 cm in length and have a deep red color. You can use any other dried chili, including dried Thai Chilis to make this, but make sure that they are large chilis of the dimensions above (not the small, super spicy Thai chilis often called “Bird’s Eye chilis”).

One of the best things about making Nam Prik Pao yourself is that you have total control over the level of spice.
The more seeds you remove from the chilis, the less spicy your finished dish will be. If this is your first time making Nam Prik Pao, it’s a great idea to remove most of them and set them aside. You can always add some back in at the end.
Step 2: Roast
Next, roast the chilis, shallots and garlic at 400 F / 204 C degrees. This is the set-up I like for roasting (a cooling rack over a baking sheet) because it allows air to circulate underneath the ingredients.
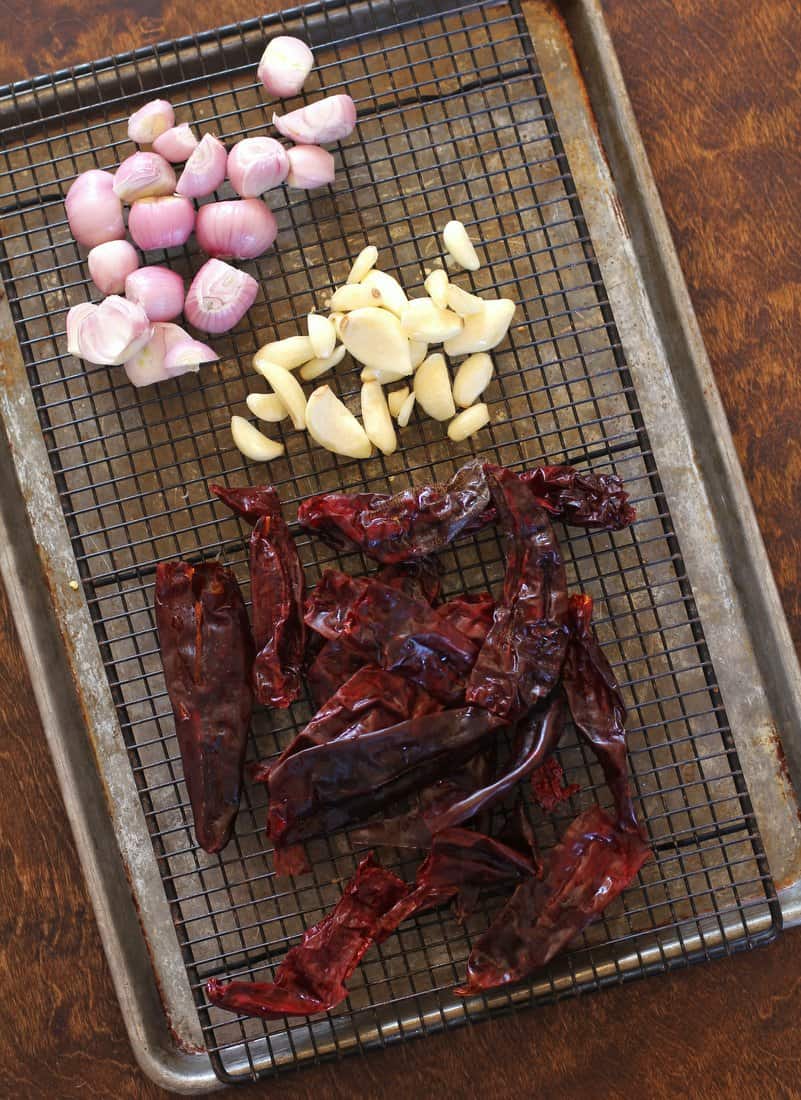
The chilis will start to char after 10 minutes, at which point you should pull those off the baking sheet.
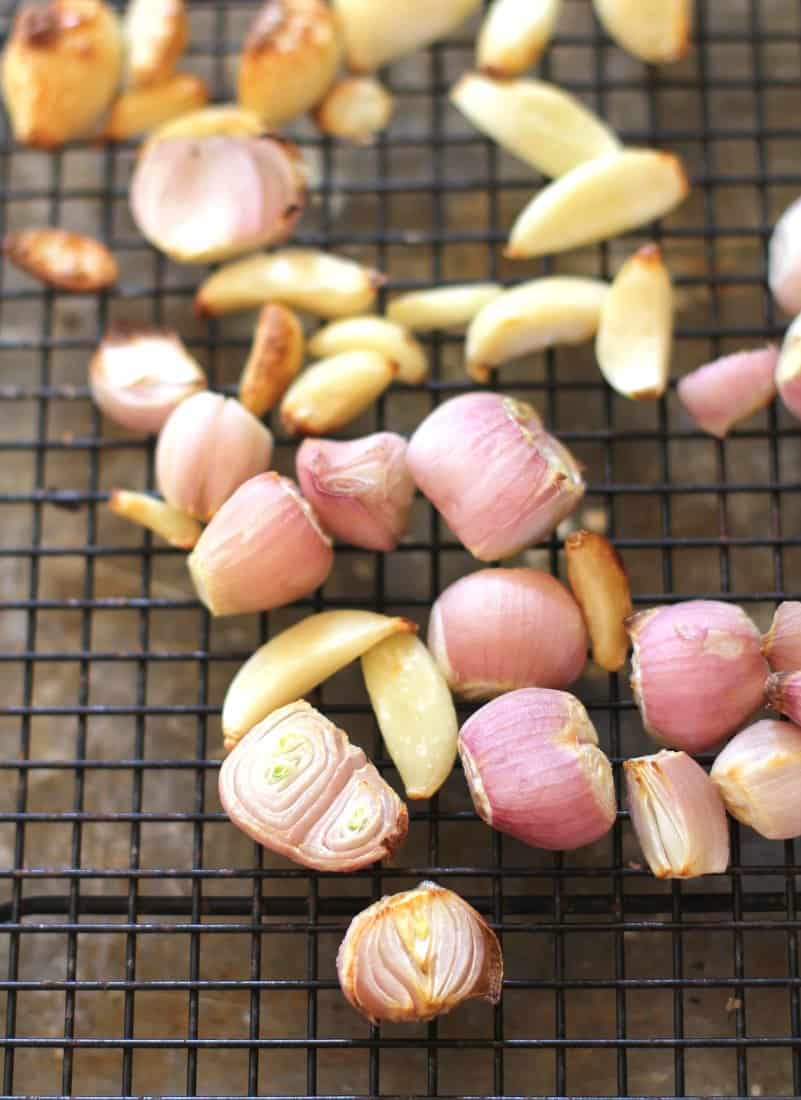
Then continue roasting the shallots and garlic for another 15 minutes, until golden brown and tender.
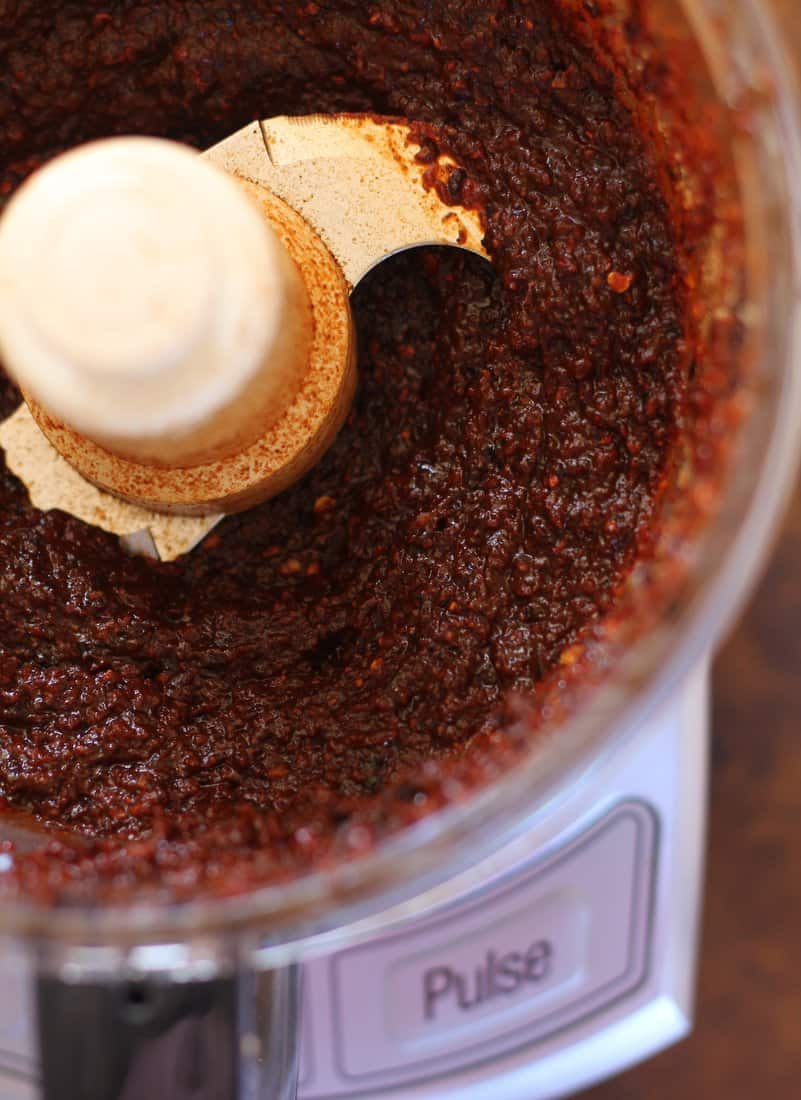
Step 3: Puree
Blitz all of the ingredients in a food processor until a thick paste forms, adding water if needed.
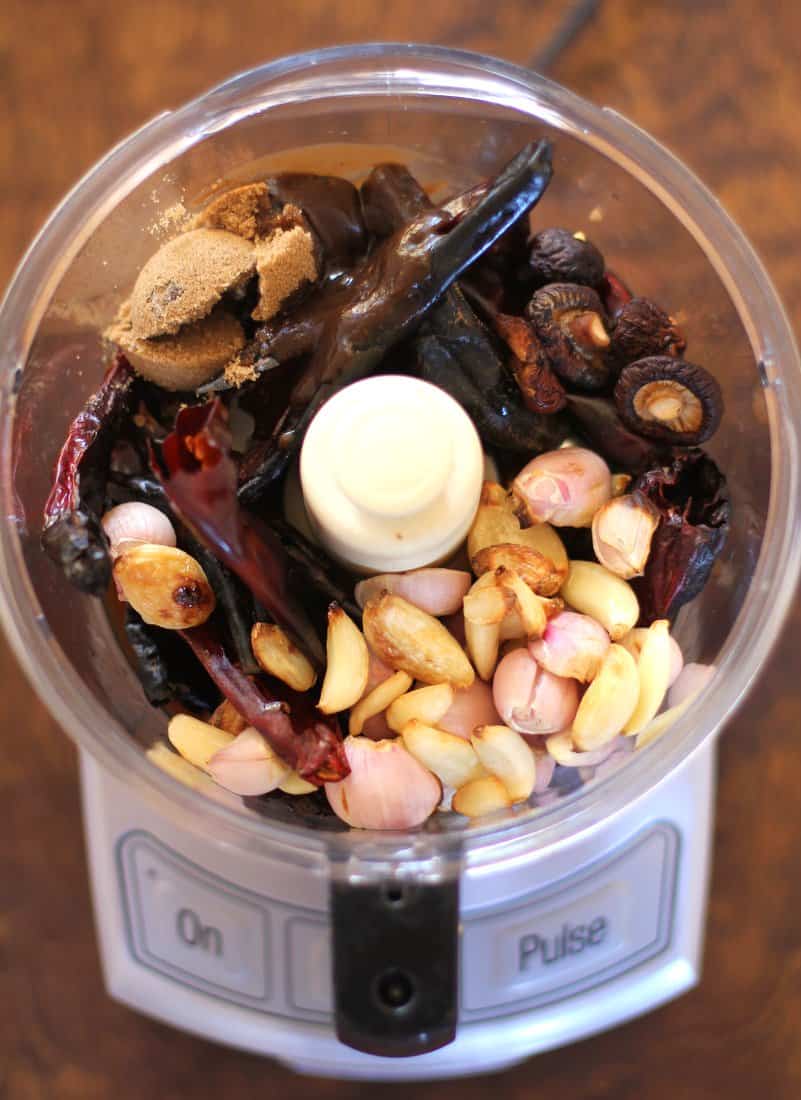
It turns bright red and thick. At this point it’s a good idea to taste and adjust the flavors a bit. With a quick taste you’ll know if you need to add a bit more sugar (palm sugar is traditional, but brown sugar works) or salt (in the form of soy sauce, fish sauce, or tamari).
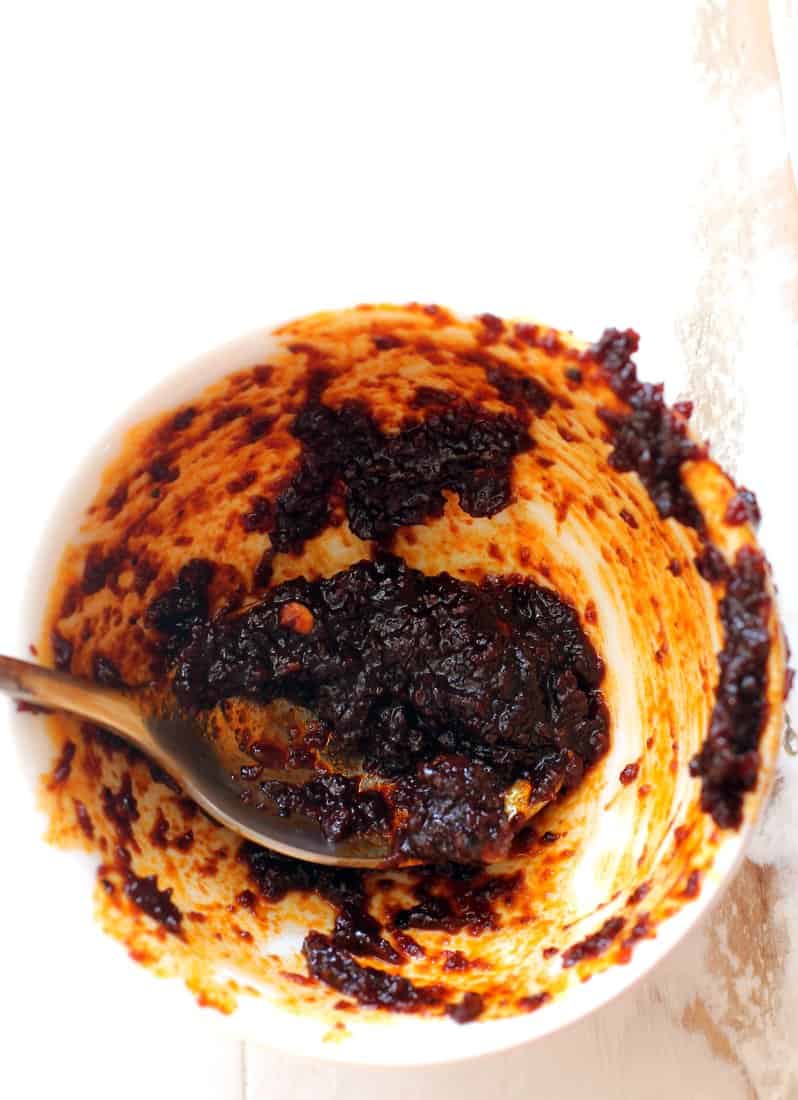
Step 4: Toast
The final step is what gives Nam Prik Pao an extra dose of deep, smoky flavor. You can skip this step if you prefer or are short on time. Just add a bit of oil to a skillet and then saute the Nam Prik Pao until it turns dark and fragrant, 6 to 8 minutes.
Tamarind Paste and Shiitakes
The only thing that might seem unusual in this lovely condiment is Tamarind Paste. You can read all about making tamarind paste here. We also tested this recipe using tamarind concentrate found at our local Asian grocery store or online here.
The homemade tamarind paste (left) is thicker and has more texture to it than the commercial version (right), but both will work in Nam Prik Pao.

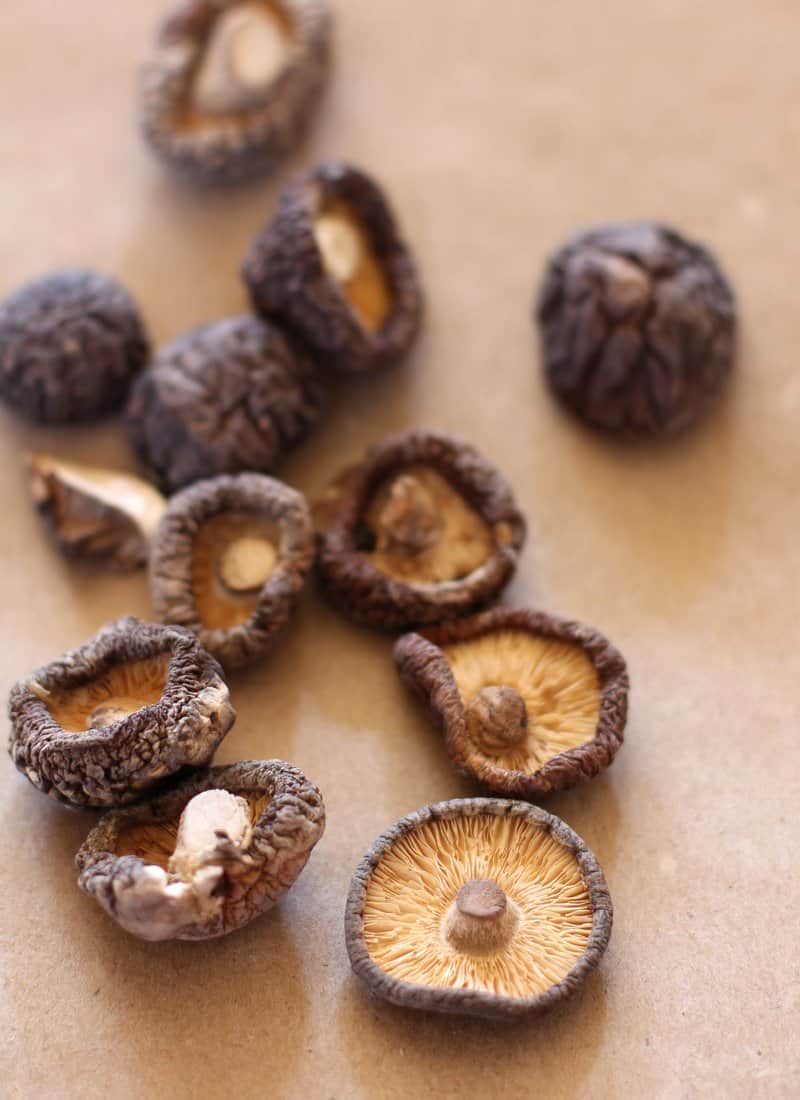
And dried shiitakes are the key ingredient that give this vegetarian version a ton of umami flavor. Traditional Nam Prik Pao uses dried shrimp to give the dish that umami, but I love the more subtle (less fishy) flavor of shiitakes.
Once you start making this condiment at home, you’ll find endless ways to use it. Crispy Tofu Stir-Fry with Nam Prik Pao is a good place to start. Enjoy!
More Homemade Thai Sauces

Favorite Tools


Pin this now to save it for later
Pin It Now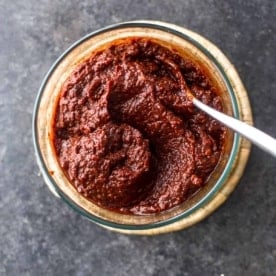
How to Make Vegetarian Nam Prik Pao (Thai Chili Paste)
Equipment
- Half Sheet Pan
- Food Processor
- Large Skillet
- Mixing Bowl
Ingredients
- 20 dried New Mexico Chilis (see note)
- 14 small Shallots, peeled 113 grams (see note)
- 20 cloves Garlic, peeled 57 grams (see note)
- 6 Tablespoons Cooking Oil, divided (any neutral-tasting oil will work)
- 10 / 2 ounces dried Shiitake Mushrooms 57 grams
- 6 Tablespoons Tamarind Paste (click here for everything you need to know about this)
- 4 Tablespoons Brown Sugar 50 grams (use the same weight of palm sugar if you can find it)
- 4 Tablespoons Soy Sauce (sub fish sauce if you eat fish; sub Tamari if gluten-free)
- 1/2 cup Water, plus more if needed
Instructions
- Preheat oven to 350 F / 177 C degrees. Lightly spray a sheet pan with nonstick cooking spray or brush with a small amount of oil. (Note: I previously always roasted the chilis and aromatics on a cooling rack over a sheet pan to increase air circulation while they roast as shown in the photos above. I no longer find it necessary to do this, and prefer to roast the ingredients directly on a sheet pan to save a step. I find the results to be very similar.)
- Rinse the chilis under water to clean (no need to soak them). Use kitchen scissors to cut off and discard the stems. Shake out seeds to achieve your desired level of spice. (Note: If you leave all the seeds in, you will have a very spicy Nam Prik Pao, and if you remove nearly all the seeds it will barely be spicy at all. If you are hesitant about spice, remove as many seeds as you can the first time you make this. You can always set the seeds aside and add them back in during the final step.)
- Toss chilis, shallots, and garlic cloves with 2 Tbsp oil. Spread out on sheet pan.
- Place the sheet pan in the oven and roast until the chilis start to char and blacken in spots, 8 to 10 minutes, turning everything with a flat spatula halfway through cooking.
- When chilis are charred, remove them from the sheet pan. Return the shallots and garlic to the oven and continue roasting until golden and tender, 10 to 15 minutes more.
- Meanwhile, rinse the dried shiitake mushrooms under tap water (no need to soak them).
- In the bowl of a food processor combine the chilis, shallots, garlic, shiitakes, tamarind paste, brown sugar, soy sauce, and 1/2 cup water. Turn the machine on and blend until smooth, adding additional water to create a thick paste.
- Heat a large skillet over medium heat. Add 4 Tbsp oil. When oil begins to shimmer, add chili paste and cook, stirring frequently, until the paste becomes fragrant and turns dark, 6 to 8 minutes.
- Taste the paste and add additional sugar or soy sauce, if needed to reach your desired balance of sweet / salty. If you reserved some of the chili seeds, you can add them back in and cook for a few minutes longer to increase the spice level.
- Transfer to containers and refrigerate. Store in the refrigerator for up to 6 weeks.
Notes
Nutrition
Nutrition information is automatically calculated, so should only be used as an approximation.


Trying this now. The gram weights in the recipe appear to be off by a factor of 10 ( 10 2oz mushrooms are abour 570 grams, not 57).
Thanks so much David! We’ll look into that.
I did not have shitakes, shallots or tamarind. I used two medium yellow onions cut into shallot-sized pieces and added 2T white vinegar for the tamarind. I reduced the brown sugar and soy sauce both by 1/2 T. It still came out delicious.
Sounds like a wonderful substitution!
I had plans to make this tomorrow but, looking through the updated recipe, I see that I have the wrong kind of chili’s. I have the bird’s eye chilis, just slightly longer than a quarter. If I remove the seeds, could these chilis be used in this recipe?
Even with the seeds removed, those will be way too spicy to make Nam Prik Pao. But you could also try this with a mix of those spicy Bird’s Eye Chilis and red bell peppers. The texture and color will be a little different since the bell peppers have a lot more liquid than dried chilis, but it should still give you a very good version. I’d try roasting 2 red bell peppers and just using 2 to 4 Bird’s Eye Chilis, depending on your spice preference.