Homemade Cinnamon Raisin Bagels
Published Mar 21, 2012•Updated Nov 08, 2023
This post may contain affiliate links. Please read our disclosure policy.
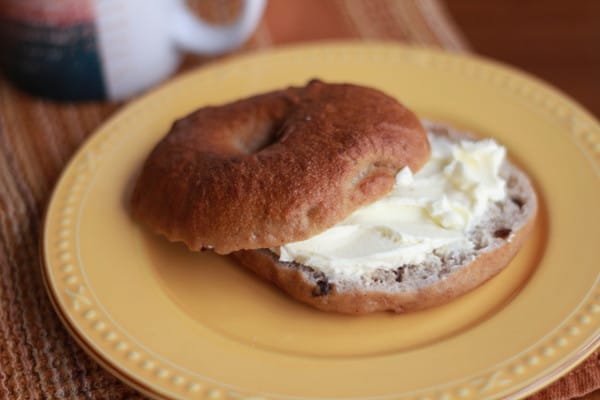
Homemade bagels are absolutely in reach. If you love cinnamon raisin bagels, look no further. This is the only recipe you will ever need to make the most delicious homemade cinnamon raisin bagels.

I wrote awhile back about my first bagel-making attempt, but they have now become such a fixture in our house that I wanted to revisit them for just a moment. At first it seemed that there are so many steps involved in bagel-making, that it would be a temporary undertaking for the years we live in Thailand. Now, after a few months of making a batch from time to time and storing them in the freezer, it seems entirely possible that I may continue to make them when we return to the U.S.

After an overnight in the refrigerator, in the morning they can be boiled and baked in less than half an hour. And you know what that means? Hot bagels straight out of the oven are always within reach.
Is there anything better?

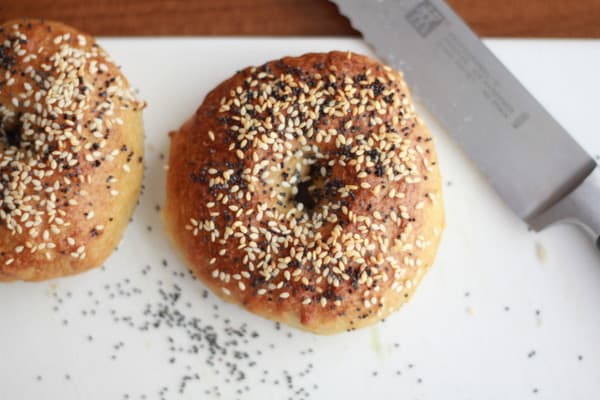
Like so many others out here in the blog world, I swear by Peter Reinhart’s bagel recipe. The recipe produces bagels with just the right amount of chew and a golden crust. I top them with sesame seeds and (the dwindling supply of precious) poppy seeds and they are darn near perfect. Unfortunately, bagels with crunchy seeds on top are not really my thing.
I pass over all other bagel varieties in pursuit of one. Cinnamon raisin. Their nutty sweetness with tiny pockets of plump raisins are my absolute favorite.

Homemade Bagels are a Possibility
The big discovery I made recently in bagel-making is that, although I have been faking my way to cinnamon raisin bagels (kneading cinnamon-sugar and raisins directly into Peter Reinhart’s original dough), Deb has a proper cinnamon raisin bagel recipe at Smitten Kitchen that I only just came across last week.
Whereas my fake-out technique made the dough sticky and difficult to manage, this recipe is far superior. And the bagels…are they ever good.
So I had to stop by today to say what I have said before. Homemade bagels are absolutely in reach. They are not nearly as complicated as one might think. And if you, like me, have a certain fondness for the cinnamon raisin variety – look no further. This is the only recipe you will ever need.
Pin this now to save it for later
Pin It Now
Cinnamon Raisin Bagels
Equipment
- Mixing Bowls
- Half Sheet Pan
- Parchment Paper
- Large Stockpot
Ingredients
For the Sponge:
- 1 teaspoon Instant Yeast
- 4 cups Unbleached High-Gluten or Bread Flour
- 2 1/2 cups Water, room temperature
For the Dough:
- 1 teaspoon Instant Yeast
- 3 3/4 cups Unbleached High-Gluten or Bread Flour
- 1 tablespoon Ground Cinnamon
- 5 tablespoons Sugar
- 2 3/4 teaspoons Salt
- 2 teaspoons Malt Powder (substitute 1 Tablespoon dark brown sugar)
- 2 cups loosely packed Raisins, rinsed with warm water
- 1 tablespoon Baking Soda
Instructions
- Make the sponge. Combine the yeast, flour and water in a large mixing bowl. Stir with a wooden spoon until evenly combined. Let rest on the counter at room temperature for 2 hours, until doubled in size. (The dough will be full of large bubbles and very sticky.)
- Make the dough. To the sponge, add the additional yeast and stir to combine. Add 3 cups of the flour, cinnamon, sugar, salt, and malt (or brown sugar). Stir just until the ingredients come together. Turn the dough out onto a lightly floured surface. Knead the dough for 10 minutes, adding the additional 3/4 cup flour as needed to keep the dough from becoming sticky. (The dough should be smooth, firm, and cool to the touch.) Immediately divide the dough into 16 even pieces (I roll it into a ball and cut it in half, and cut those halves in half, and so on until I have 16 even pieces.) Cover the rolls with a damp towel and allow them to rest on the counter for approximately 20 minutes.
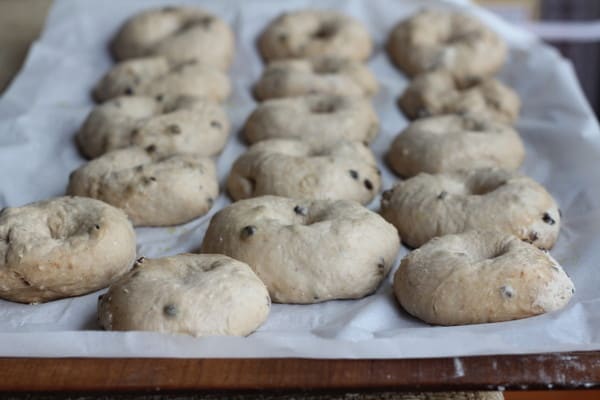
- Shape the bagels and refrigerate. Line 2 baking sheets with parchment paper and spray lightly with oil. Holding one piece of dough in both hands, gently press your thumbs through the center to form a hole. Pull gently, working your way around the bagel with your fingers, until the hole is about 2 inches wide (it will close up slightly as the dough rises). Place the bagels 2 inches apart on the baking sheets. Mist them lightly with oil and cover gently with foil or plastic wrap. Let the pans rest at room temperature for 20 minutes.
- Refrigerate the bagels overnight. (Note: I have made these without refrigerating them at all and have still found the results to be great.)
- Boil and bake the bagels. Preheat the oven to 500°F with the two racks set in the middle of the oven. Bring a large pot of water to a boil (the wider the pot the better – I use my wok), and add the baking soda.
- Remove the bagels from the refrigerator and gently drop them into the water, boiling only as many as comfortably fit without touching. Boil for 2 minutes. Then turn the bagels and boil them on the other side for 2 minutes more. After boiling, return the bagels to the parchment-paper lined baking sheets.
- When all the bagels have been boiled, place the pans on two middle shelves in the oven. Bake for approximately five minutes, then rotate the pans to allow them to bake evenly. After the rotation, lower the oven setting to 450°F and continue baking for about 5 minutes, or until the bagels turn light golden brown. (You can continue to bake them for a few minutes more to get a darker, chewier crust.) Allow to cool on a baking rack for 15 minutes before serving.
- For storing: I find that these do very well frozen. I allow them to cool completely, slice them, and then store them in tightly sealed plastic bags in the freezer. With a quick toast (5 or 6 minutes) in the oven right out of the freezer, they are fantastic.
Notes
Nutrition
Nutrition information is automatically calculated, so should only be used as an approximation.


wow! it looks yummy!
Those bagels look so great! I’ve been meaning to try to make them for a long time. You’ve definitely inspired me.
I’d literally never thought of making my own bagels first – I think this might be a towards the end of my experiment recipe though. Bread first, then bagels!
I’ve started making bagels too! Enjoy your blog as a routine break from work. Can I mail you poppyseeds?
Rachel from ED
Somehow it doesn’t surprise me a bit that it’s something you’ve tackled as well, Rachel! Missing all of you back at ED!
I remember making bagels exactly once when we were growing up. The seemed like a lot of work! Yours look delicious enough to almost make me want to try them again!
I imagine there are more complex methods out there, Eliot – but I swear that these are just about as good as any I’ve had!
….or when you get back you and the friz can start a bagel biz in philly with big john! I love bagels (and pretzels which are sort of the same anyway, right?)…love the post, love the pics and you’ve inspired me to try again…e.g. I was sure that first batch was my last! Hope you guys are great!
Lol – we’ll add bagel-shop management to careers for consideration when we get back to the States. We can only open it in Philly if you’ll do PR for us though. 😉
Your bagels look so professional!
Mmmm this makes me want to make them homemade!
I’d listen to the last comment if I were you… set up your own little bagel business right there in Bangkok.
There’s not a lot of bagel shop competition in Bangkok. Something to think about. 😉
Do you take orders? Delivery to Soi 24?? hehe
Soi 24 – you’ll be on my list for the next batch! But only after Lent for you two white-flour abstainers – maybe we should track down a whole wheat recipe….