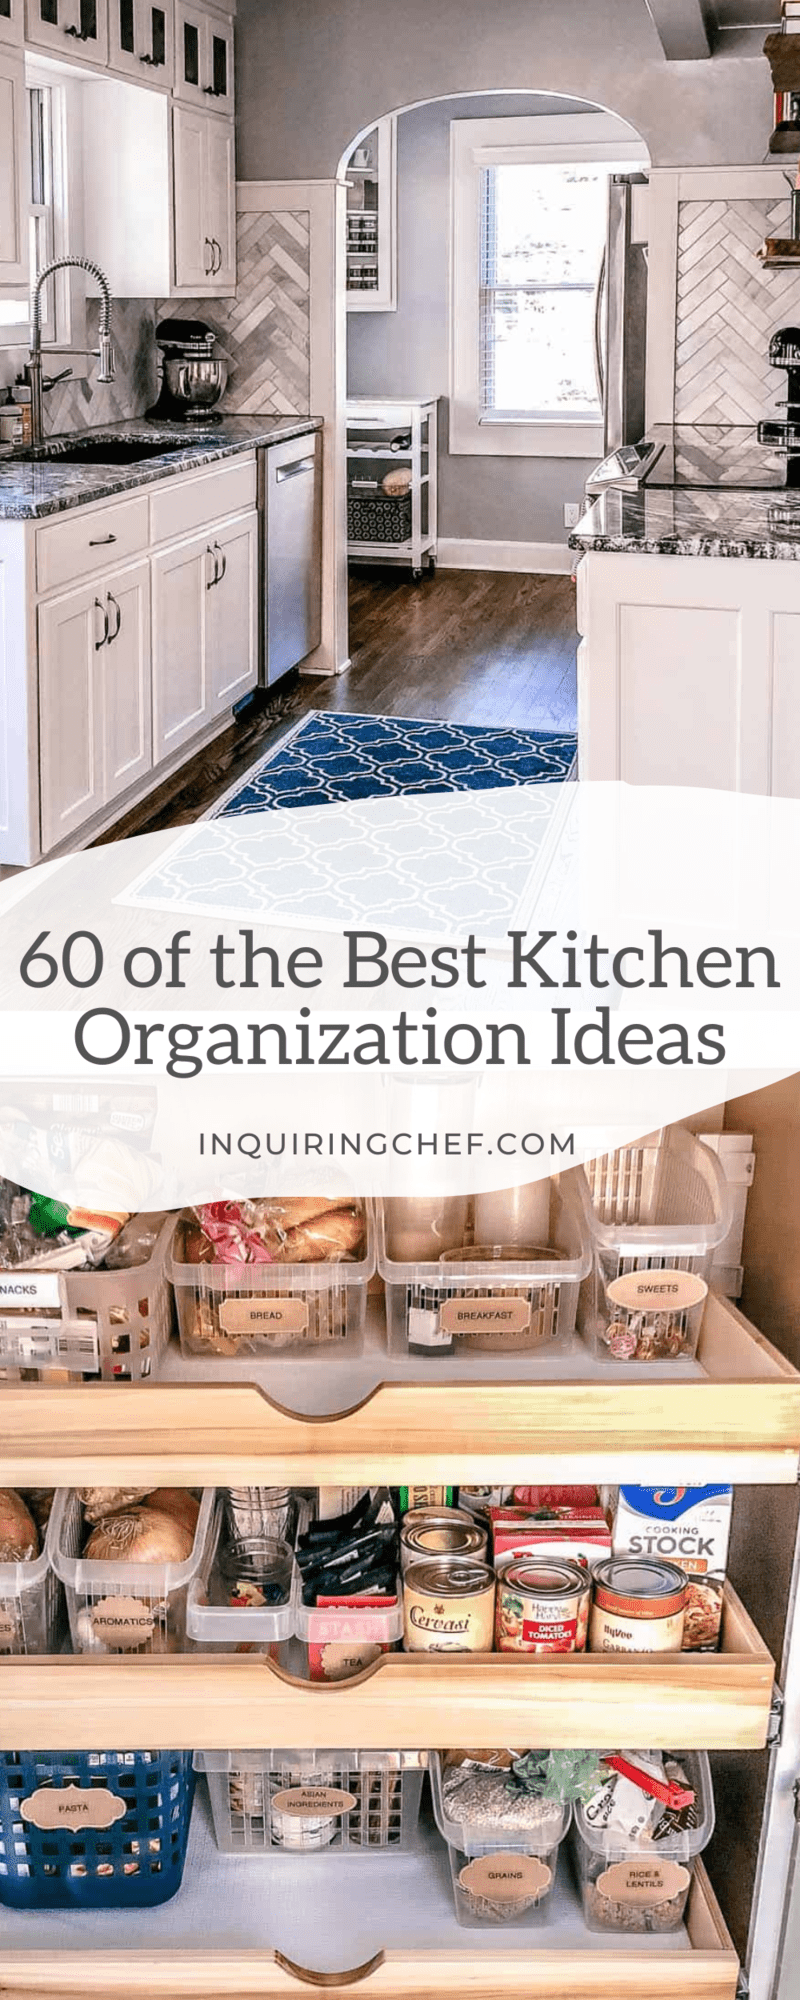
60+ Best Kitchen Organization Ideas
Published Mar 22, 2019•Updated Feb 24, 2023
This post may contain affiliate links. Please read our disclosure policy.
We rounded up more than 60 of the best kitchen organization ideas to make your kitchen the happiest place in your home.
Kitchens are the busiest room in the home. For many of us they’re not only the place where we prepare meals, but where we gain energy for the day, catch up with family and friends, wind down with a cup of tea or glass of wine. And what can make that space work best for you is to organize it to fit your unique needs.
In this roundup of kitchen organization ideas, we focused on variety. There’s something for everyone, including low and no-cost options.
Table of Contents
Kitchen Organization by Zones
The easiest way to organize any kitchen is to divide it into zones. This takes one big project and makes it more manageable by breaking it up into a few smaller projects. Take each zone, prioritize what is important for you in that space and organize it for those uses.
Most importantly of all, move or remove anything that’s not serving you in that space. If your counters need to be used for food prep, move the mail to another spot. If all of the spices come tumbling out of the cabinet when you grab one, move them to a drawer or a hanging rack on the back of the pantry door.
Countertops
- Declutter and stow all but the most essential items – Counter tops attract clutter. While items like decorative countertop bowls are cute, unless you use them frequently, it makes more sense to store them.
- Stow large appliances to give yourself more work space – Mixers, food processors, air fryers, Instant Pots, and coffee grinders save us so much time in the kitchen. They also take up a lot of space. Keep these nearby if you use them often, but consider stowing those that are less frequently used.
- Get rid of the knife block – Free up counter space by storing the knife block on a shelf or in a cabinet. Or, ditch the block all together by installing magnetic knife strips.
- Add a dry erase board for quick notes and grocery needs – Searching for a pen and paper to jot down grocery lists can send you on a scavenger hunt. Simplify things by jotting down reminders on a dry erase board.
- Corral essential cooking utensils into a small crock near the stove – Keep wooden spoons, tongs, and spatulas should near the stove. You want to quickly grab them whenever you need them.
- Use a tray to keep essentials together – Keeping essentials in a tray means you don’t have to go looking for most-used kitchen tools. A tray condenses items while keeping them in one place.
- Use a hanging paper towel holder – Paper towels are big, bulky items. You will be amazed at what a difference installing a hanging paper towel holder makes.
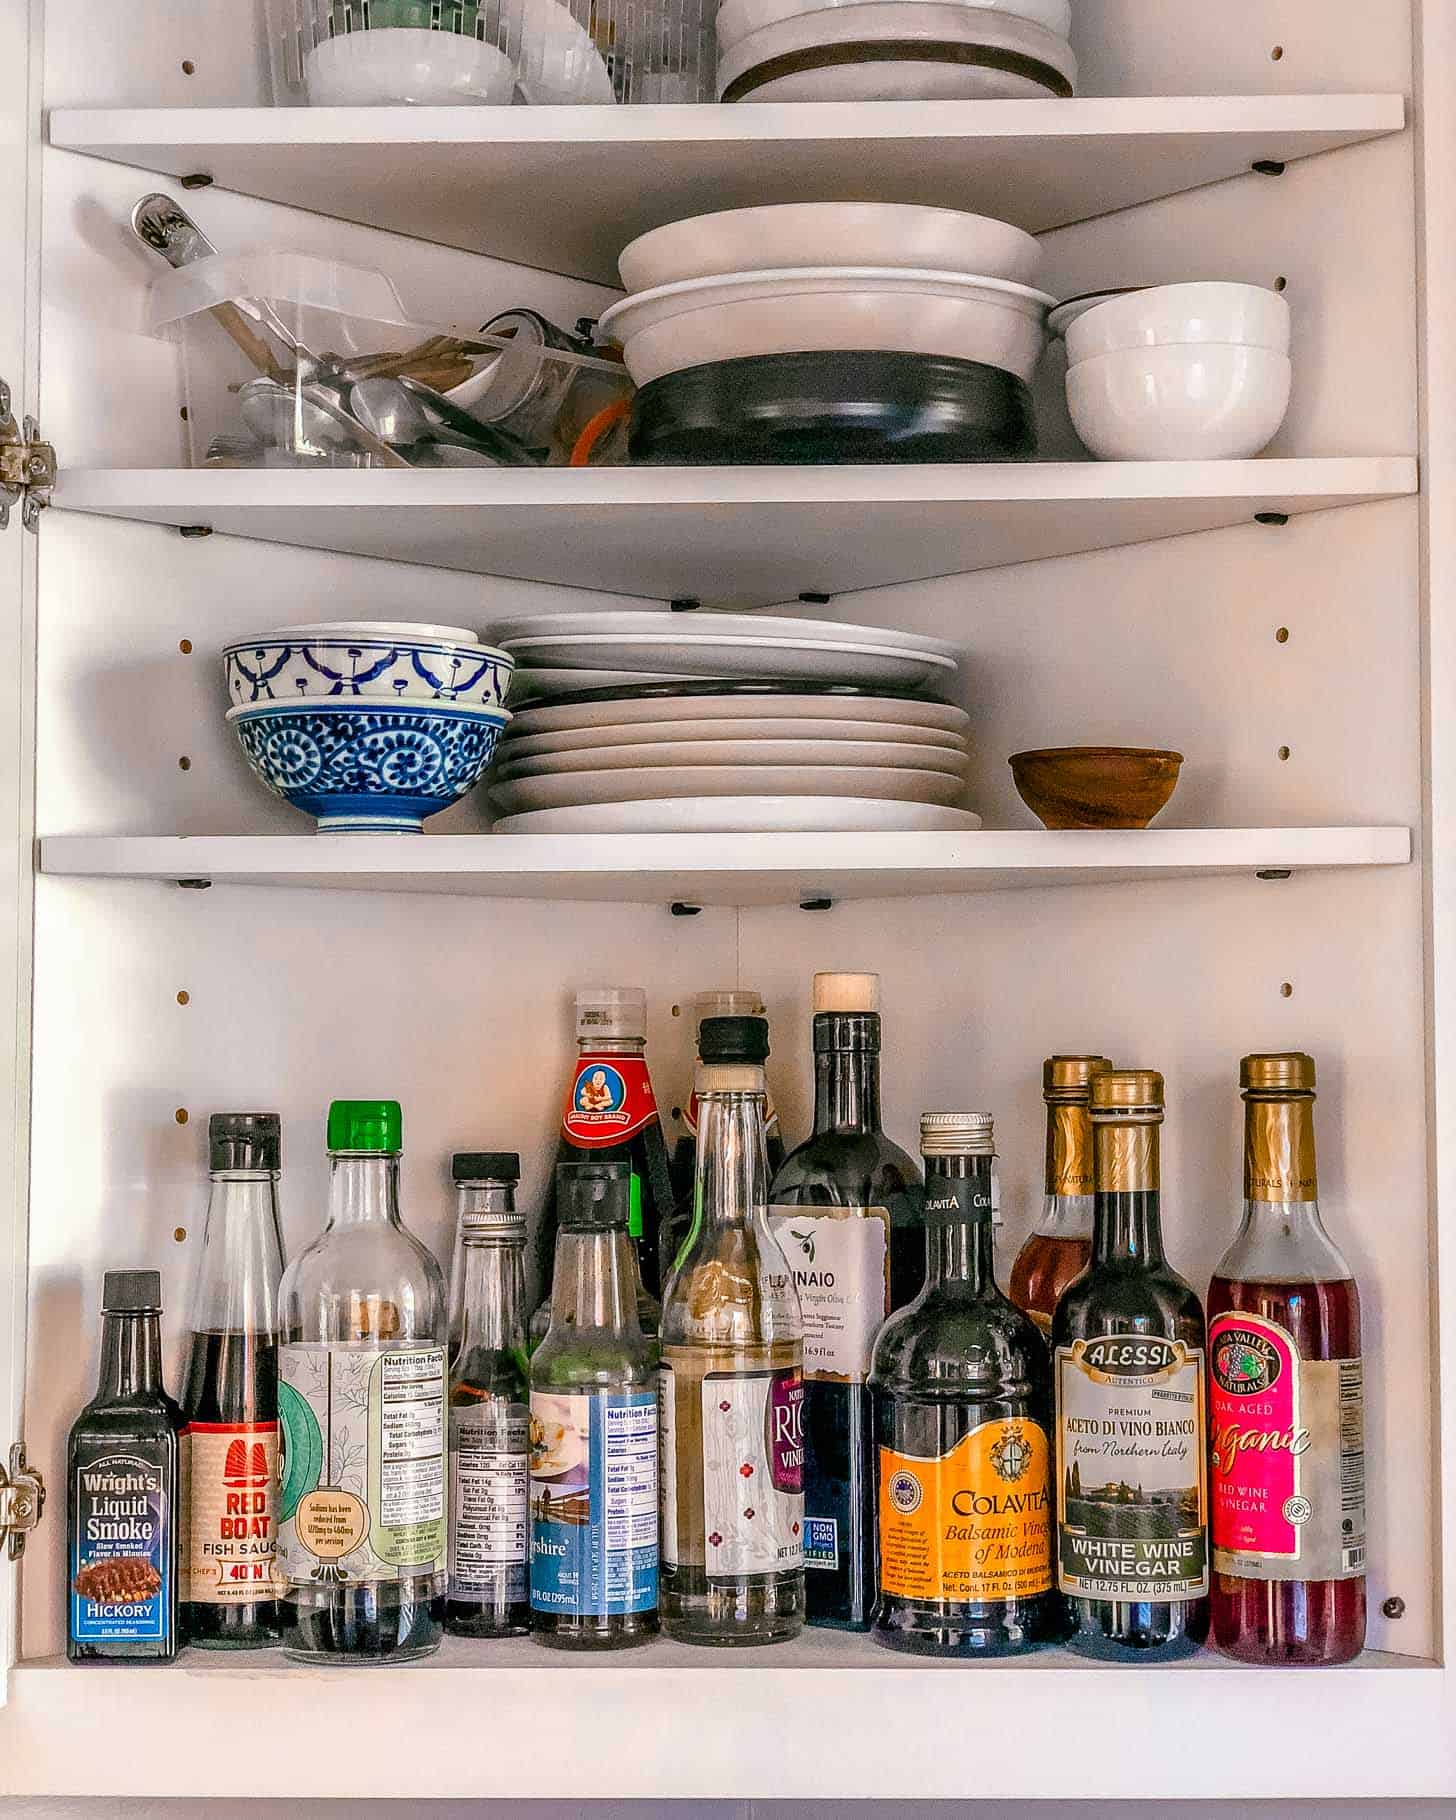
Cabinets
- Store the most-used items near the dishwasher – Convenience is key to a well-organized kitchen. Save time unloading the dishwasher by storing frequently used items like airtight food containers right next to the dishwasher.
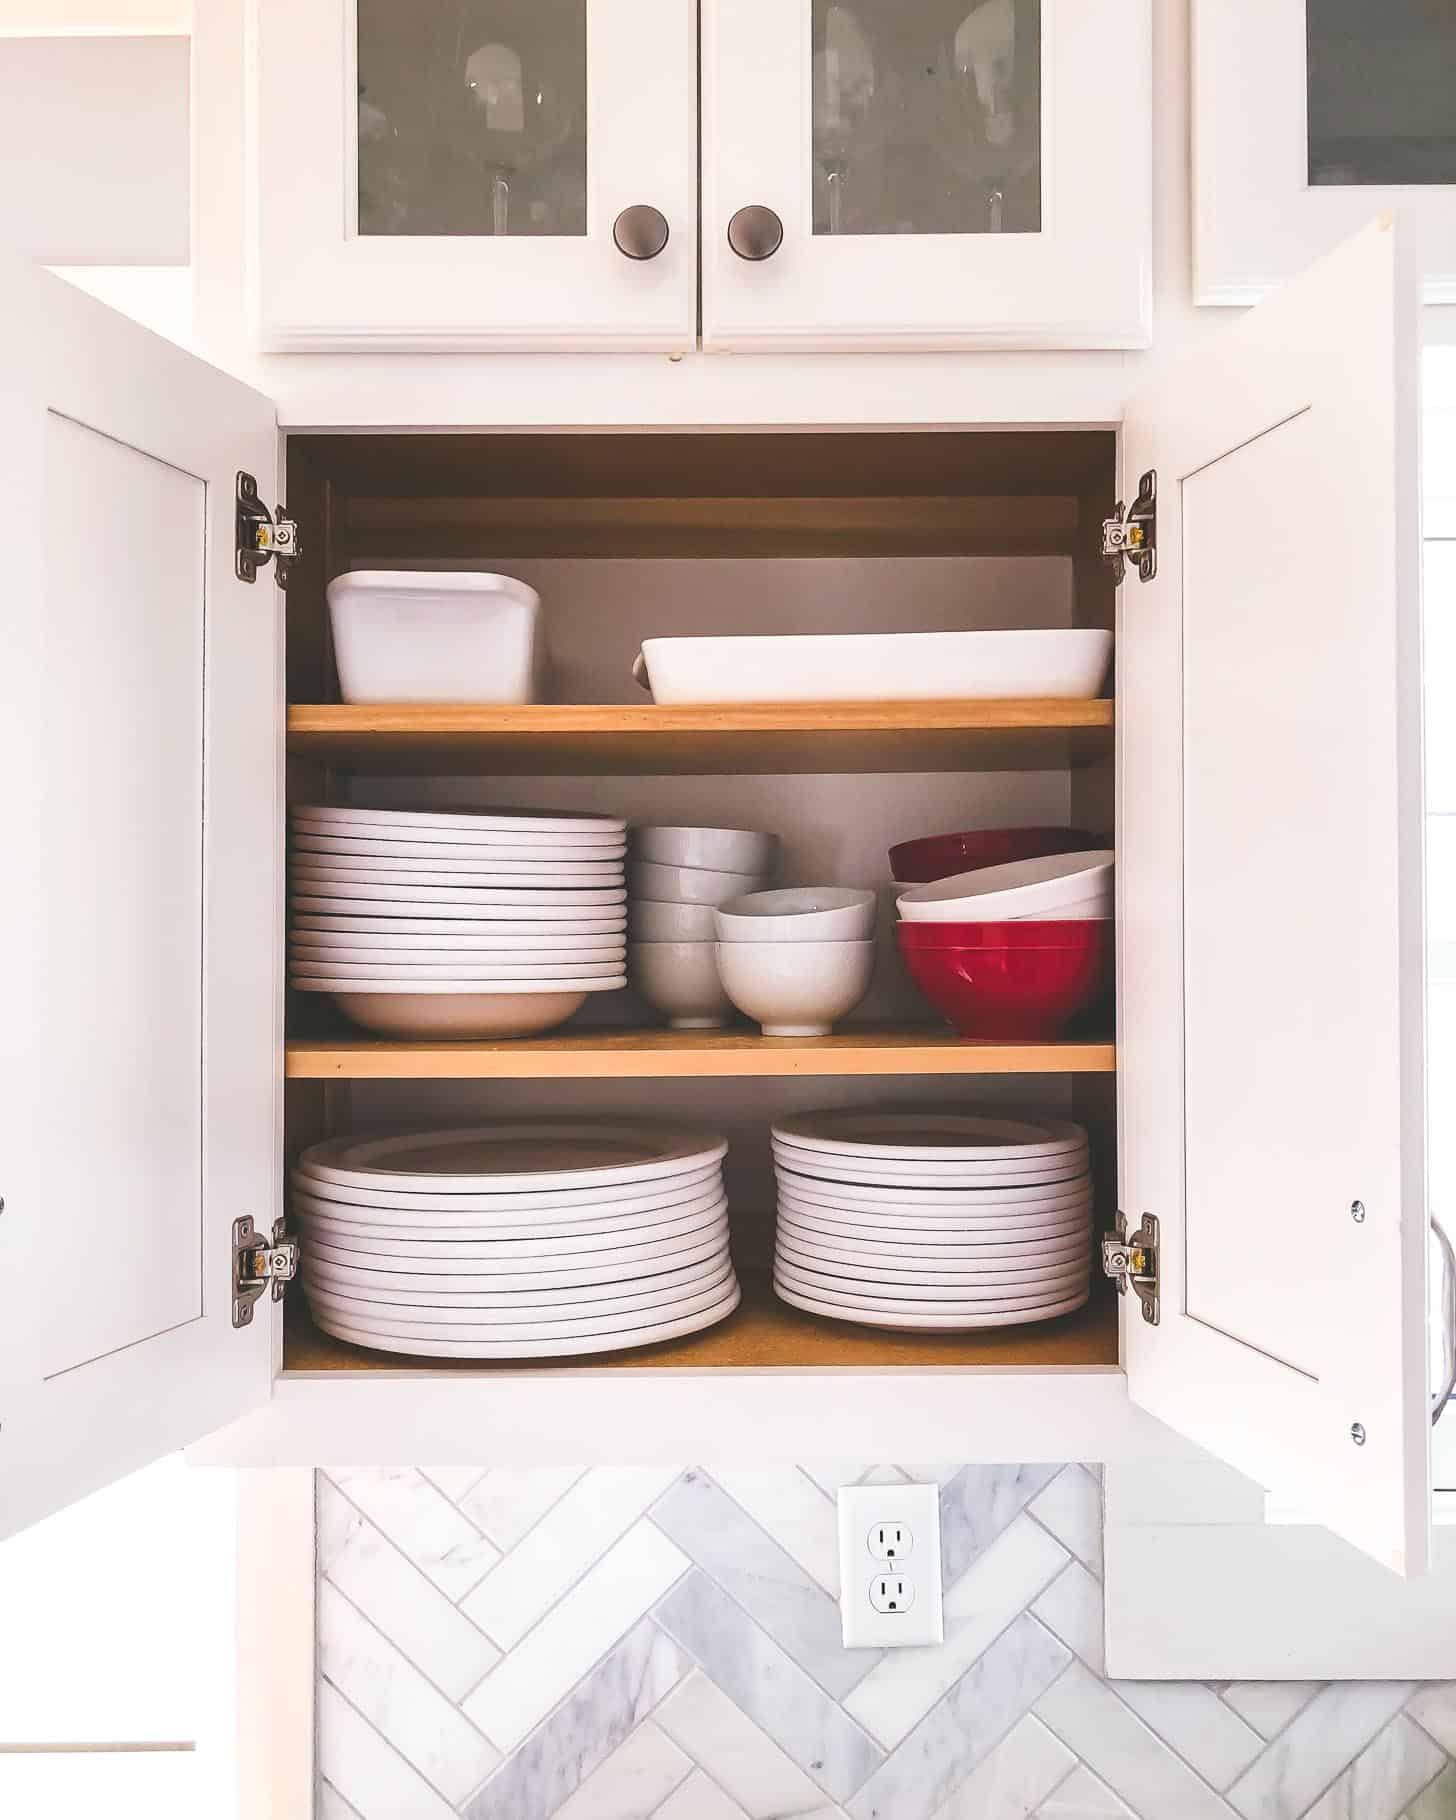
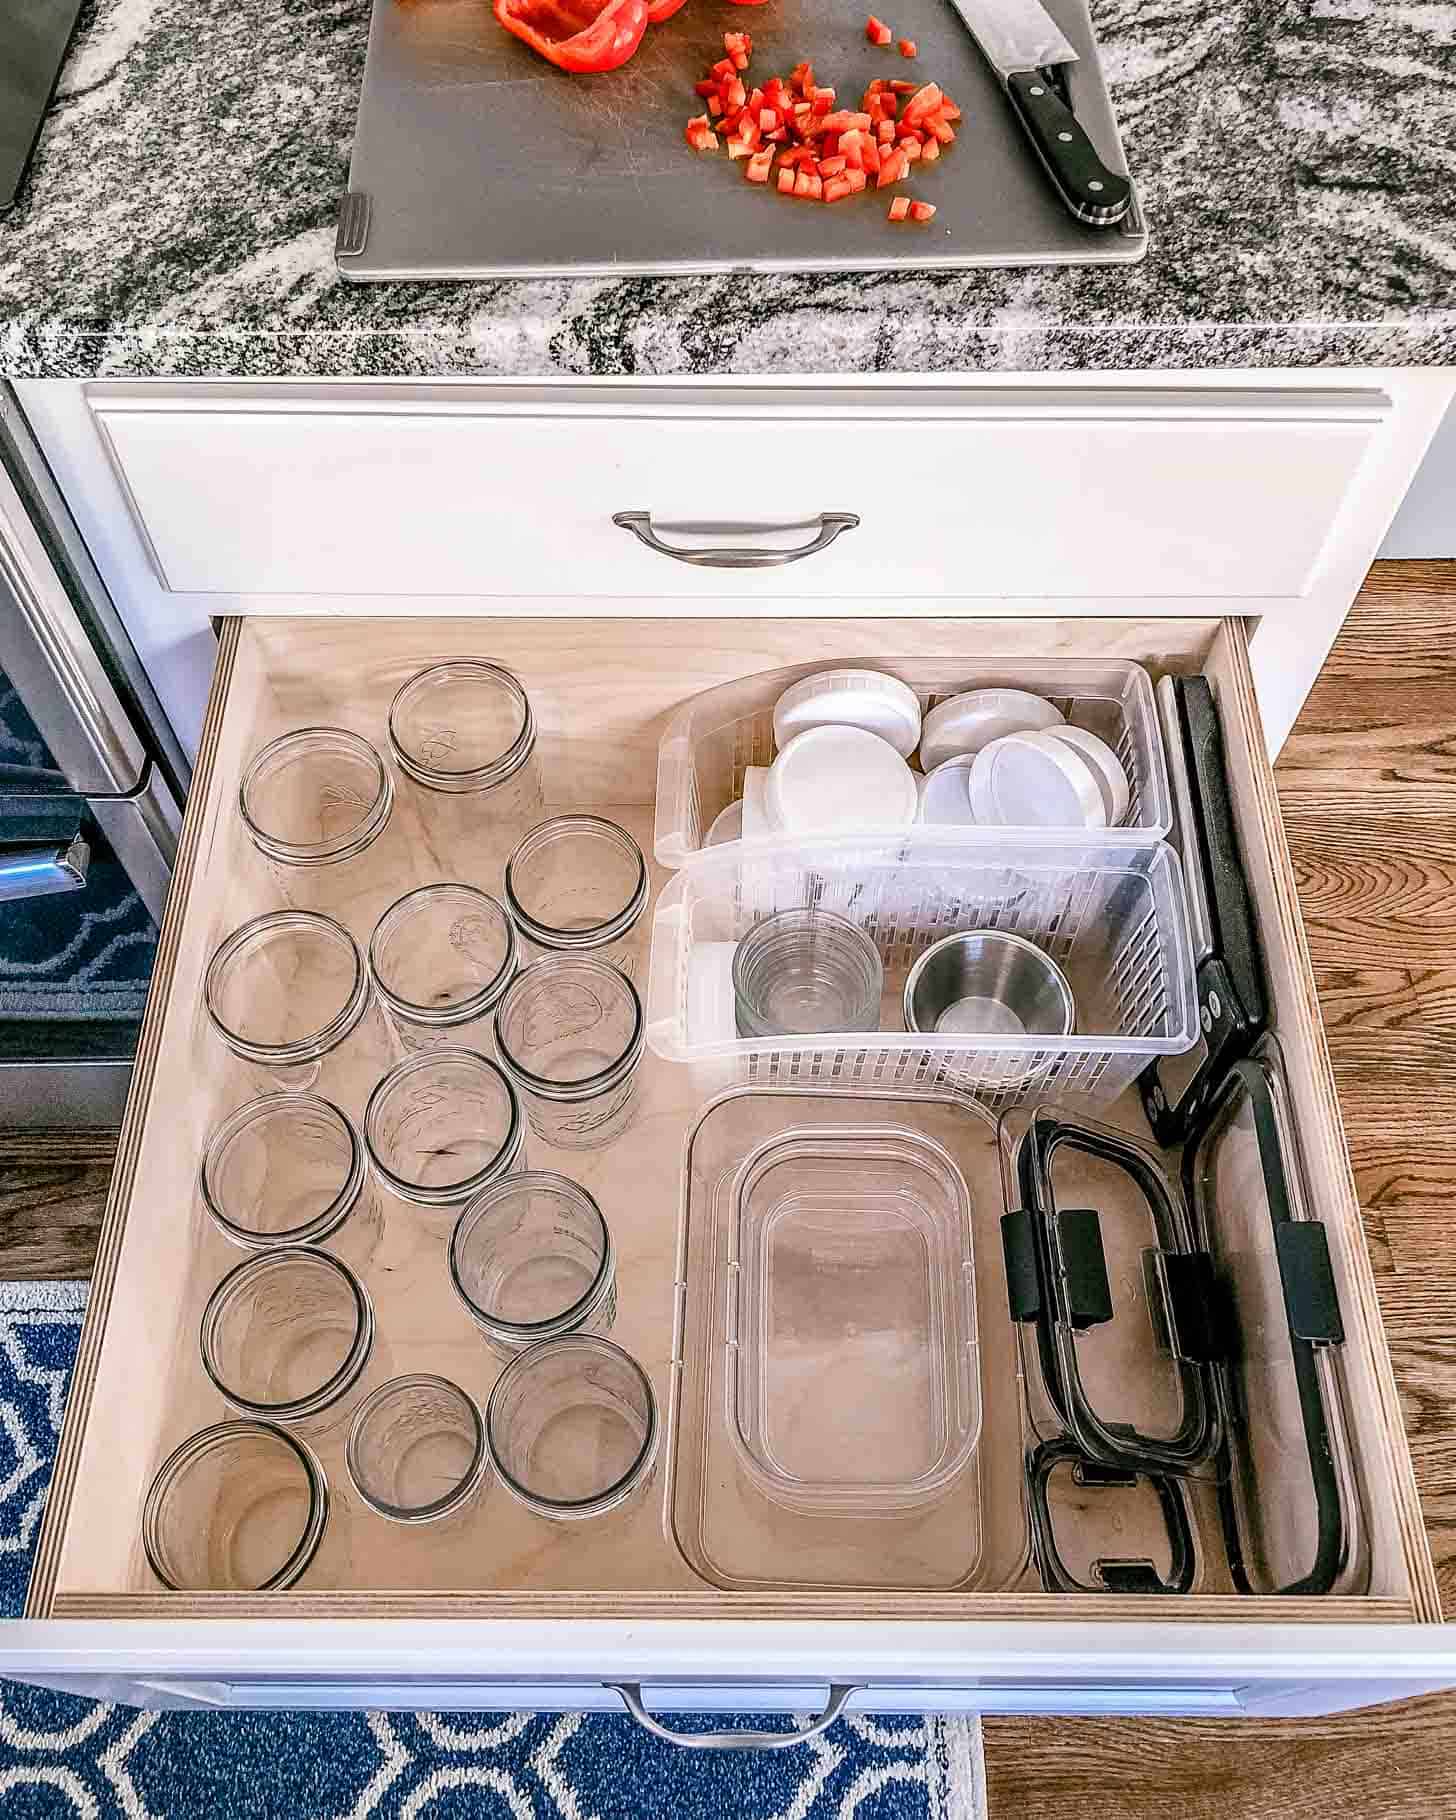
- Audit food storage containers and work towards using one type – Using one type of food storage container creates a picture perfect cabinet, and one that is highly organized. Utilizing just one type of container also makes stacking easier.
- Store plastic lids upright in bins – Say goodbye to shuffling through all of those plastic lids when you store them up right and in bins. Quickly grab the right size lid for the right container in just a few seconds.
- Consider installing sliding shelves for pots and pans – No more stretching and bending to reach into the way-way back for a specific pot or pan. Sliding shelves make access easy, and maximize cabinet space.
- Nestle pots and pans and store lids upright – Removing the lids and nesting 3-4 pots and pans together saves so much cabinet space. Storing the appropriate lids upright and next to the nestled pots allows you to keep everything neat and organized.
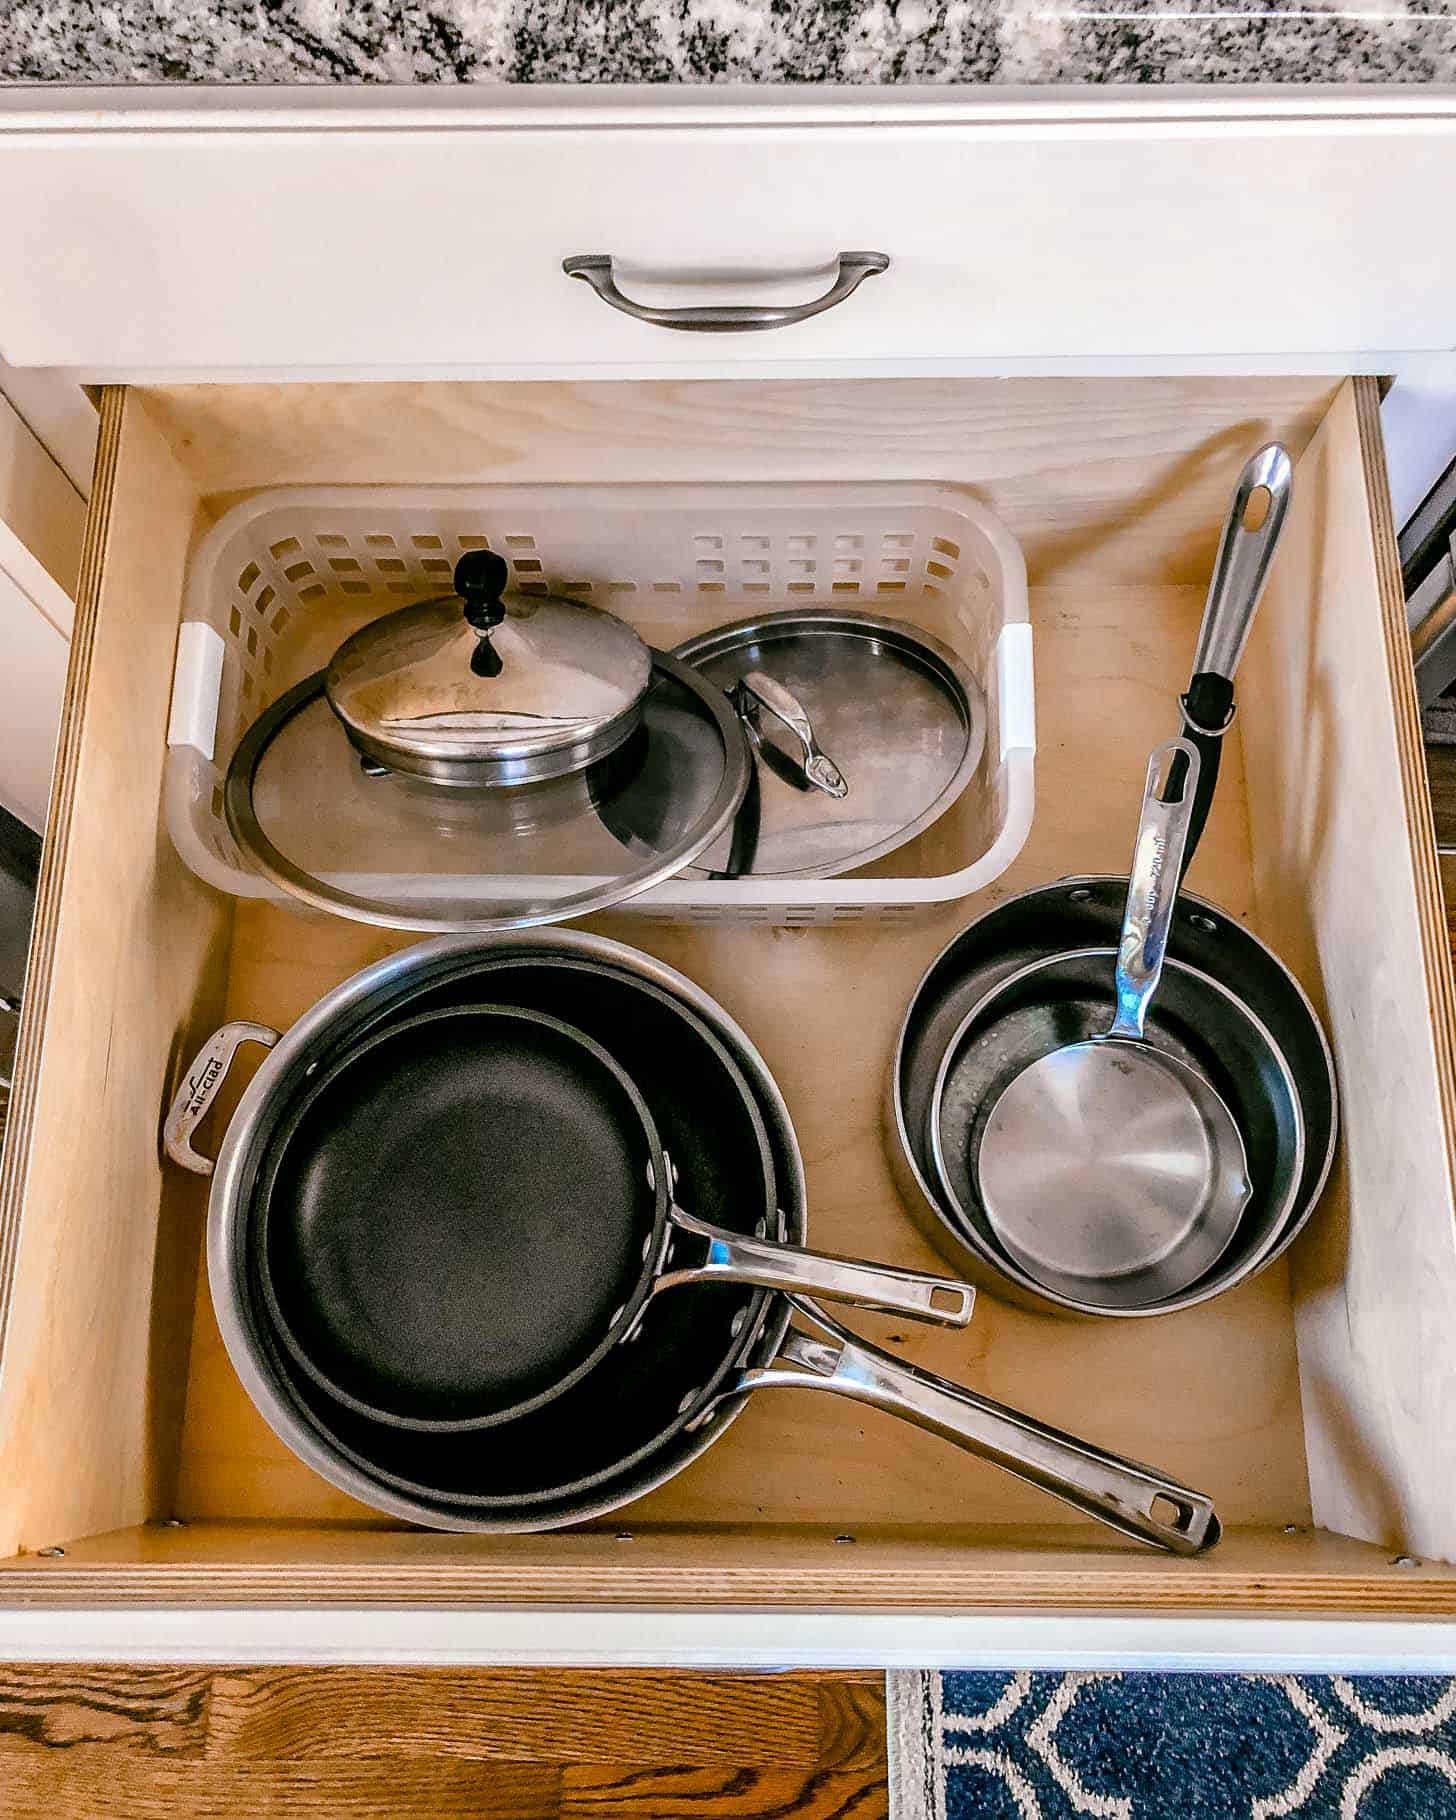
- Use a heavy duty lazy Susan for corner cabinets – Maximizing space in an awkwardly-sized corner cabinet is challenging. Adding a lazy Susan keeps pots, pans, and other items front and center when you need them. No more trying to feel your way to the back of the cabinet and hope you pull the right item out.
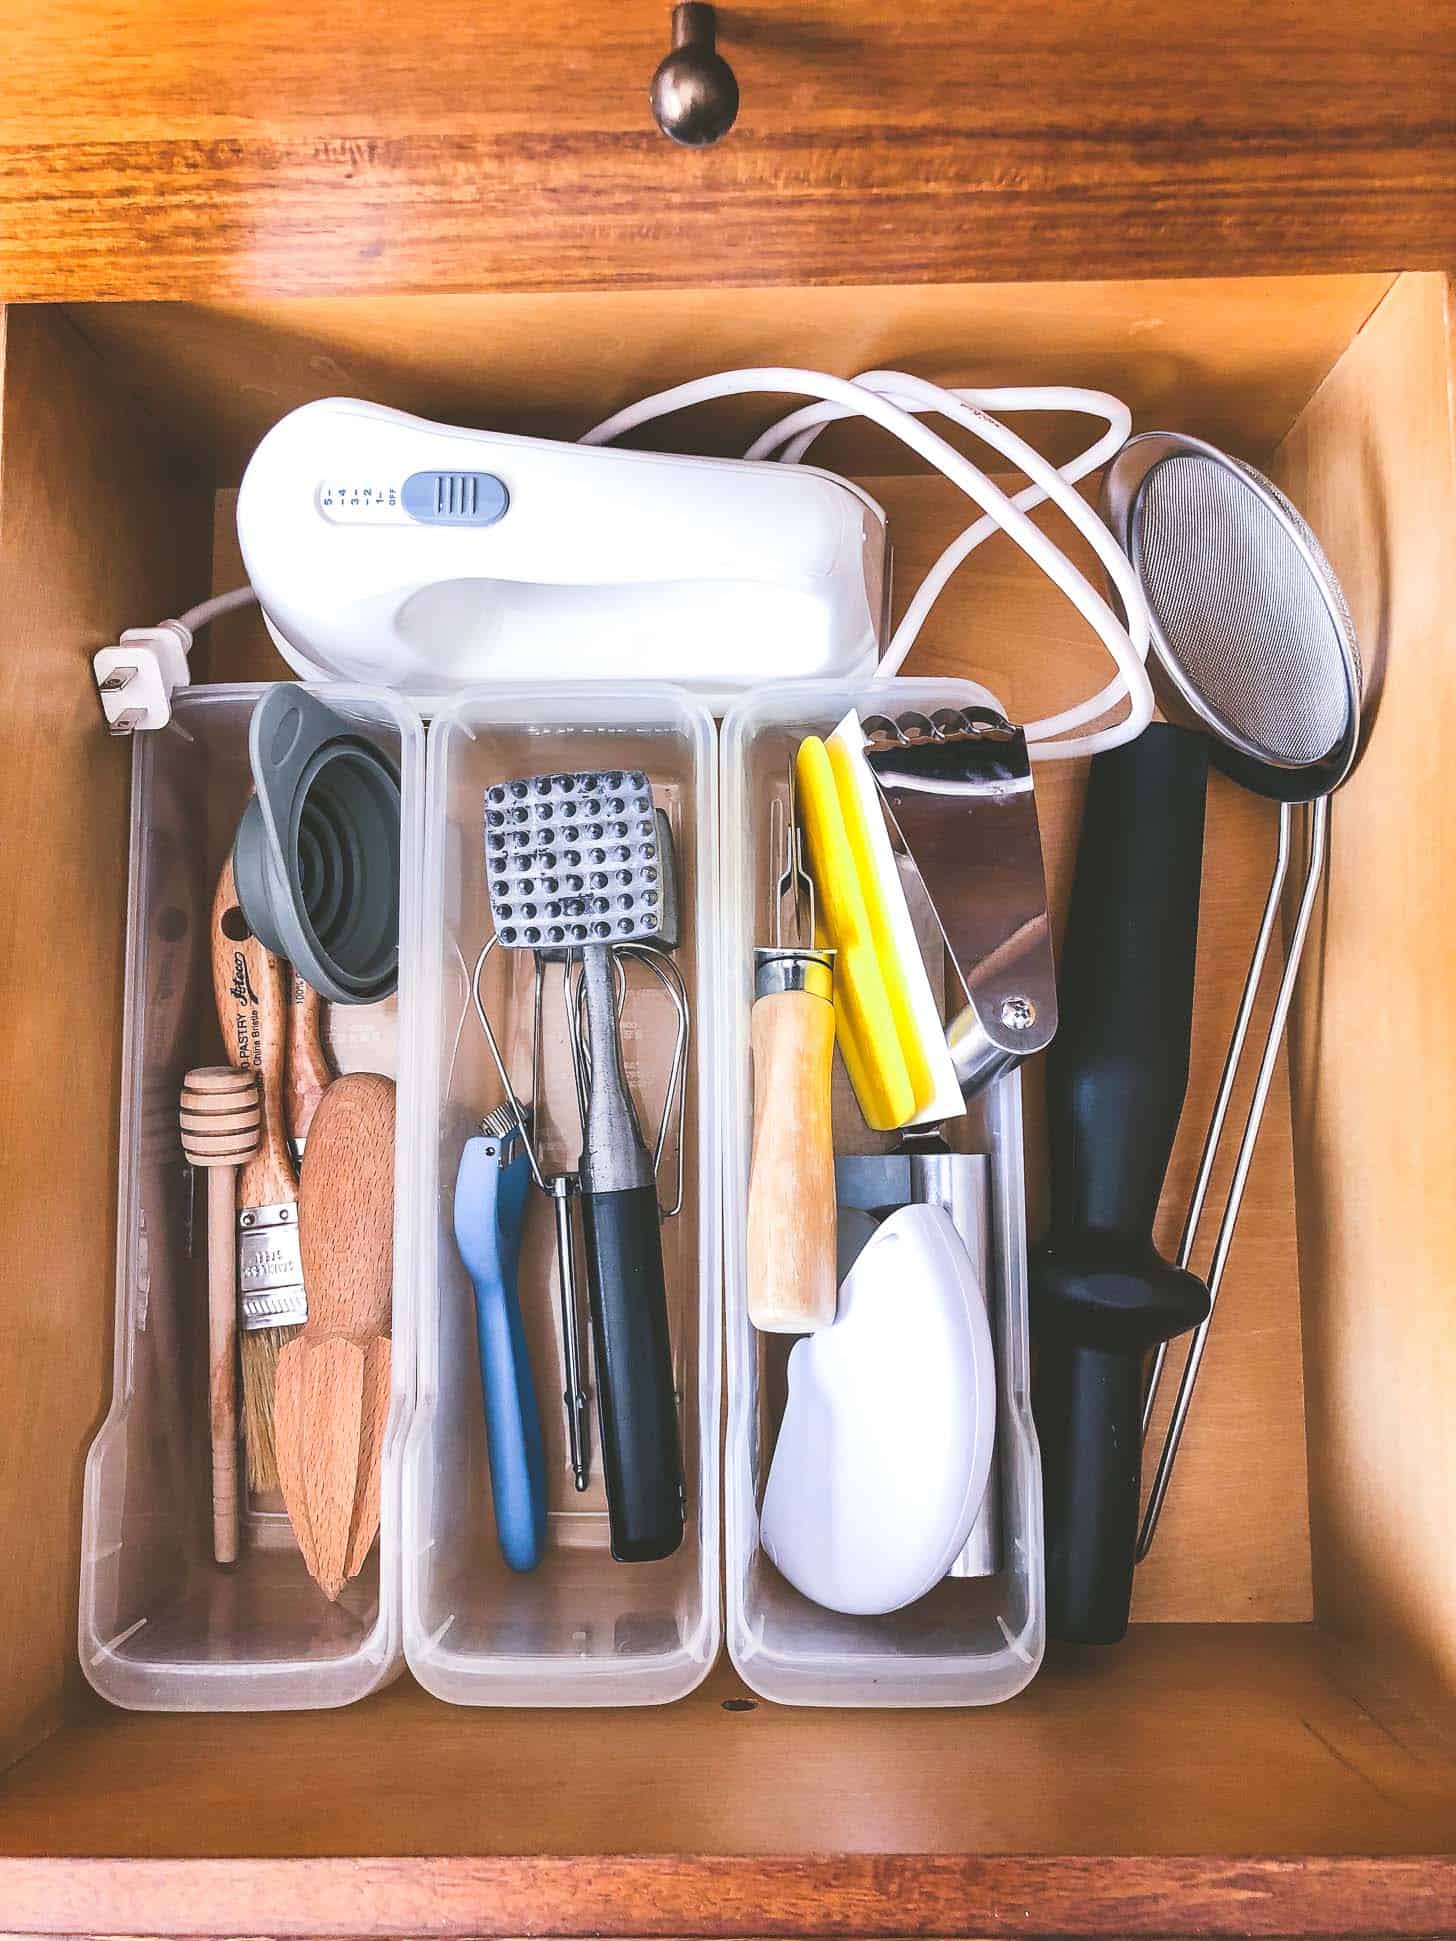
- Use cabinet racks – Use cabinet racks to organize kitchen cabinets and drawers. Create extra space with cabinet racks. Organize and group items together for simplified storage.
- File cutting boards – No more piling cutting boards on top of each other, then awkwardly taking the one you need from the bottom. File cutting boards vertically, and add a divider between “meat-only” boards, and those used for fruits and veggies.
- File baking sheets – Filing baking sheets upright and on their side is a space-saving hack, and makes it easy to grab the sheet you need when you need it. No more shuffling through stacked sheets to find the one you’re looking for.
Under the sink
- Grab a caddy for cleaning supplies – There’s only so much space under the kitchen sink. Keep cleaning supplies in one place, and organized, with a caddy.
- Utilize behind-the-door storage – Small items like sponges, kitchen compost bags, and scrubbing brushes fit neatly into cabinet door organizers. These can be installed right on the side of the door that stays hidden.
- Install clear vertical shelves or stacked containers – Get the most out of this super small space by installing clear vertical shelves. Fill them with cleaning supplies, garbage bags, and dishwashing pods.
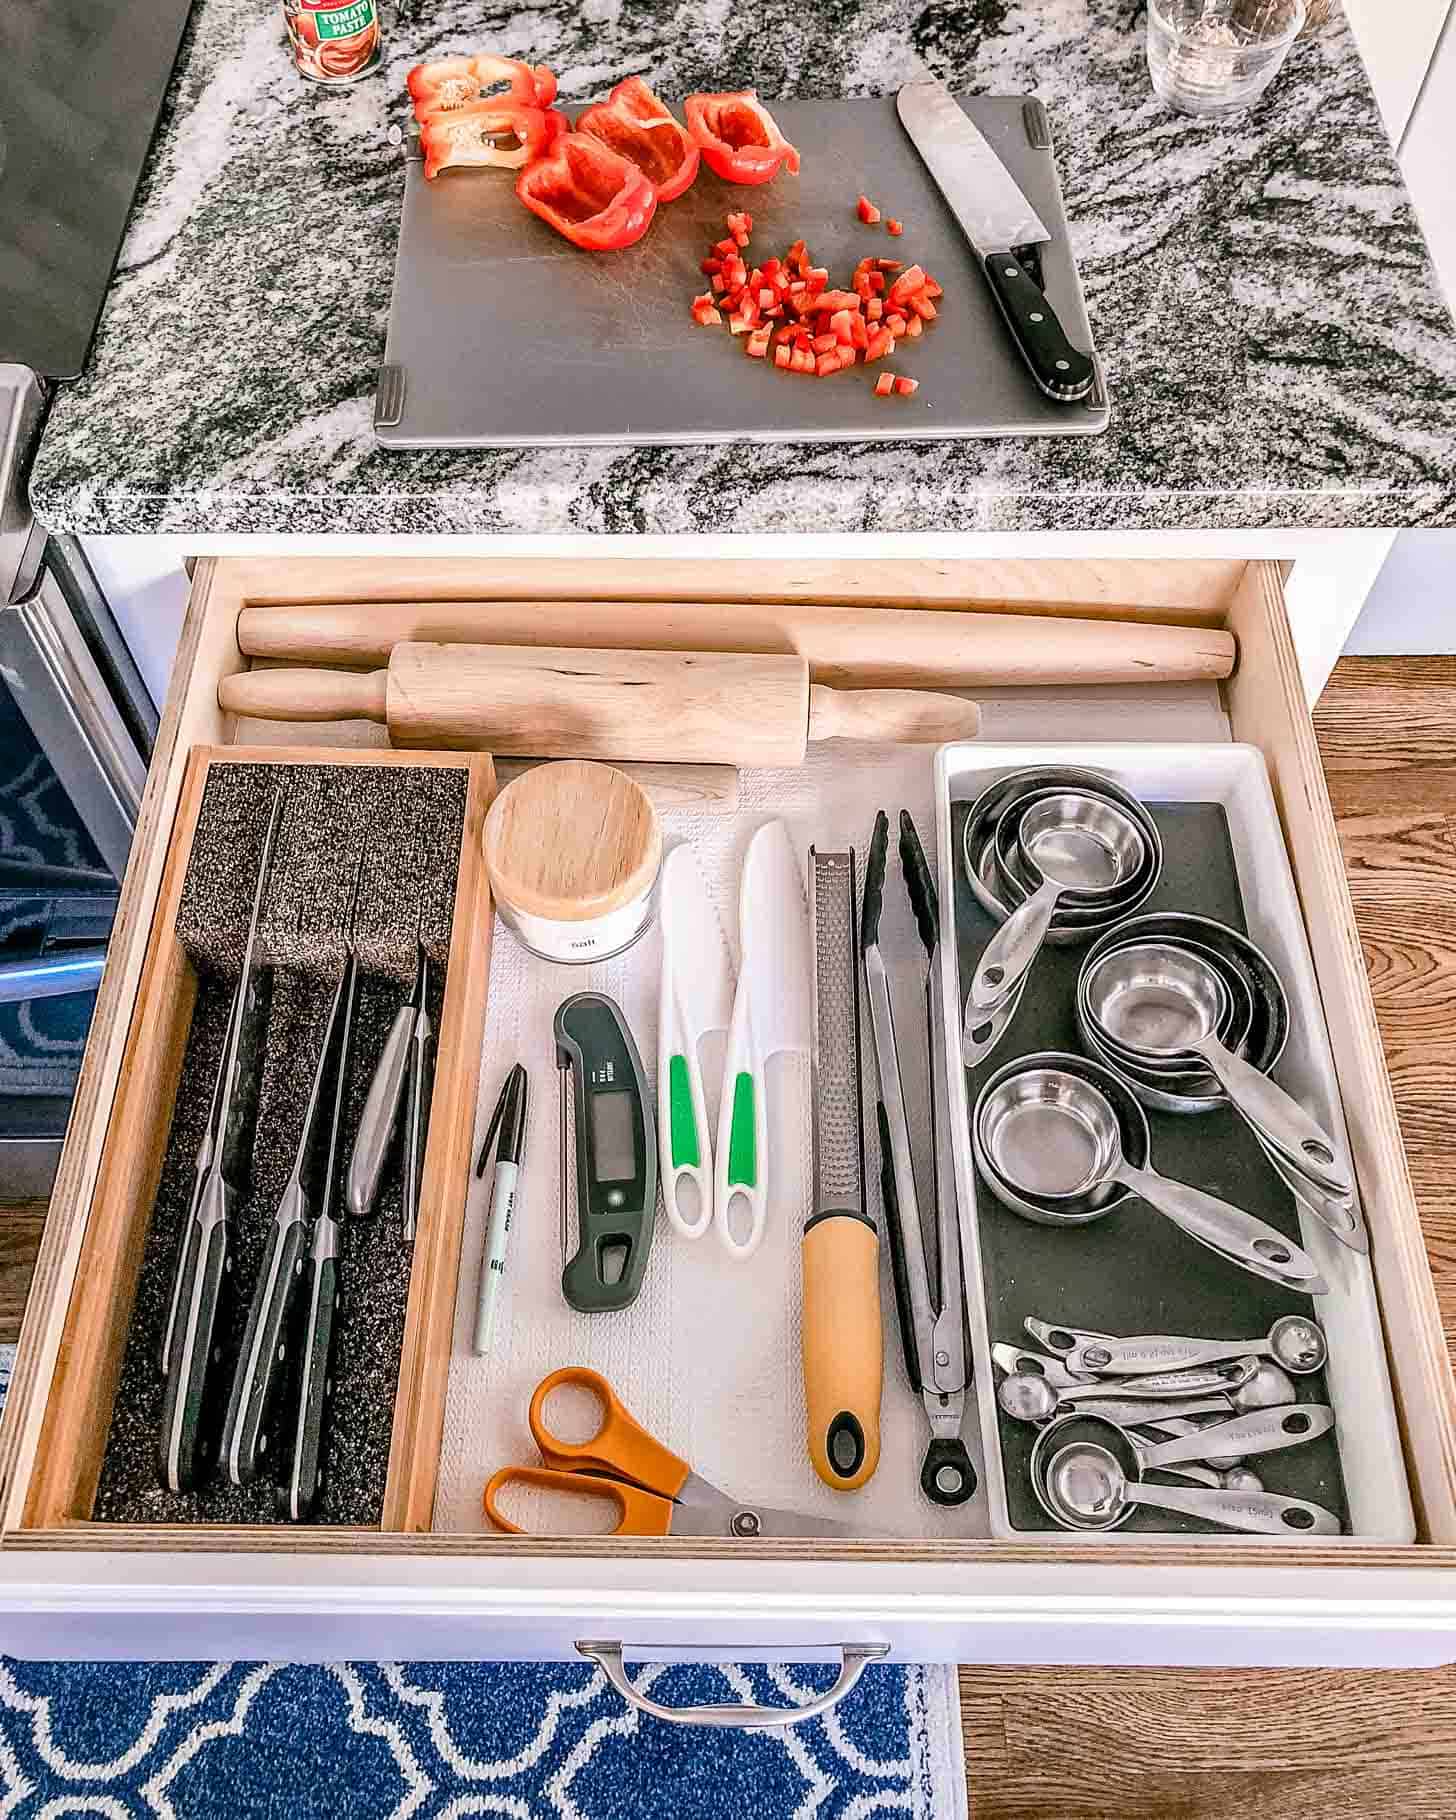
Drawers
- Install drawer liners – The simplest, most convenient way to keep drawers clean is with drawer liners. These easy to install items also protect your drawers from wear and tear. Look for removable versions that are easy to wipe down.
- Add adjustable dividers to all of your utensil drawers – Keep serving spoons and ladles separate from serving forks and knives with adjustable drawer dividers. These allow you to make drawer zones larger or smaller depending on your needs.
- Add dividers to your junk drawer (and majorly audit whatever is in there) – Pens, receipts, rubber bands: junk drawers attract so many small items. And when those small items get mixed up, it’s impossible to find anything. The solution? A few simple dividers!
- Create a tea / coffee drawer – Coffee, teas, and their accessories are some of the most used items in a kitchen. Place bags of coffee, filters, pods, and tea bag organizers in one drawer near the coffee maker or kettle. No running around to find what you need.
- Store oven mitts near the stove – Keeping oven mitts near the stove where you use them the most is a huge time saver in the kitchen. Never go oven mitt hunting again.
- Use drawer organizers designed for foil, plastic wrap, and plastic bags – Drawer dispensers and organizers made specifically for foils and wraps save space. They also make tearing off a sheet a breeze.
- Add a bin for dish towels – Folded kitchen towels stay compact and stackable when stored in a bin. Stored this way, you won’t need to worry about towels snagging in a drawer.
- Create a kid-friendly drawer – Help get your child involved in cooking and other kitchen activities. Place their cups, bowls, and kid-sized baking supplies in an accessible “kid height” drawer. Providing a child their own special drawer also teaches independence in the kitchen.

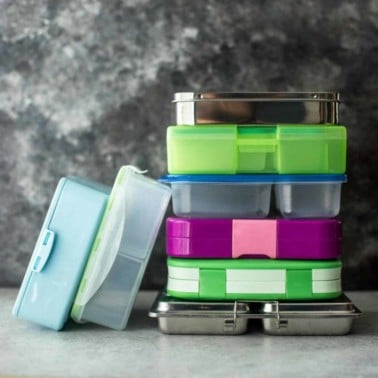
- Create a lunch-packing station – Stop bounding from one side of the kitchen to other looking for lunch boxes, sandwich containers, and zip lock bags. Creating a lunch-packing station keeps everything together and saves tons of time.
- Create a meal prep drawer – Stackable food storage containers, lids, and labeling equipment can be stored in one simple drawer. Using uniformly sized containers makes organizing and storing refrigerator or freezer meals a cinch.
Spice Drawer / Rack
- Decant spices into matching containers with labels – Achieve a clean, streamlined look by putting your spices in one set of uniform containers. Creating matching labels for each spice for next-level organization.
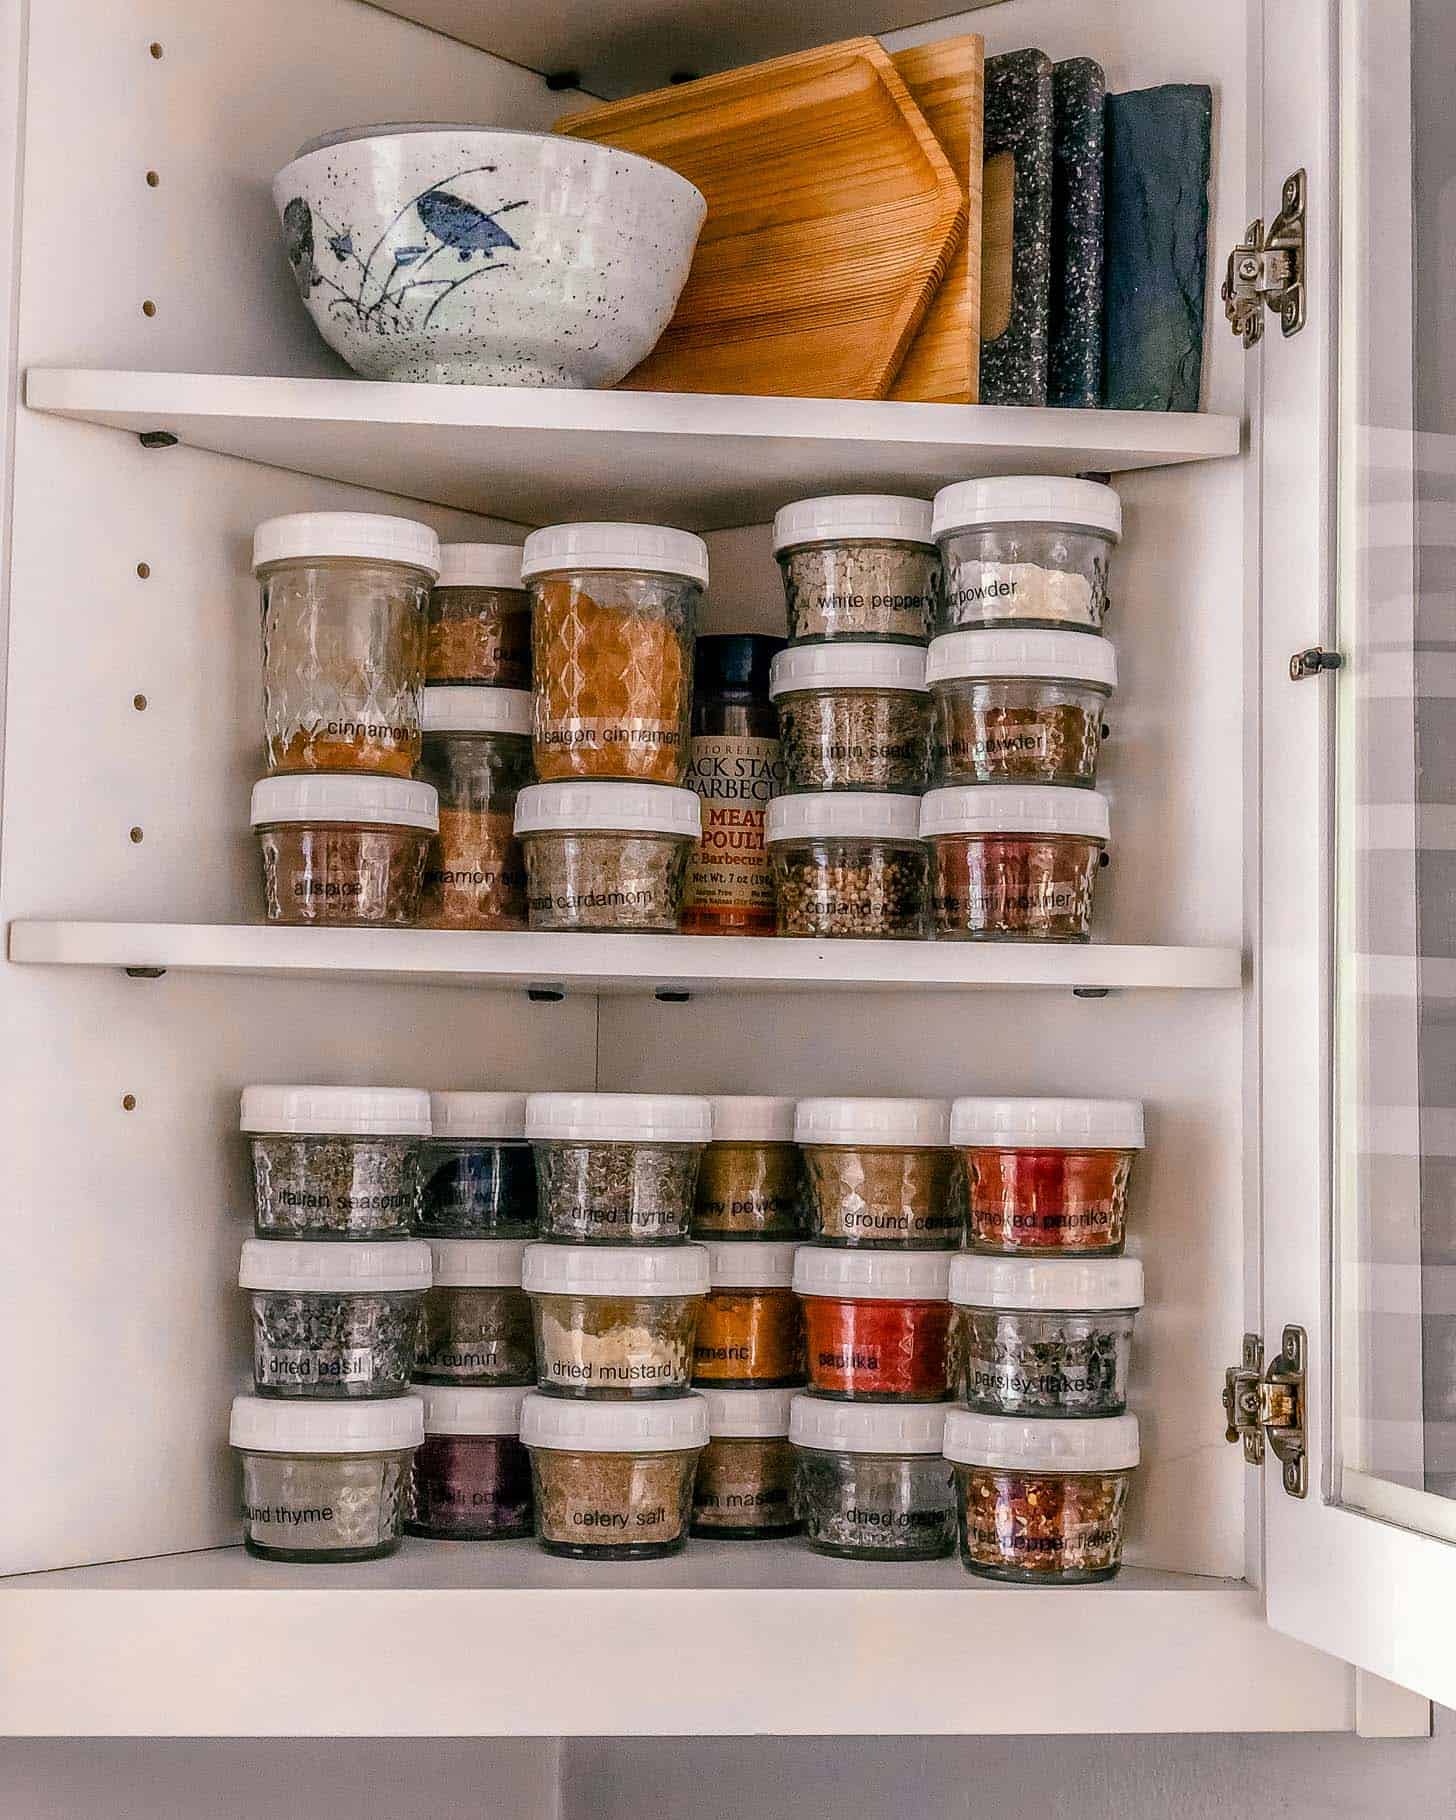
- Store spices on their sides in a drawer – Place drawer inserts in your spice drawer to triple the amount of storage space. Storing spices this way also means you can also see the spice label.
- Use magnetic spice containers and attach them to the side of the refrigerator – Magnetic kitchen organizing supplies will ‘wow’ you by how much space they save.
Pantry
- Use clear, matching containers to avoid visual clutter – Get the Pinterest worthy pantry you’ve been dreaming of when you use clear, matching containers. This visually appealing and efficient kitchen organization method streamlines everything.
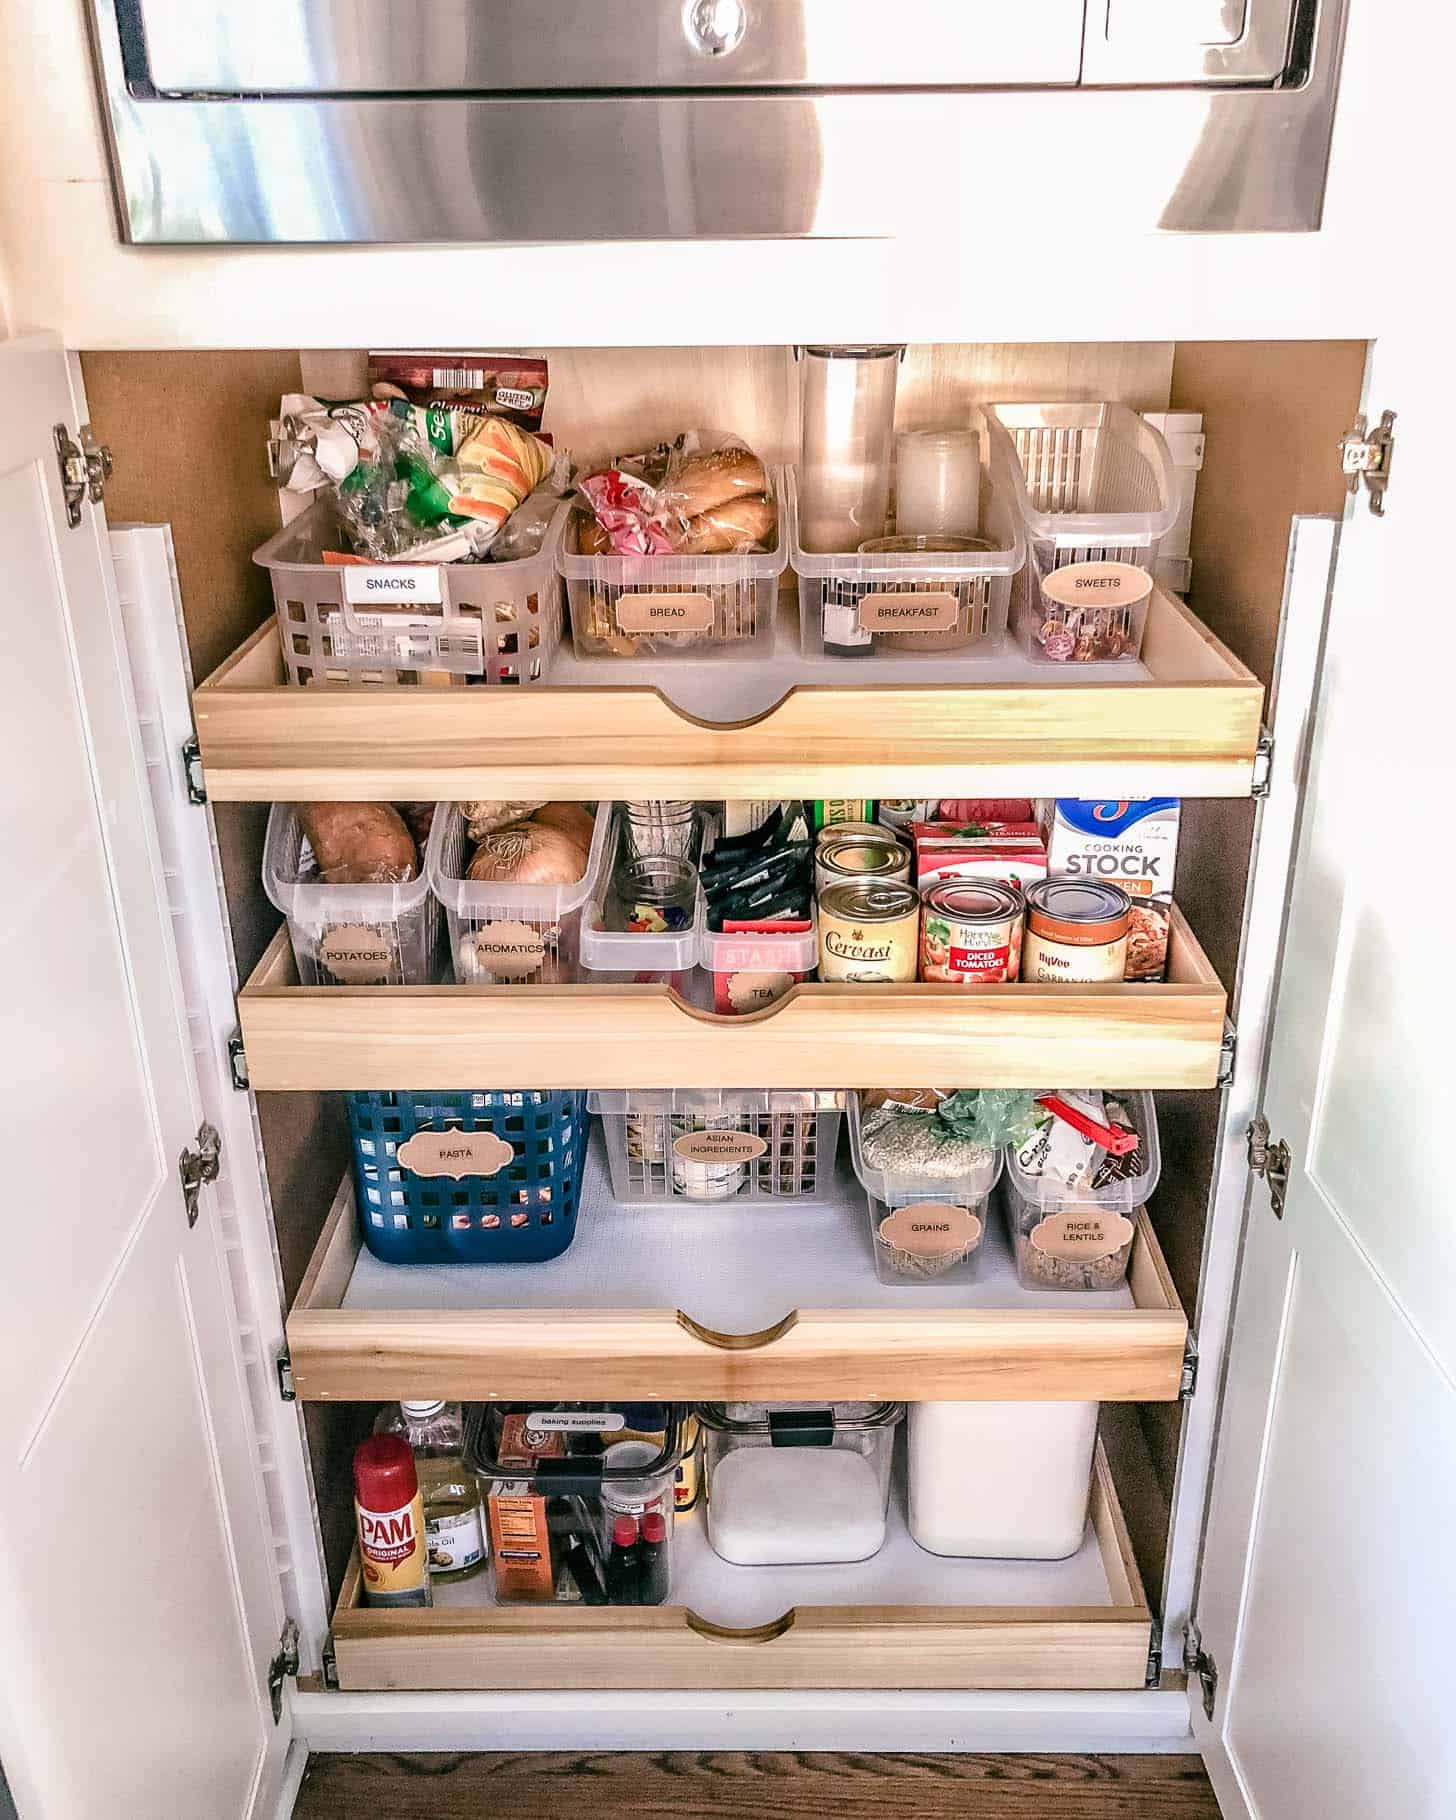
- Use large bins to store produce – Not all produce needs to be refrigerated. Foods like garlic, potatoes, and onions love to be stored in cool, dark areas with regular air flow. Store them in large bins for improved organization.
- Store cans and jars on risers – Cans and jars have a way of disappearing into the pantry only to be seen again when they’re about to expire. Using risers prevents disappearing cans, and quickly lets you see the label.
- Store plastic bags – Storing plastic bags within their own pantry bin keeps plastic grocery bags in one neat place. You can also house plastic bags in an empty tissue box, and pull bags out as you need them
- Install hooks on an open wall – Installing hooks in your pantry is an affordable way to transform this small space. Store measuring cups, utensils and labeling supplies.
- Add a foldable step stool – Don’t go searching for that step stool the next time you need to reach something on the top shelf. Store a foldable step stool in your pantry for easy access.
- Put seasonal items on high shelves – Don’t let holiday plates, mugs, or seldom used seasonal cookie cutters take over those eye-level shelves. Store up top and take them down when you’re ready to use.
- Use a bin to store folded paper grocery bags – No need to push bag after bag into that tiny corner of your pantry, or keep stacking them on top of one another until they tumble over. Keep paper grocery bags compact and neatly in one place with a bin.
- Keep water bottles on their sides in a wine rack – Water bottles are cumbersome when stored upright. Using a wine racket utilizes more space by allowing you to stack water bottles on their side.
- Use divided lazy Susans for grab-and-go snacks – If you have one box of snacks on the top shelf, one on the bottom, and two in the middle, using a divided lazy Susan will bring everything together in one place. Dividers will keep trail mix separated from fruit snacks, and pretzels separated from chips.
- Add labels – You will never get lost in your pantry again if you add simple labels to containers with flour, sugar, baking powder, etc. You can also label sections of the pantry with names like ‘rice’, ‘baking’, ‘soups’, and more.
Refrigerator
- Add clear bins – Clear bins are a tried-and-true way to separate and organize foods in your refrigerator. They also let you easily see what’s inside each bin.
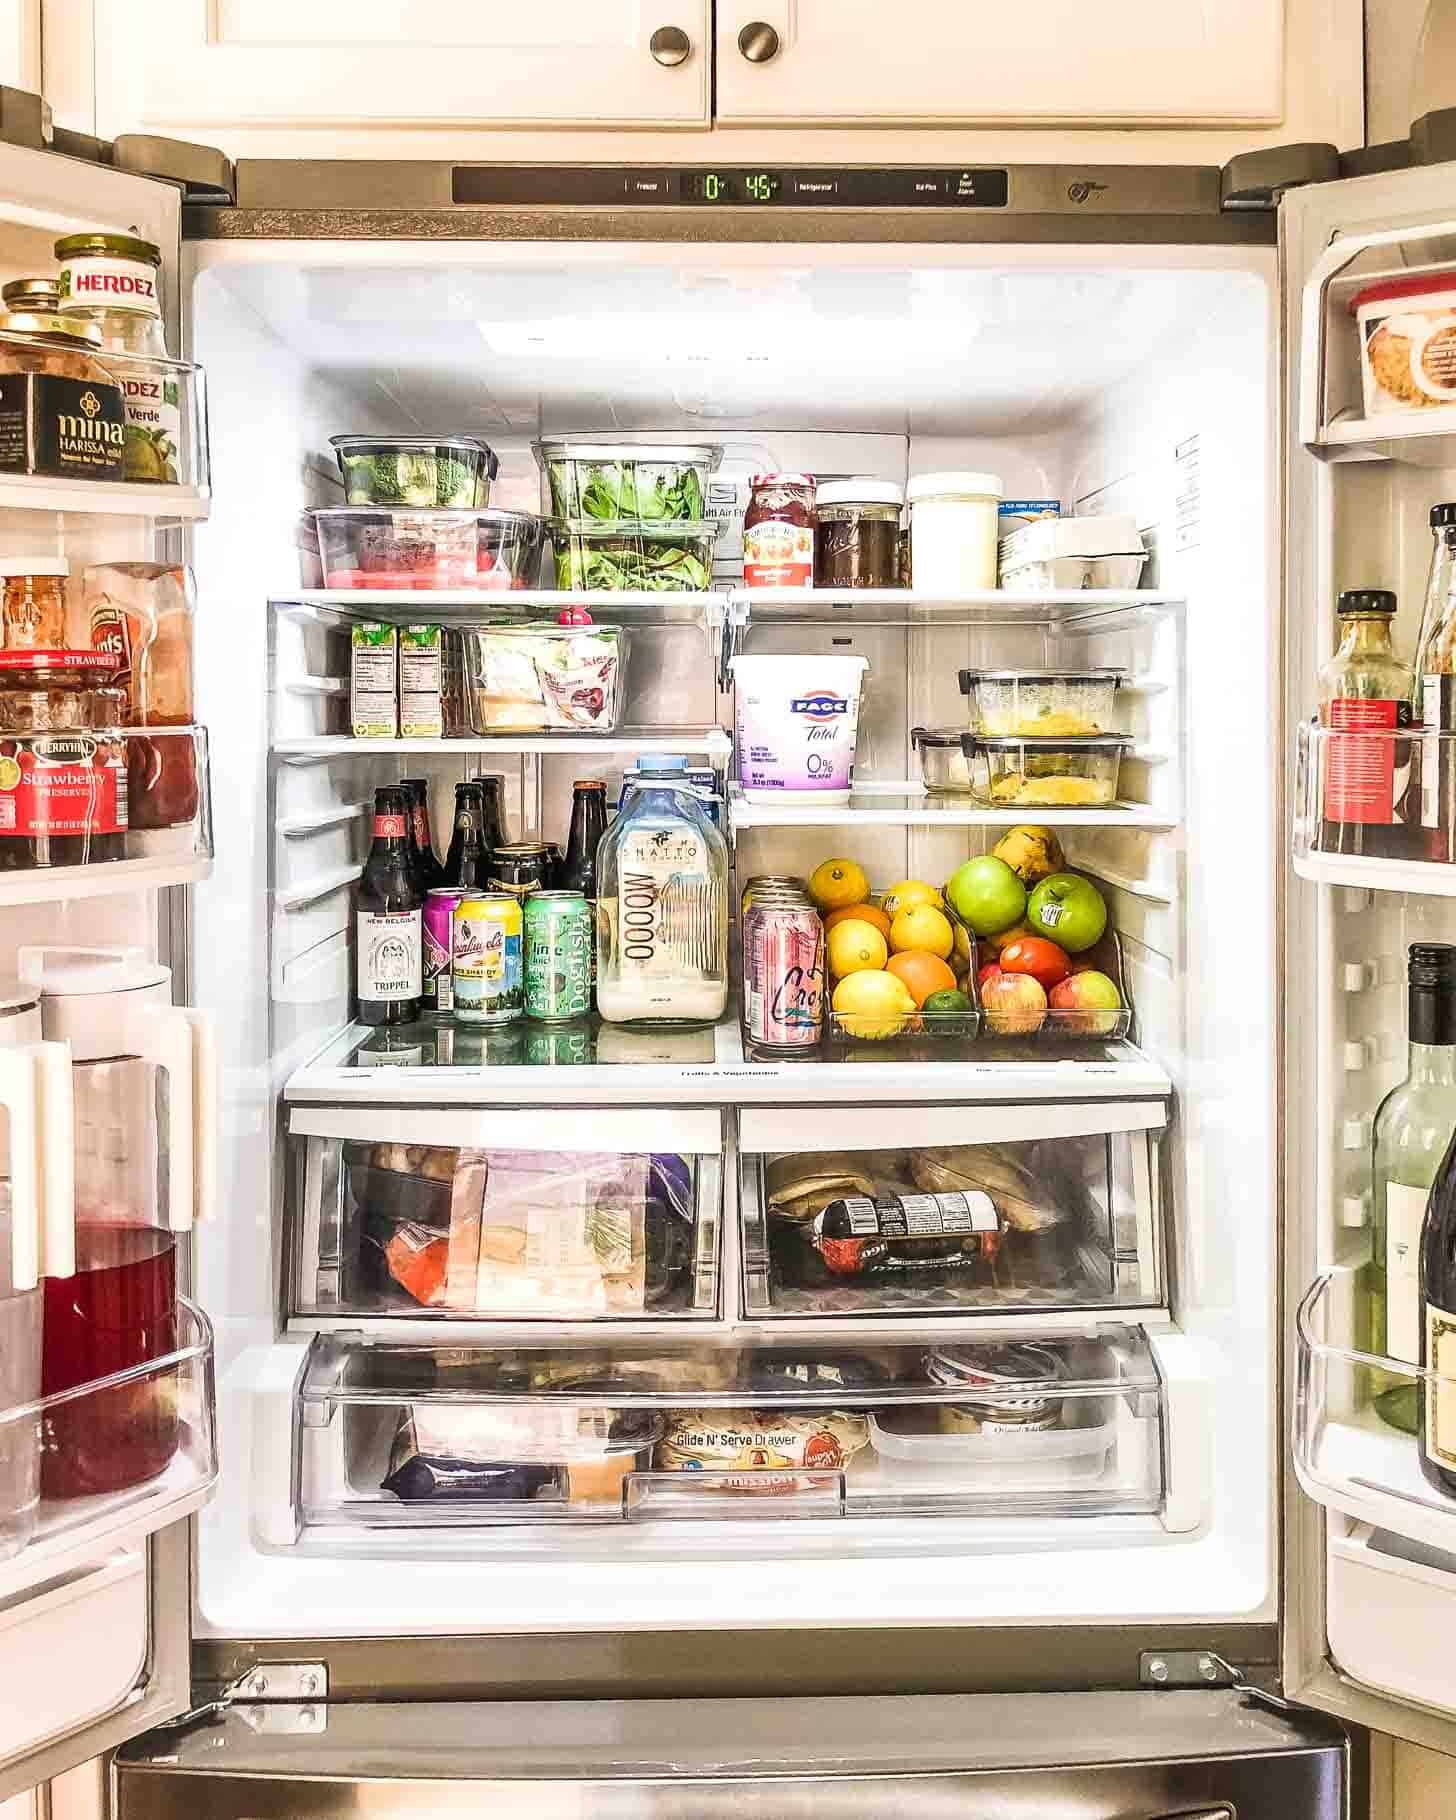
- Use zones (a zone within a zone!) to easily find things – Placing things like veggies, fruits, dairy, and meat in their own zones takes the guesswork out of finding ingredients. No more wondering where that fruit for school lunches is.
- Remove snacks and drinks from boxes and store in clear containers – Boxes take up so much room. Increase space in your refrigerator by neatly organizing items in clear containers so you can grab and go.
- Add labels (use a chalk marker so you can easily change them) Labeling refrigerator items is a good way to quickly find the ingredients you need. Place labels on drawers for snacks, veggies, and fruit. Label shelves for milk, condiments, and butter.
- Use a lazy susan for sauces and dressing – Save time searching through bottles of sauces, condiments, and dressings by using a lazy Susan. This rotating tray saves you from accidental spills, and from needing to move other items to get what you’re looking for.
- Use refrigerator shelf liners – Let’s face it, refrigerators can get messy. Placing shelf liners in your refrigerator will make cleaning up tiny bits of food, onion skins, and small spills so easy.
Freezer
- Add clear bins with labels – Save time trying to figure out what’s where when you use clear bins with labels. Not only are these great for organizing your freezer, but they help cut down on food waste.
- Freeze food flat and then store vertically – The average freezer often isn’t large enough to store make-ahead meals or ingredients. Using a system that allows you to “file” food by freezing it flat is an amazingly efficient way to preserve freezer space.
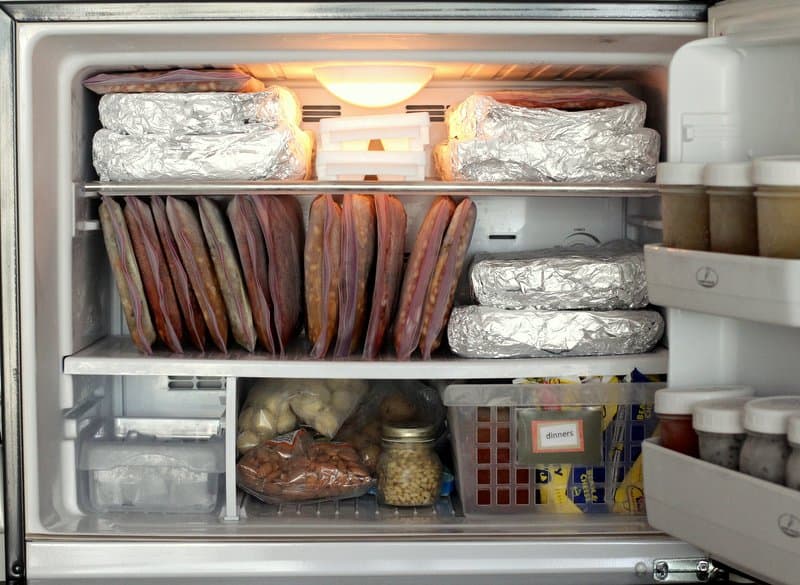
- Store sauces in small single-use containers – Small containers are stackable, so you can store more items within a smaller area.
- Freeze fresh herbs, tomato paste, pesto, etc in ice cube trays and transfer to plastic bags – This freezer hack will change your life. Ingredients stay fresher longer and they pack easily into plastic bags when you freeze them in an ice cube tray.
- Put a dry erase board on the front to track what you have and best-if-used-by dates – Food waste is a problem in kitchens everywhere. Keep track of expiration dates on make-ahead meals with a simple dry erase board.
Utilize Extra Space
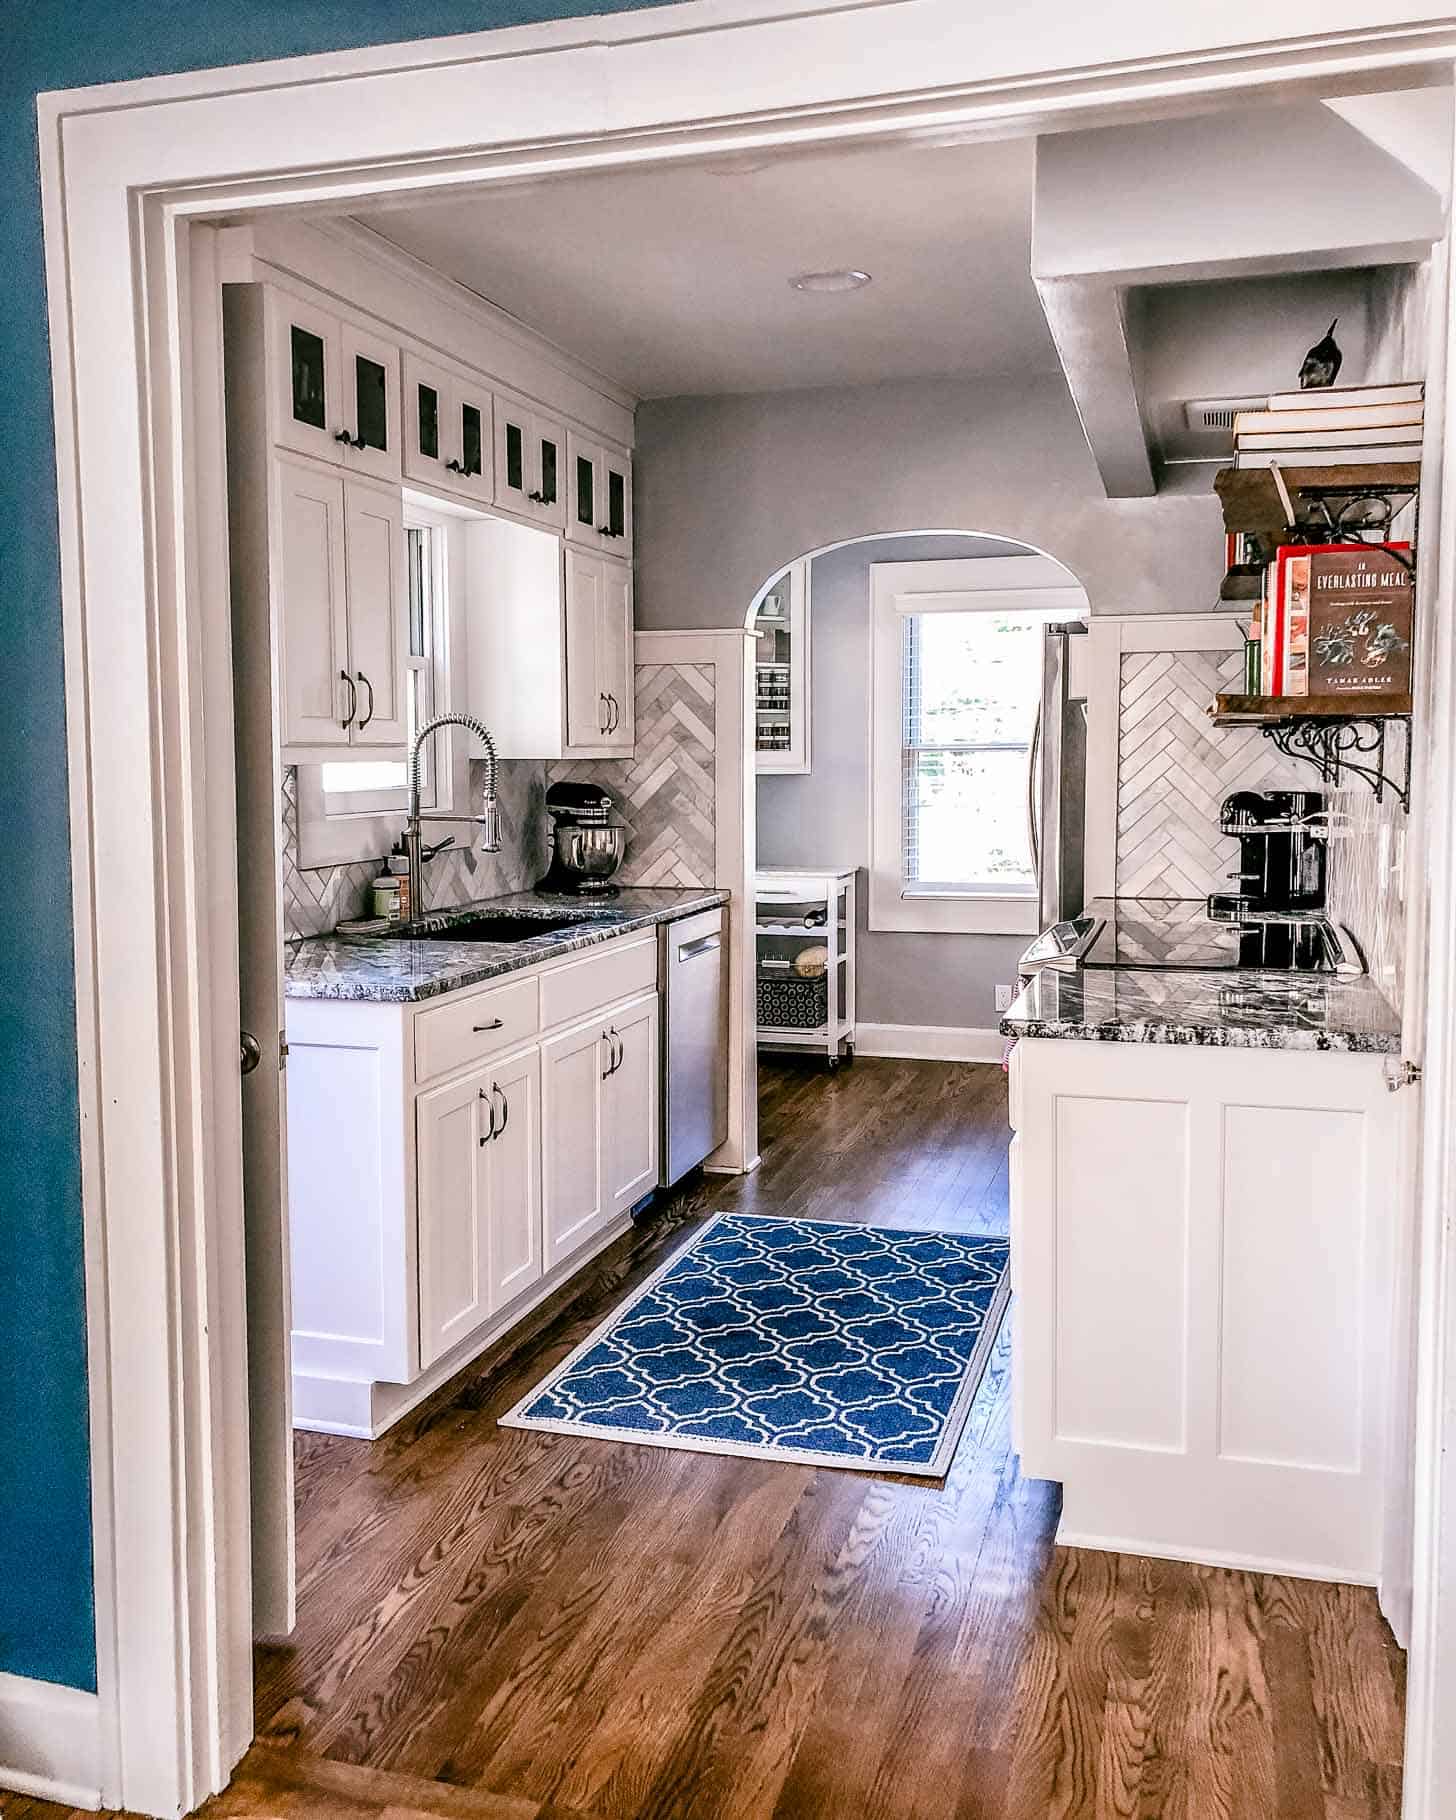
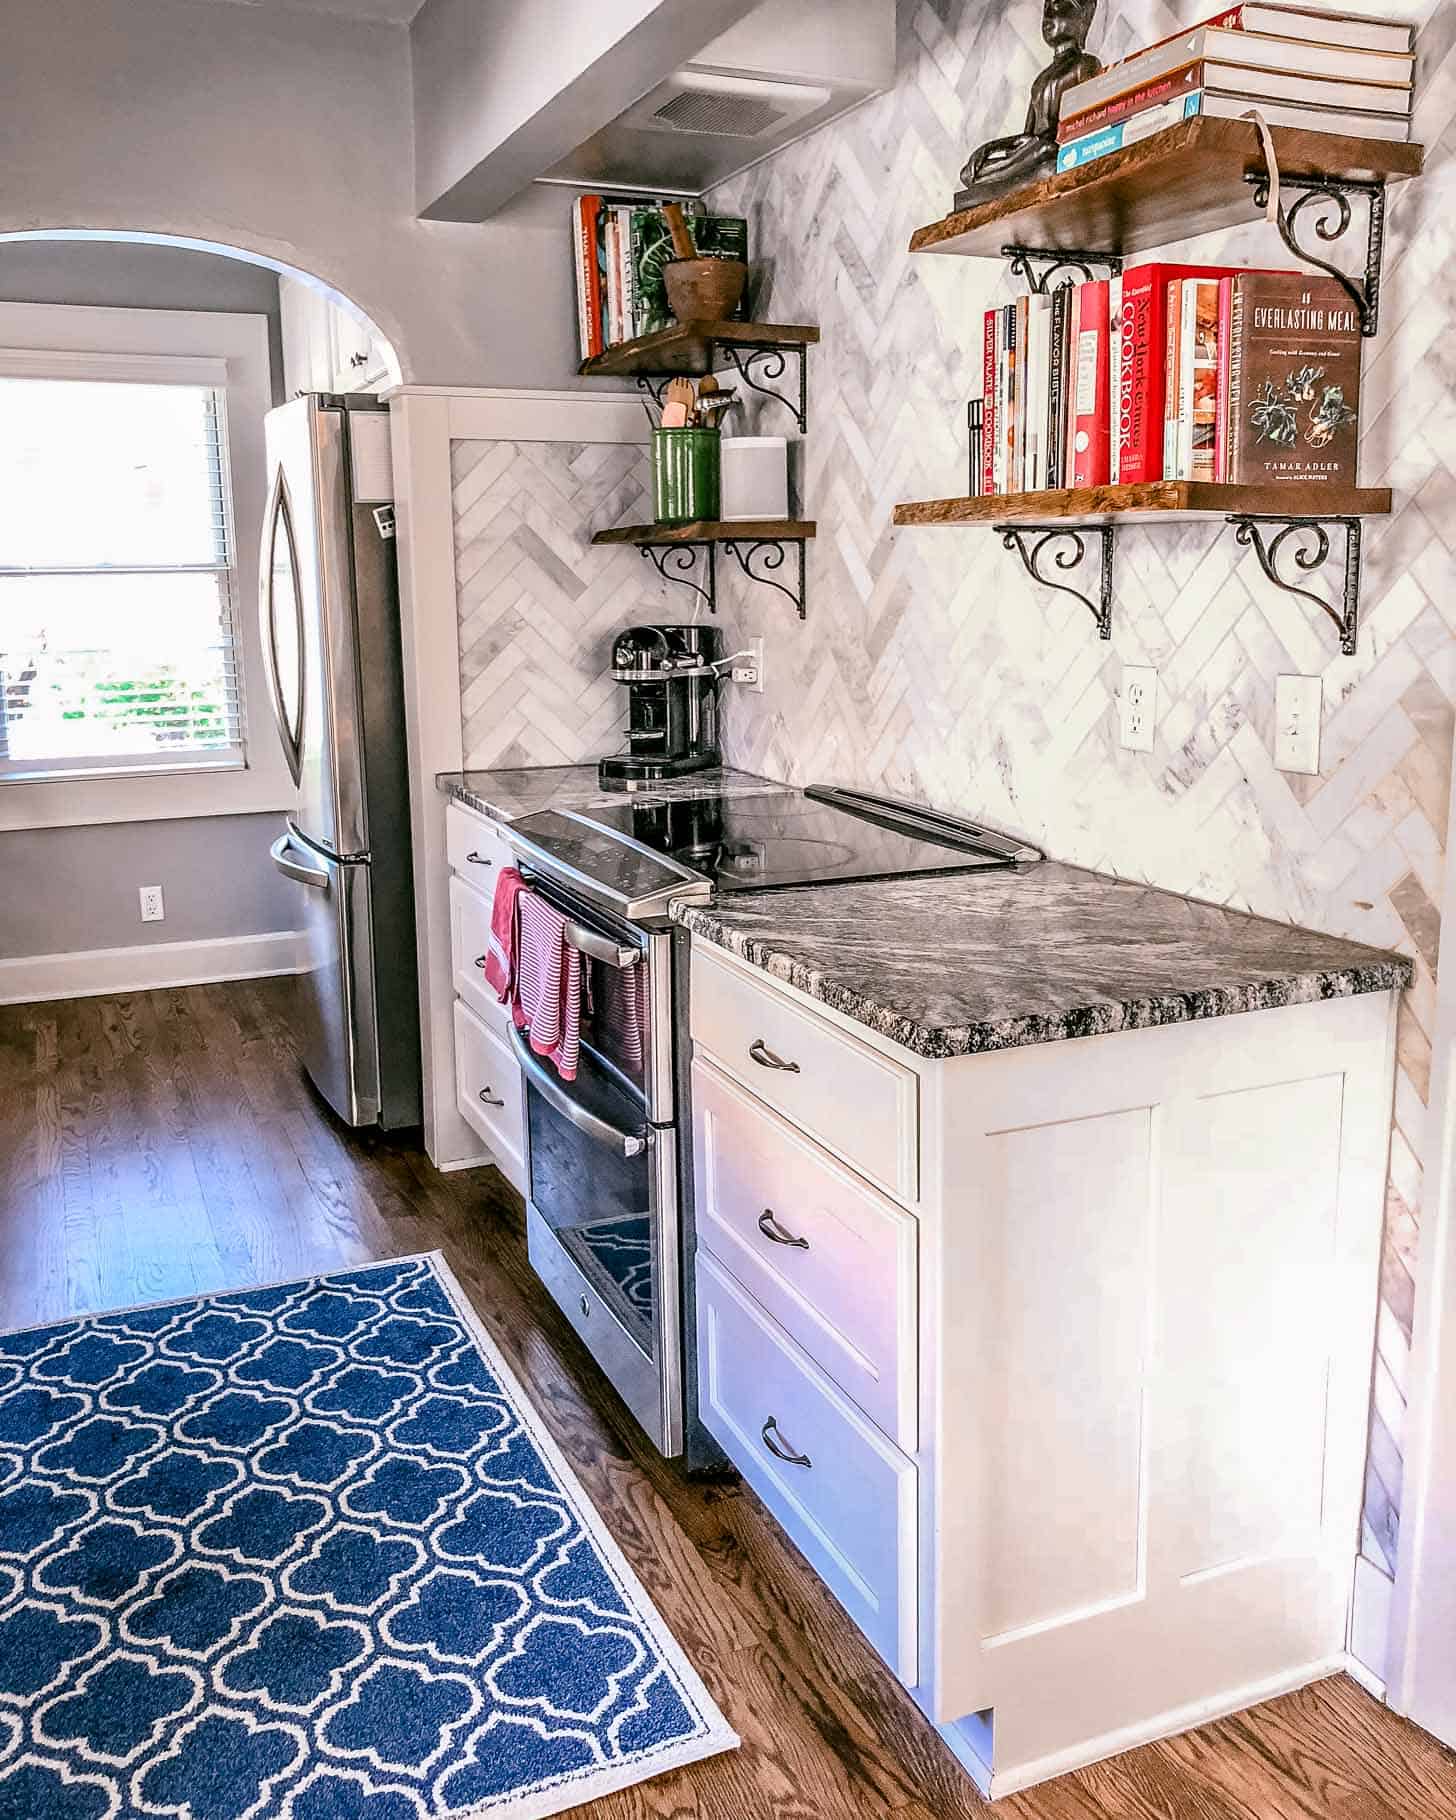
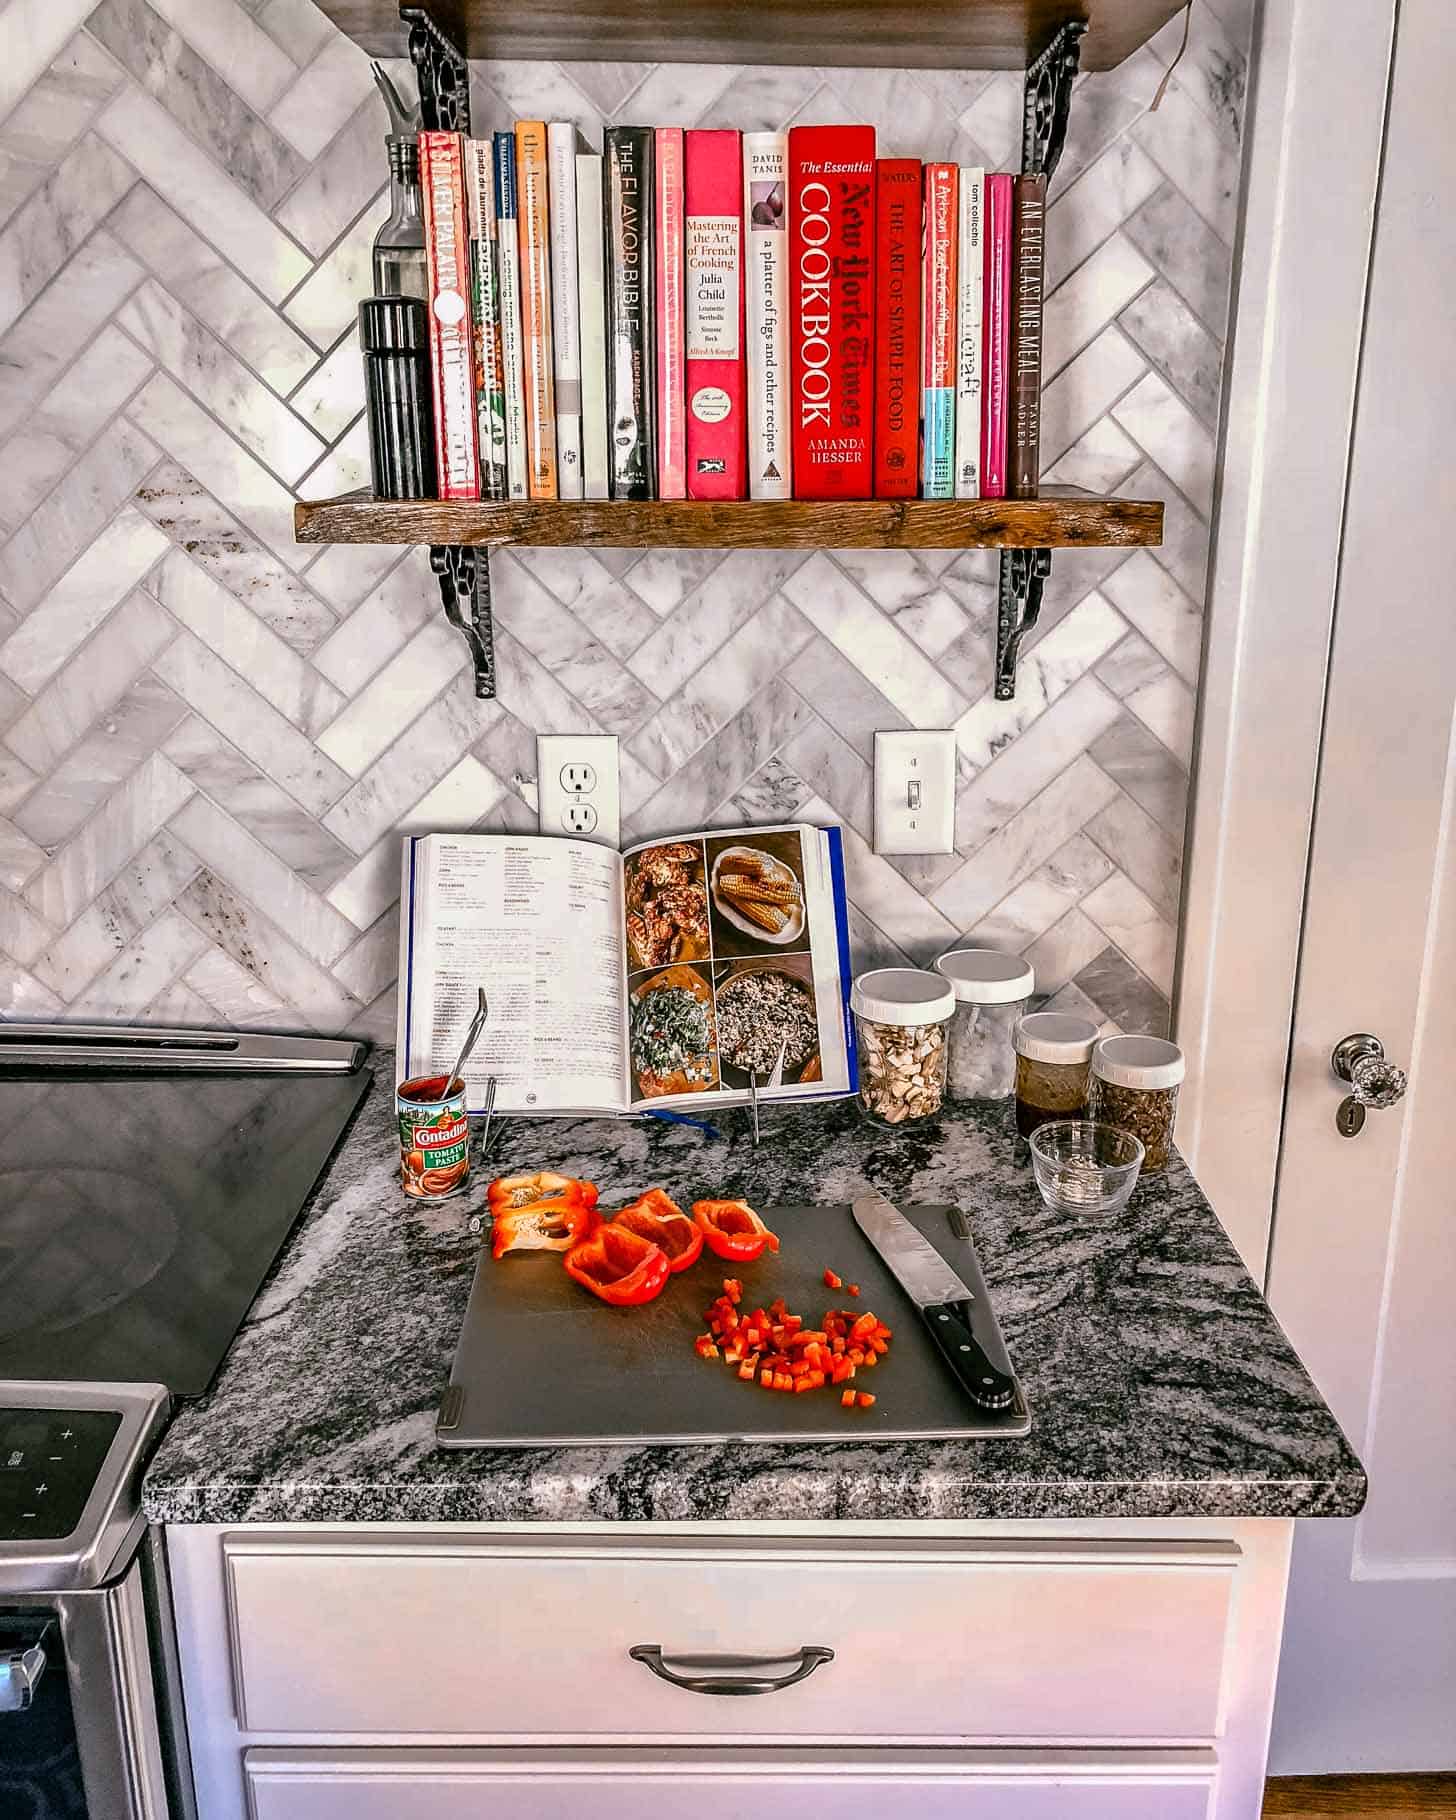
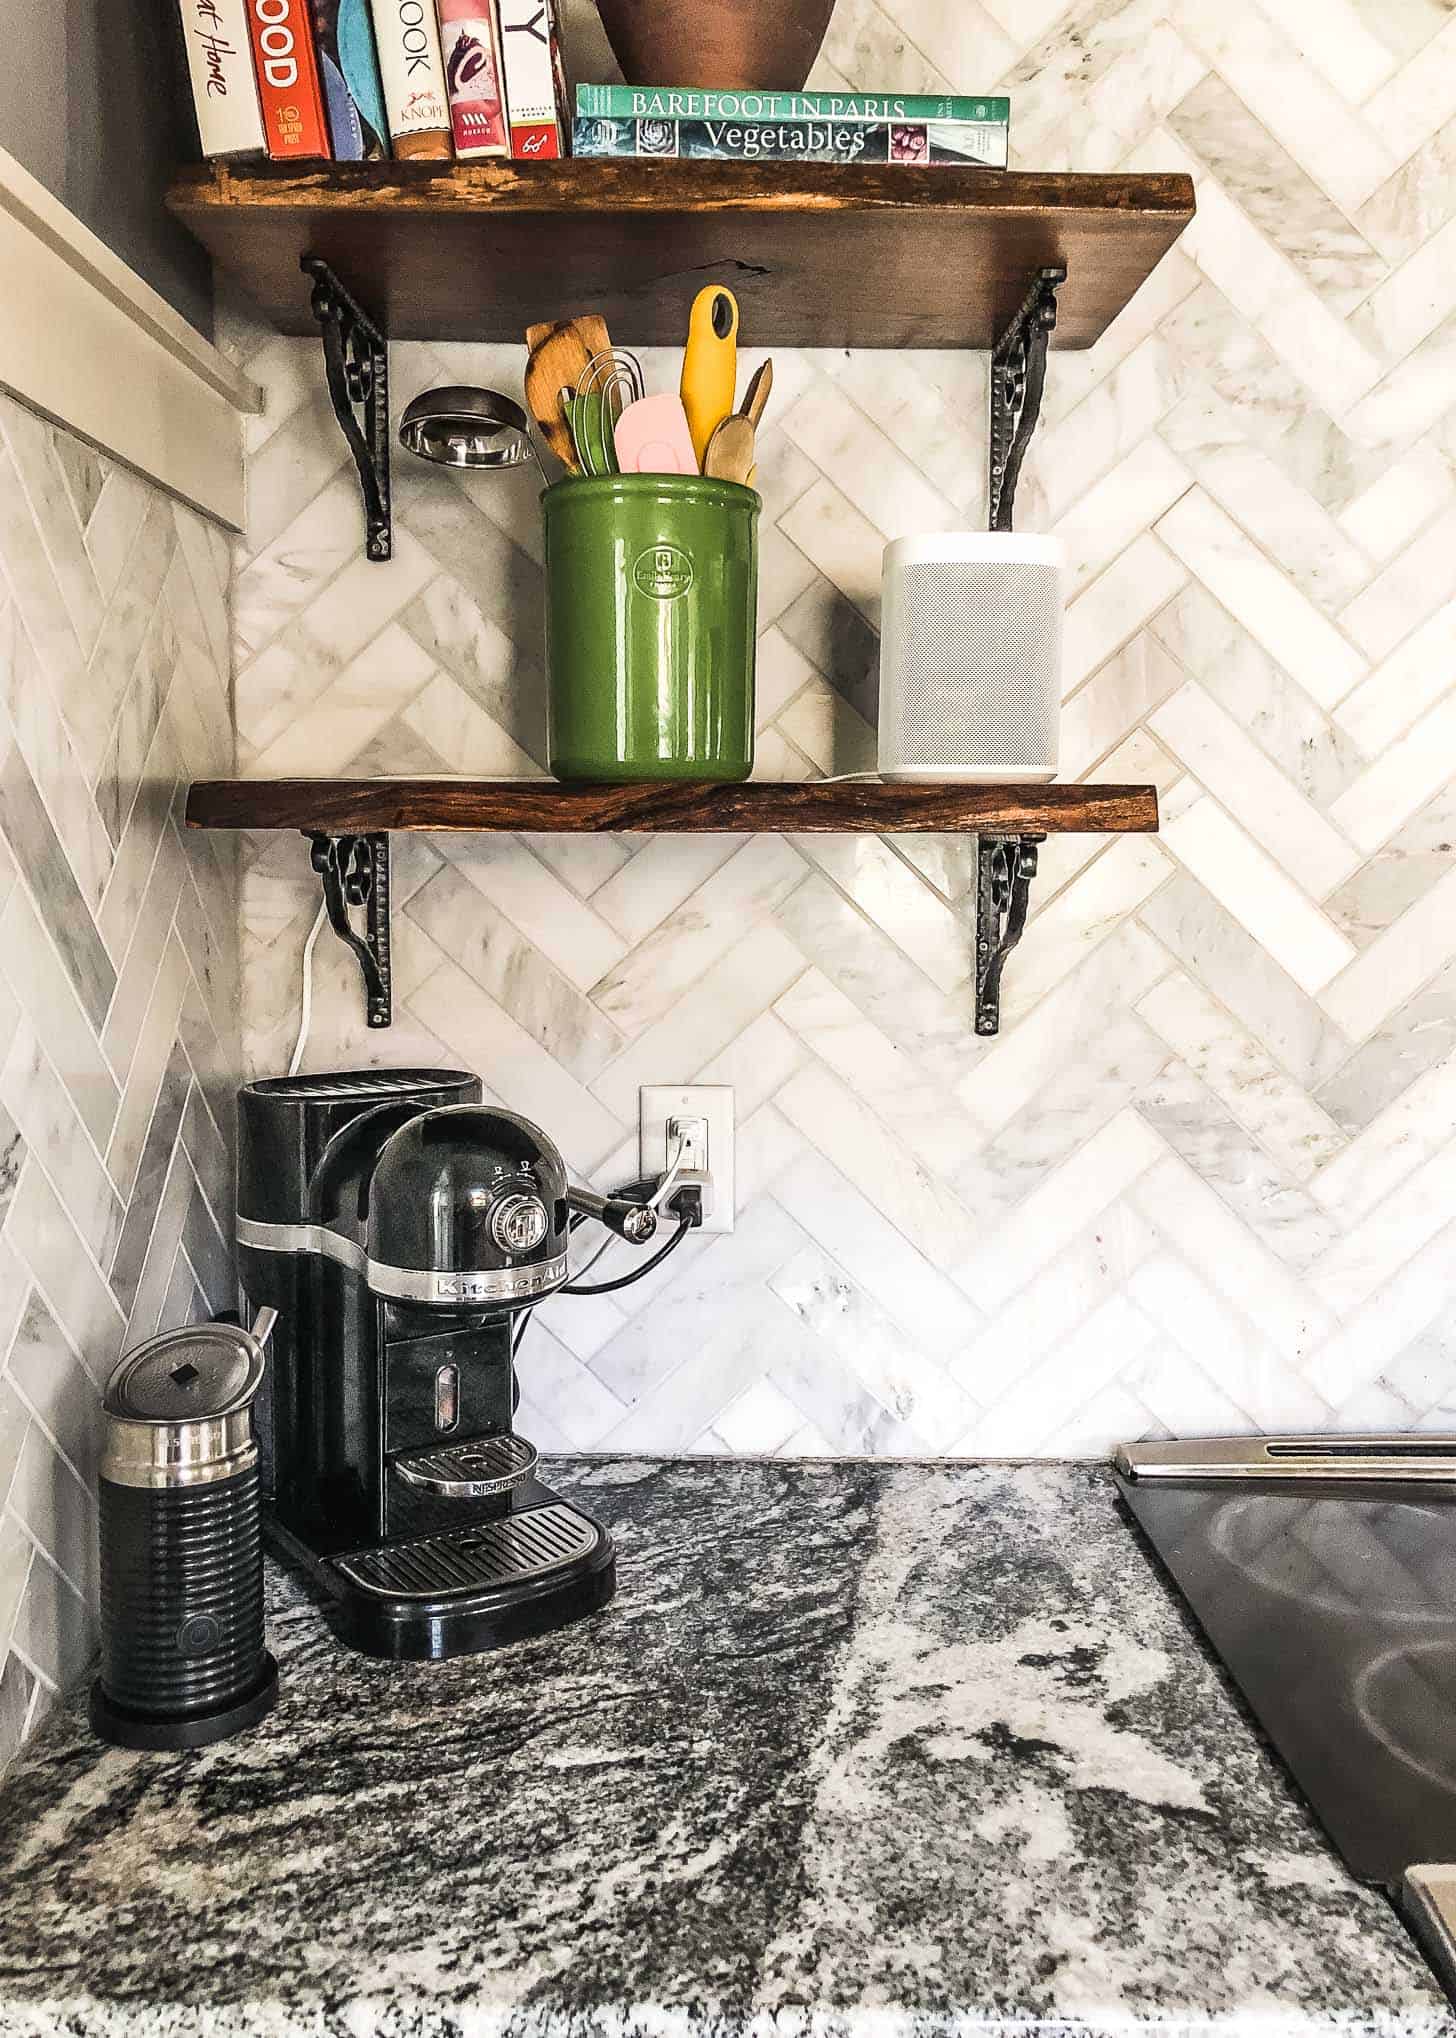
- Convert an open wall into open shelves – Stylish, visually appealing open shelves increase your kitchen’s storage capacity and keep everyday items within reach. Use them for everything from cookbooks to cake stands.
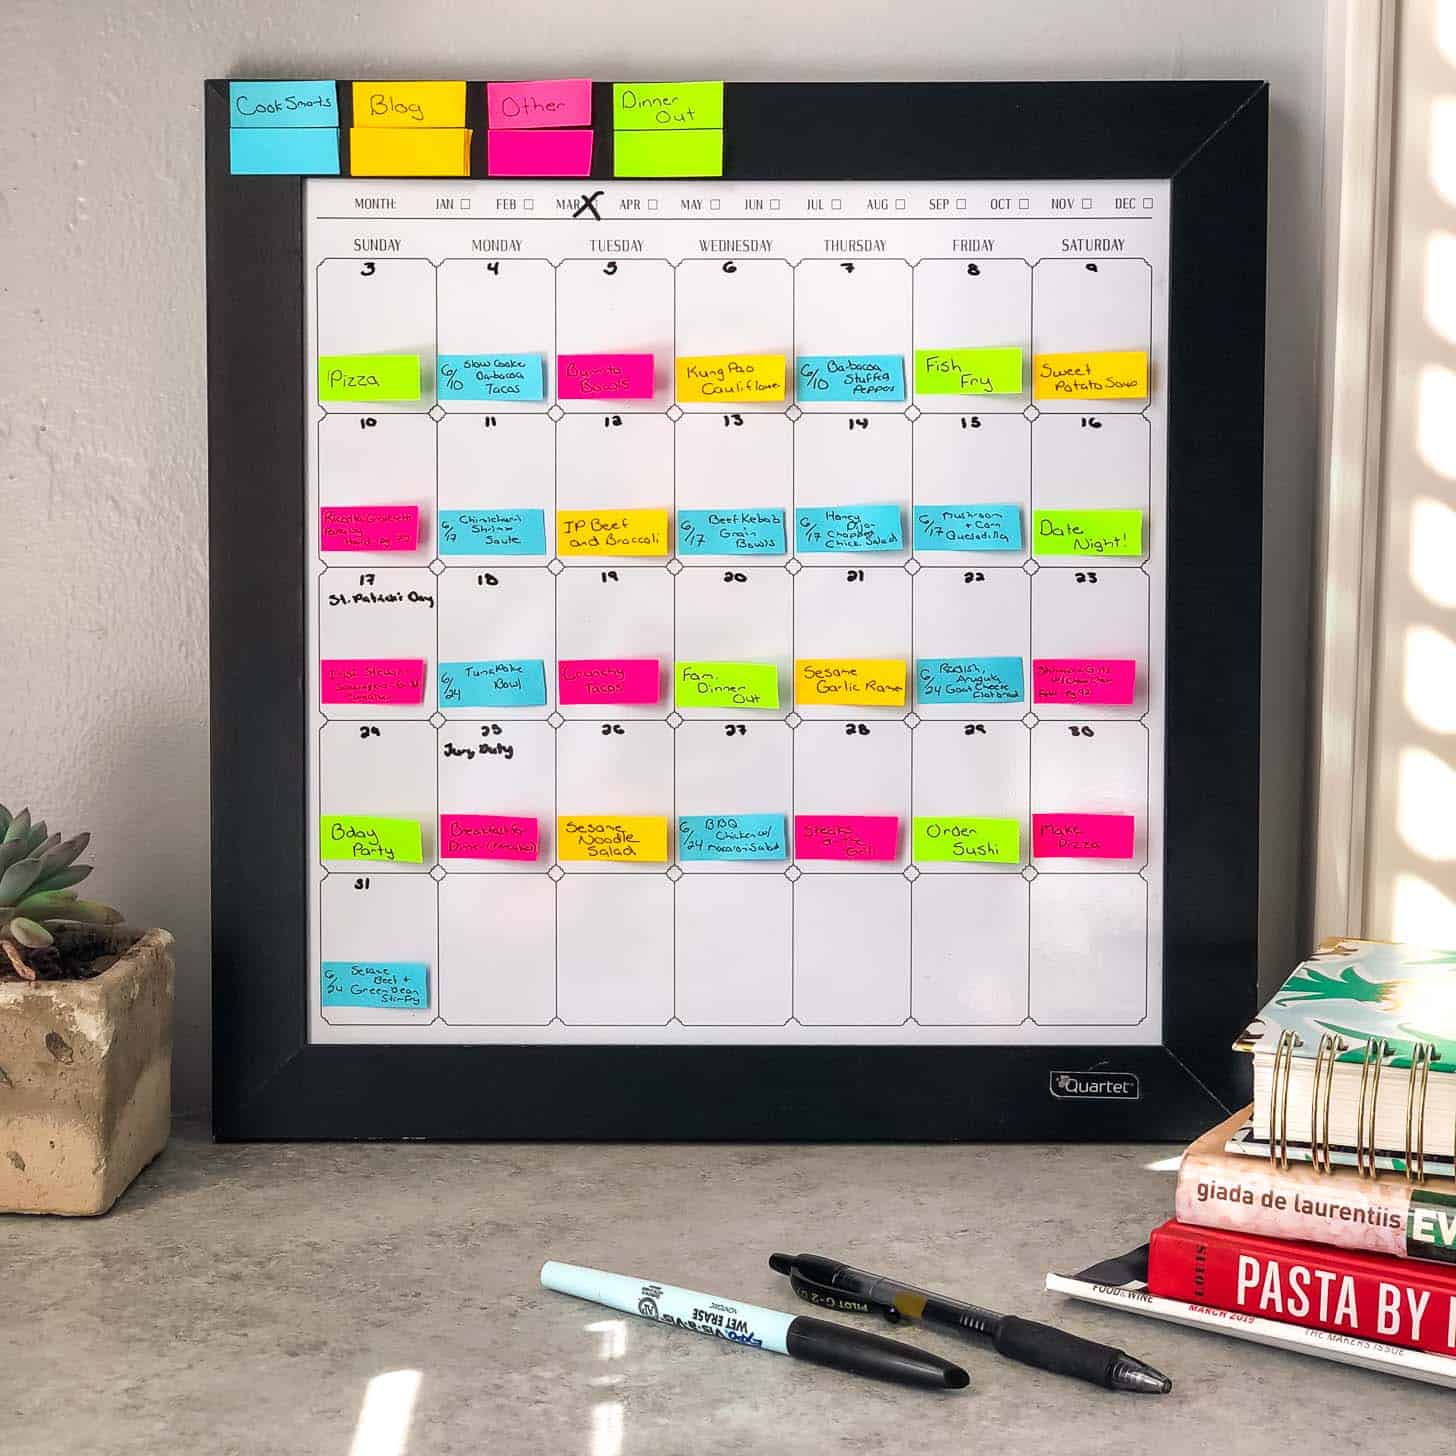
- Create a chalkboard wall for meal planning / grocery lists – Reduce the stress of wondering what’s for dinner each week with a kitchen chalkboard. Visual reminders ensure you never run out of your favorite items or worry about what’s for dinner.
- Add a rolling cart for coffee and tea or for storing less-often used appliances – Rolling carts are a convenient way to increase storage space in your kitchen. If you’re short on counter space, use a rolling cart as a makeshift coffee or tea bar.
- Use the back of a pantry door as a meal planning or family command station – The hidden side of a pantry door has so much potential. Post your meal plan for the week, or post family reminders.
I wrote a blog post about how to meal plan for a month (shown on my favorite white board below).
Please share here in the comments or join the conversation on Instagram! How do you keep your kitchen organized? Do you have a ton of space or not enough? Is there an organizational tool that you can’t live without?


great information ,thank you
Yeah, it not really easy to set things up, thanks for the suggestion I think I can make some use of it 🙂
Hi Jess,
Wonderful kitchen idea you share. A perfect kitchen decoration for any kitchen. I think this discussion is not a small kitchen it is possible for also a big kitchen.
Very helpful in organizing a kitchen. Buying tools in the kitchen that matches it will make it better in organization.
Great ideas on kitchen Organization.
Classic, inspiring and easy to carry out.
Amazing kitchen.
Very clean, enticing and full of life.
Well written article.
Thanks for sharing these ideas with us.
Hi – where are the shelves from! I’ve been looking for something like this. -Your old friend Rachel from ED
Hi Rachel!!! I love those shelves, but they were here when we came, so I’m not exactly sure. I had a contractor tell me that he thought they were just stock shelves from Home Depot or Lowes, so that’s my best guess. They’re great for a small (and otherwise useless) space like that.