The Ultimate Guide to 6-Minute Instant Pot Meals {Classics}
Published Jan 12, 2020•Updated Mar 15, 2022
This post may contain affiliate links. Please read our disclosure policy.
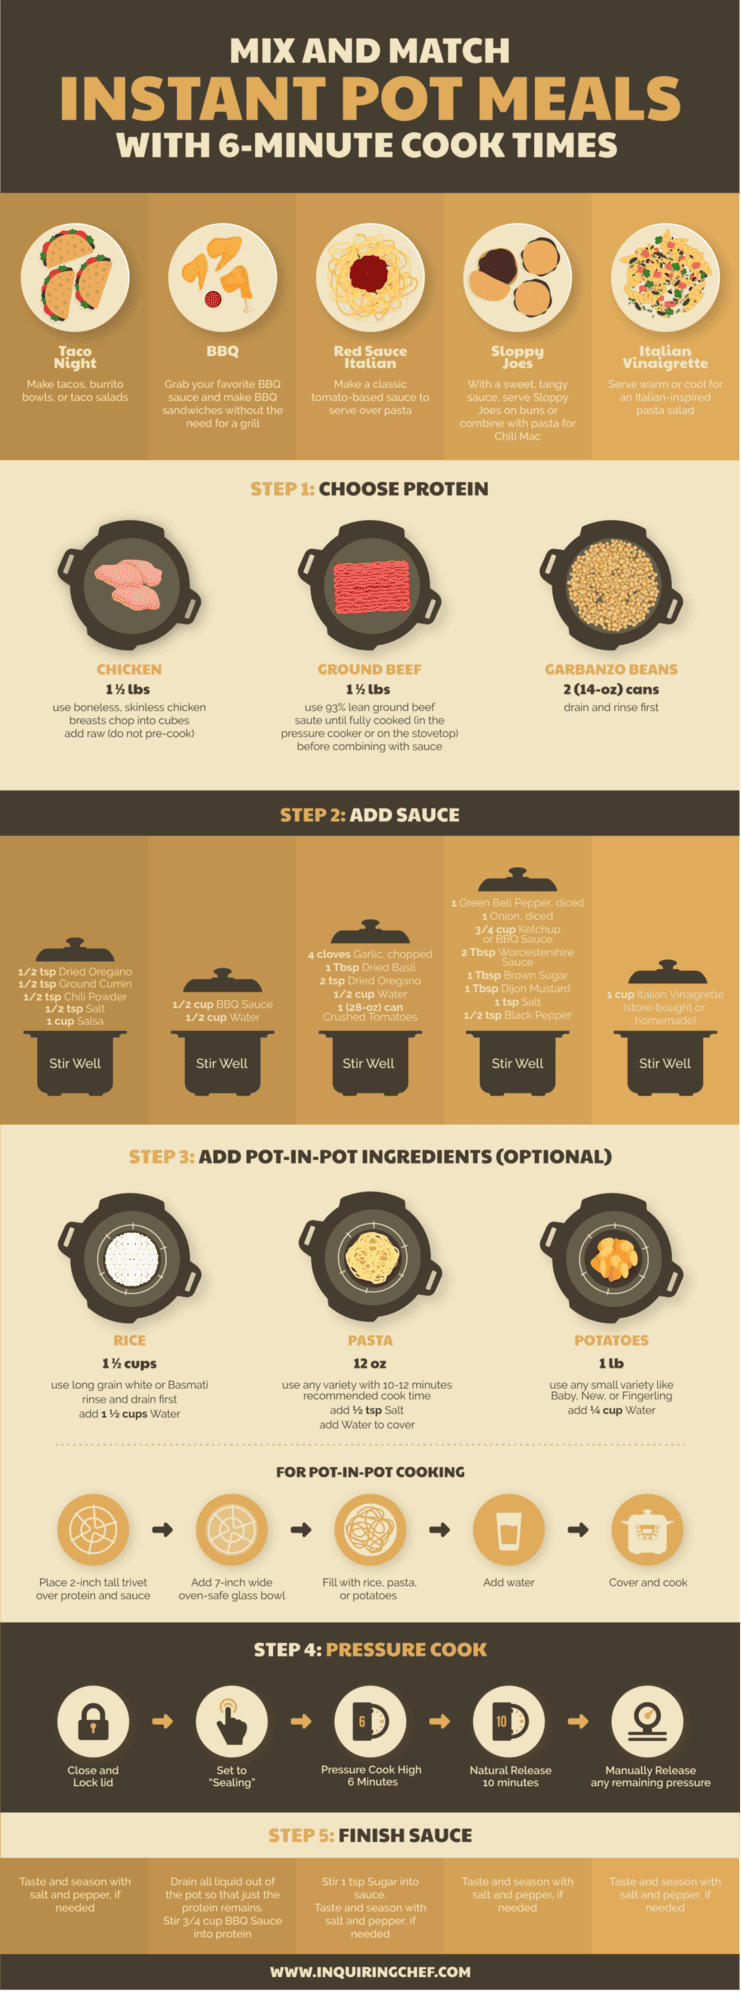
Meet the ultimate guide to classic meals you can make in your Instant Pot on 6-Minutes High Pressure. Mix and match your way to tons of delicious meals, including side dishes that can be cooked using the Pot-in-Pot Method.
I have been so excited to share this guide! It started as just an idea many months ago. I felt like I would use my Instant Pot more if I didn’t have to look up a new recipe every time I made a basic meal – like taco night (which we have almost every week). I want my Instant Pot to be the tool I use when I need dinner to be super fast and almost effortless. This guide makes that possible! All you have to remember is 6 minute high pressure + 10 minute natural release, and use these easy sauces to build flavor. This guide is only the beginning – check out The Ultimate Guide to 6-Minute Instant Pot Meals {Takeout Favorites}.
Have questions? I’ve got answers!
[feast_advanced_jump_to]
Q: What can I make with this guide?
So many things! Here are a few of my favorites, with photos included throughout the post:
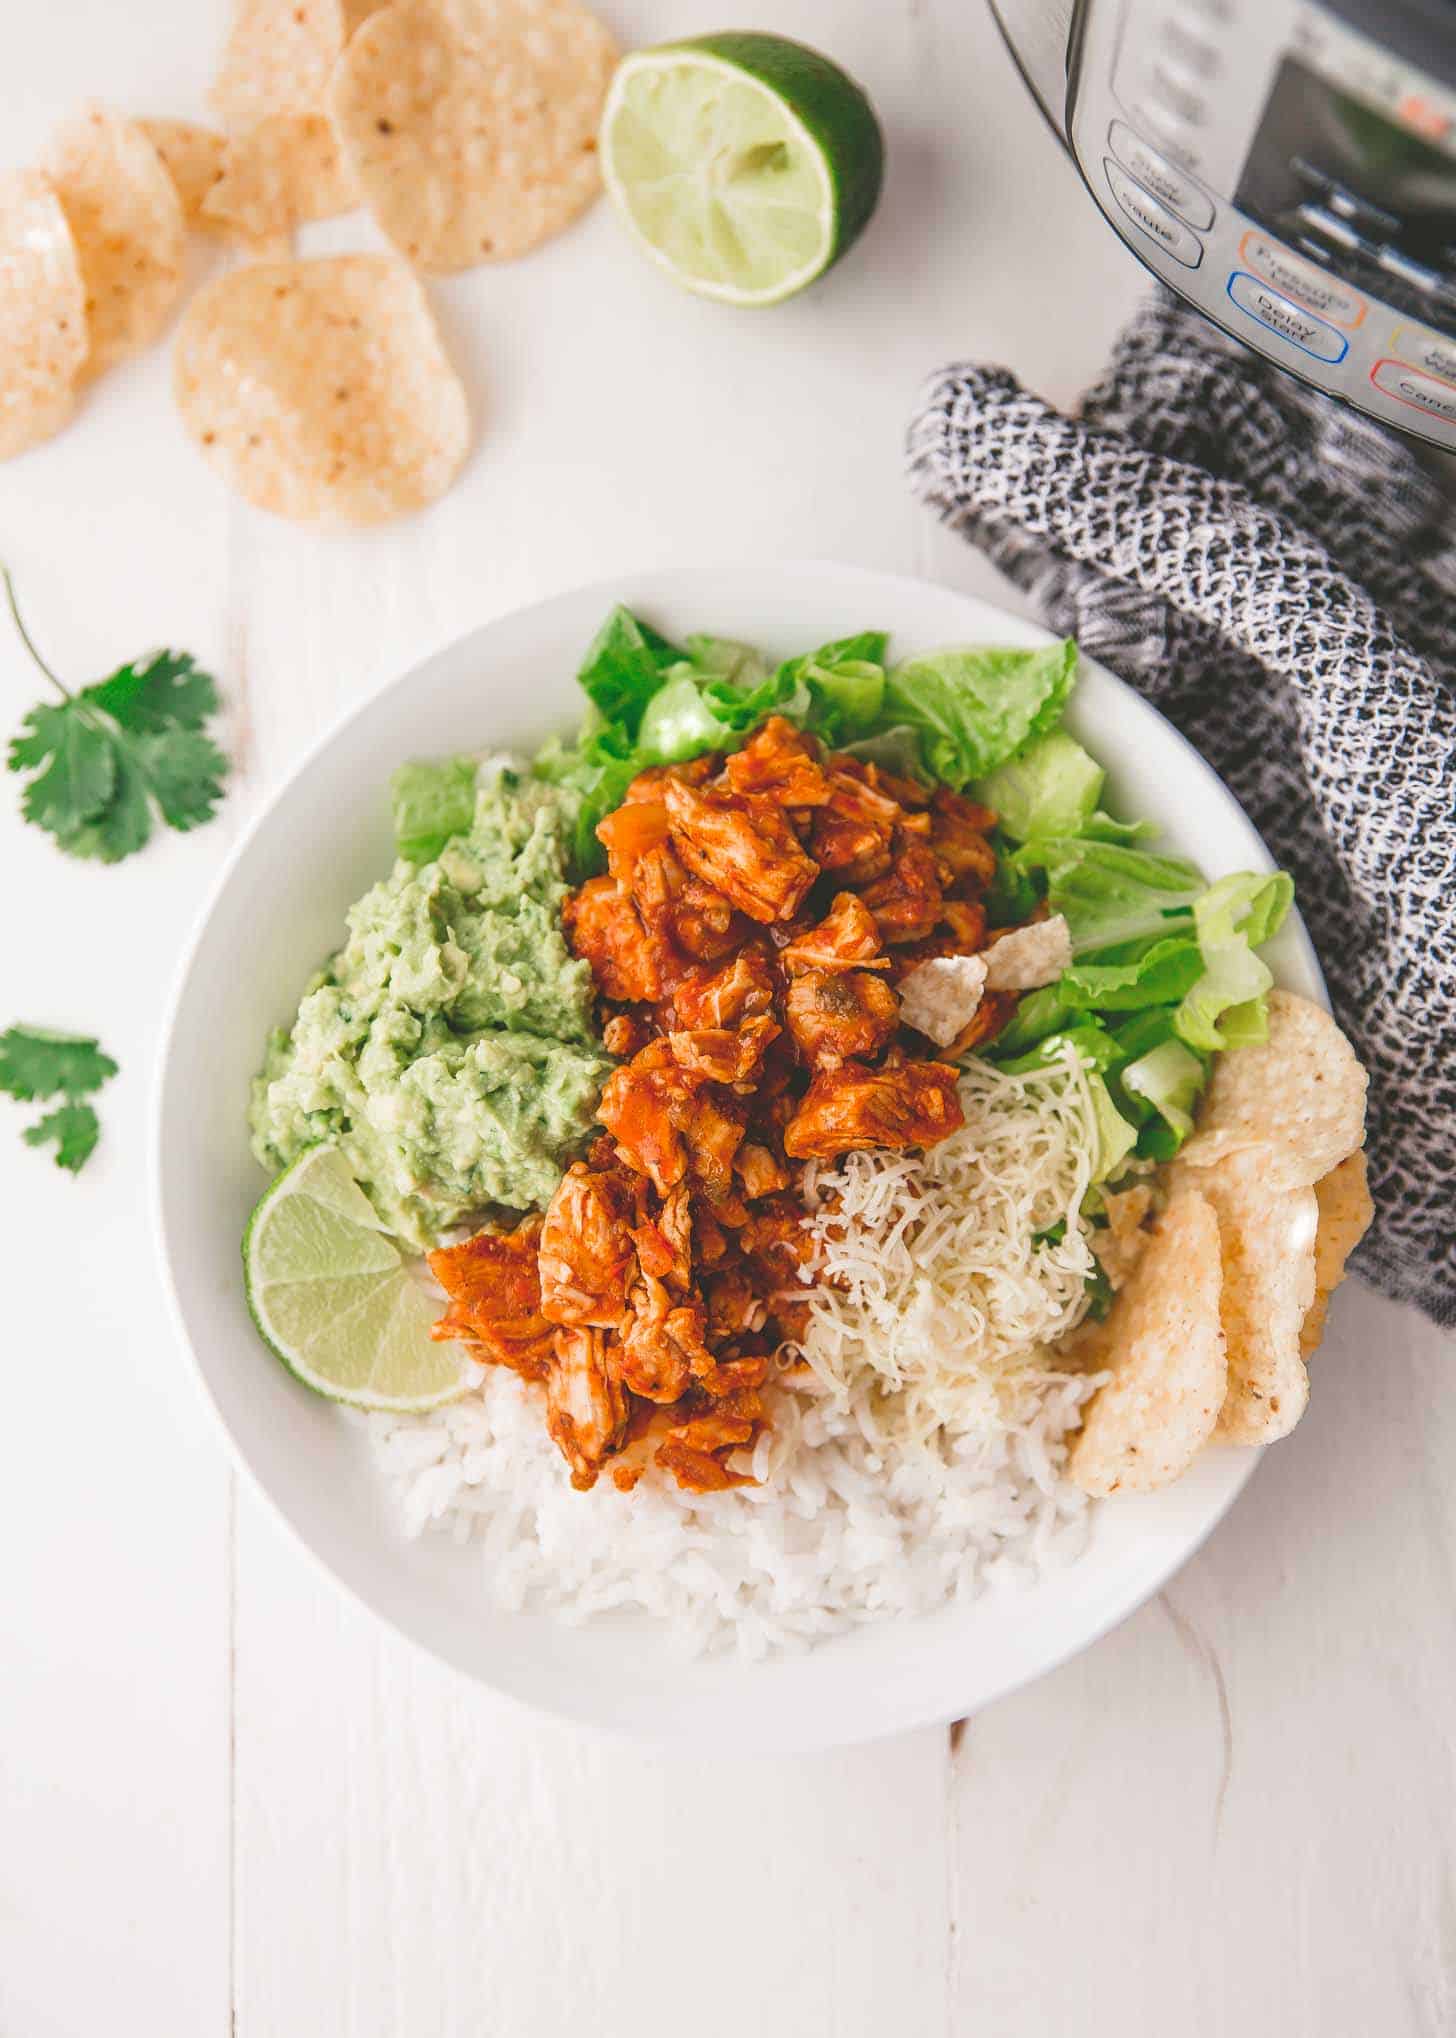
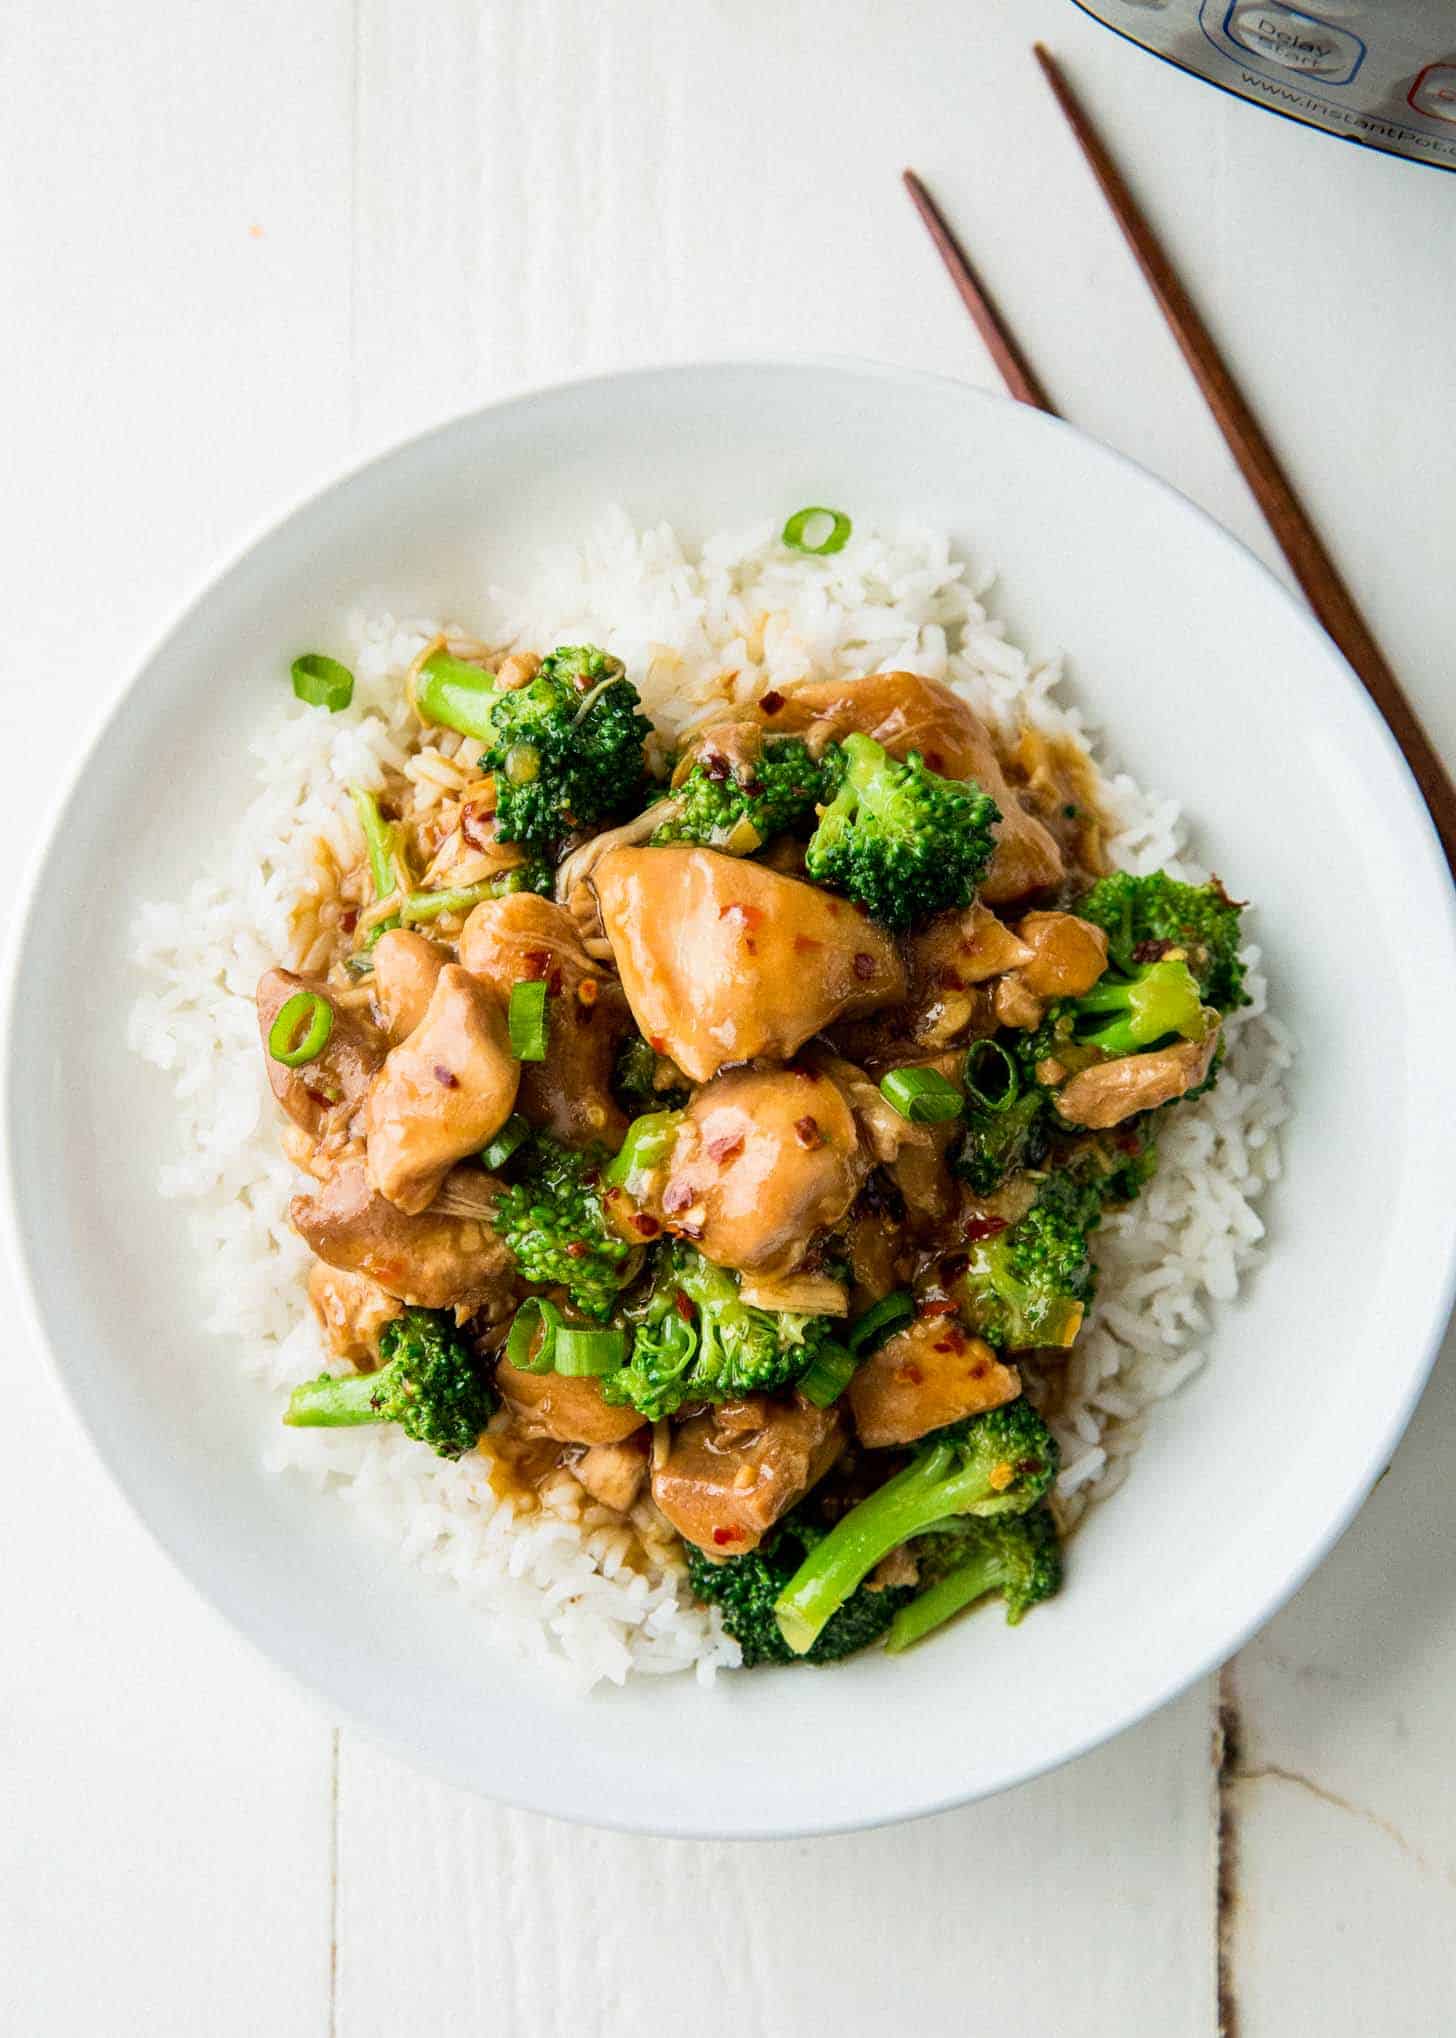
- Chicken Burrito Bowls (taco night + chicken + rice)
- BBQ Chicken Salad (BBQ + chicken)
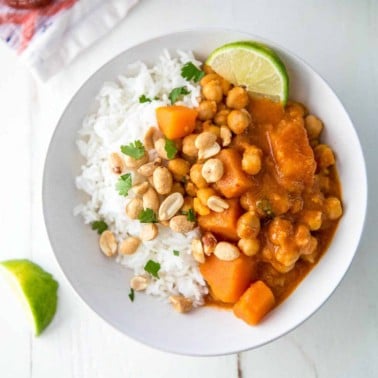
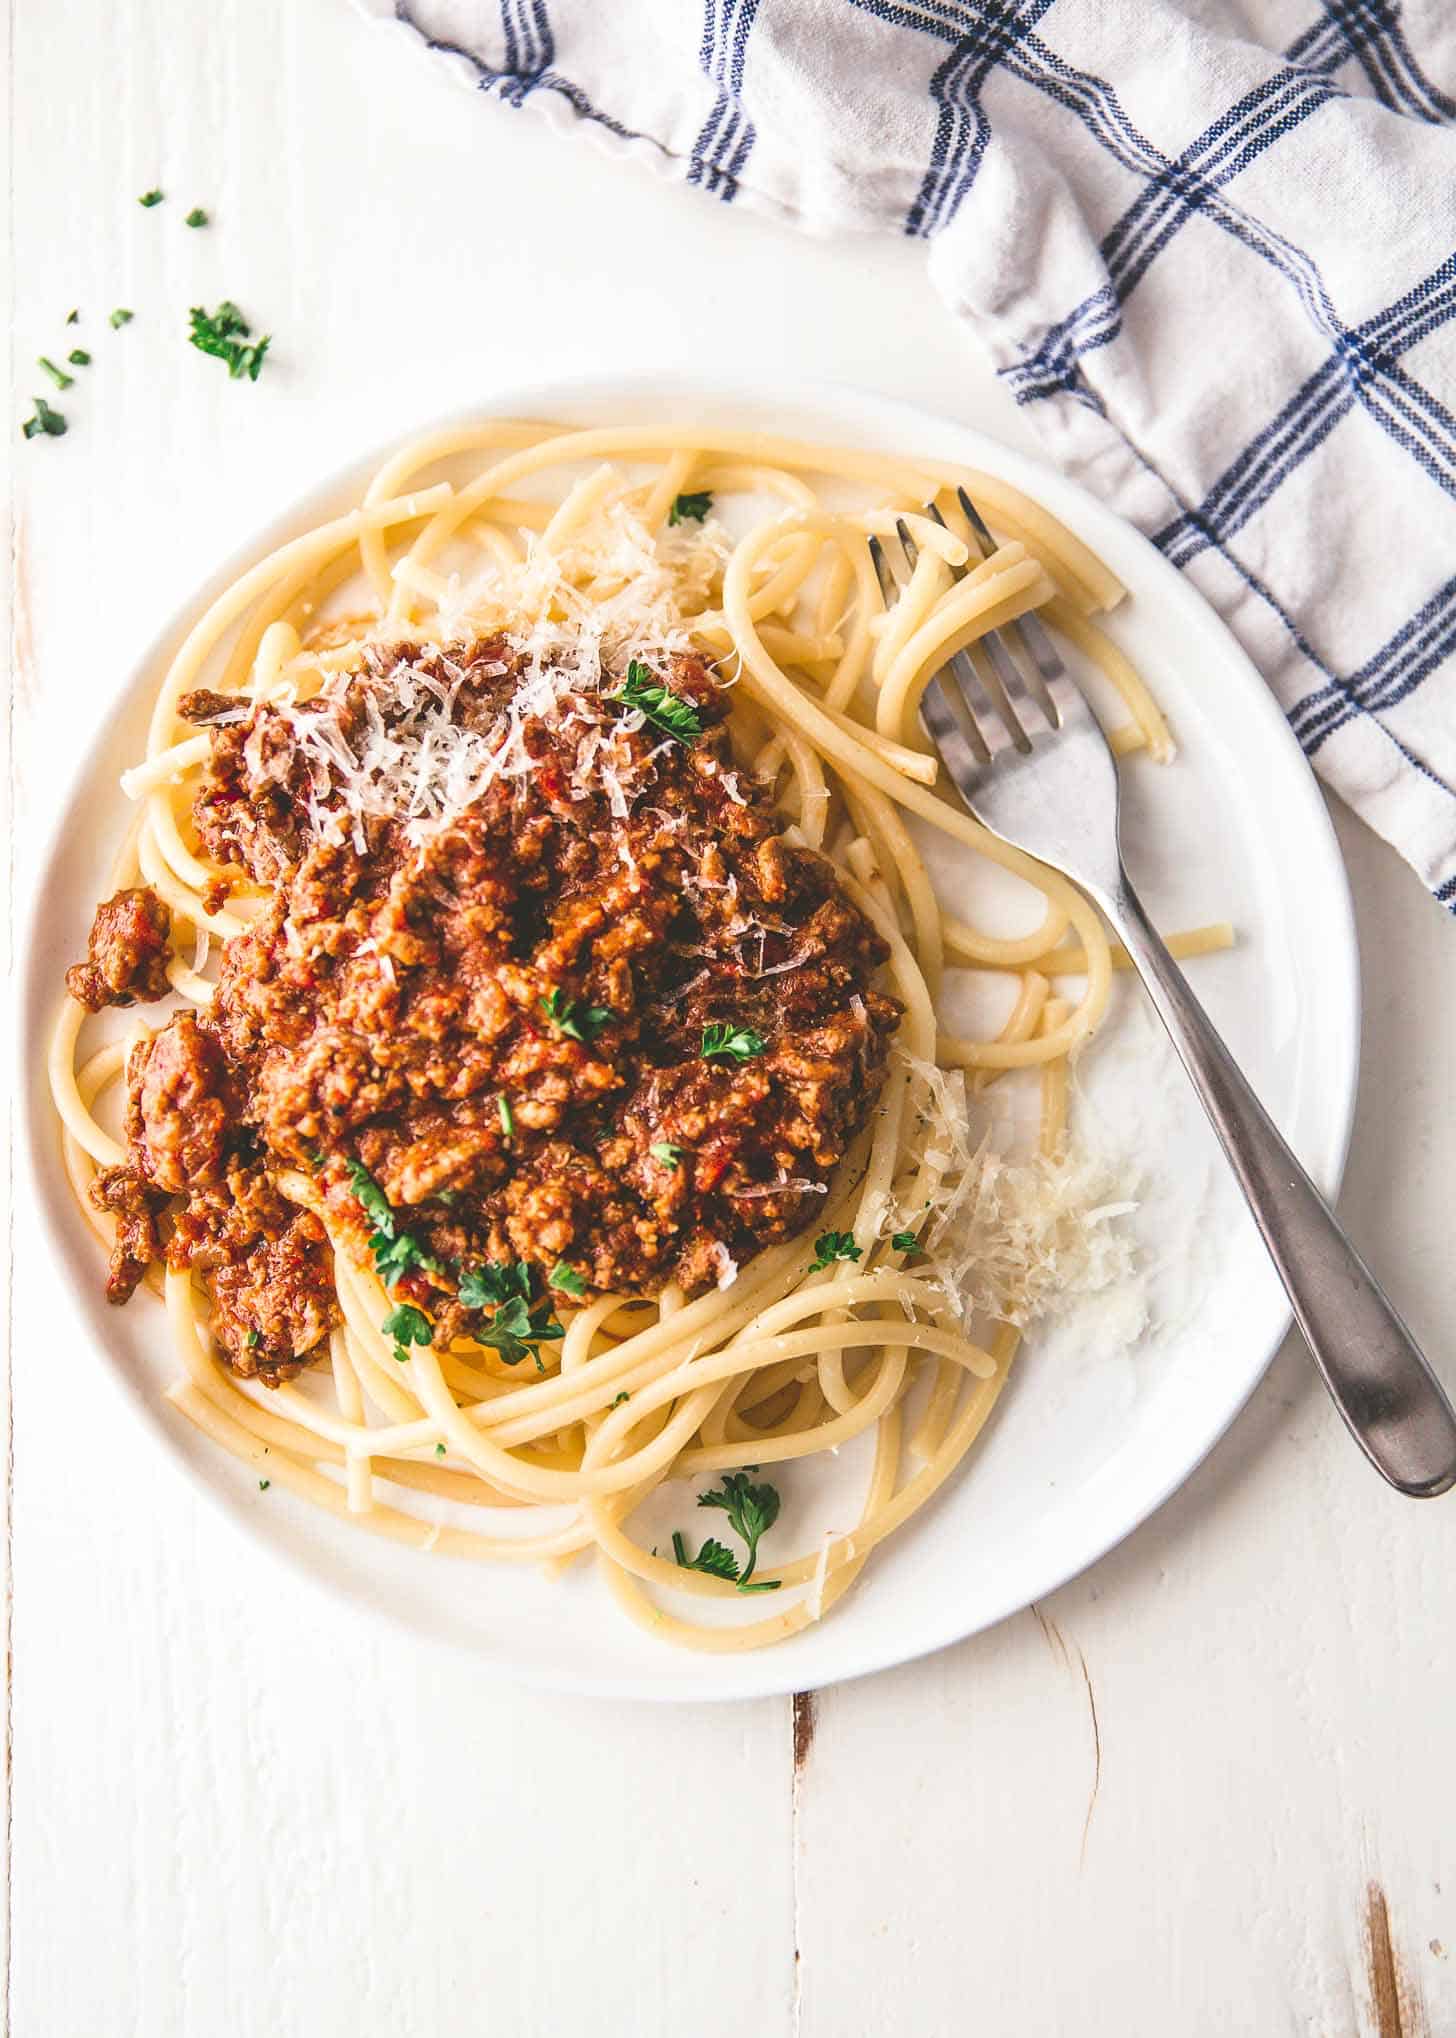
- Simple Beef Ragu (red sauce Italian + ground beef + pasta)
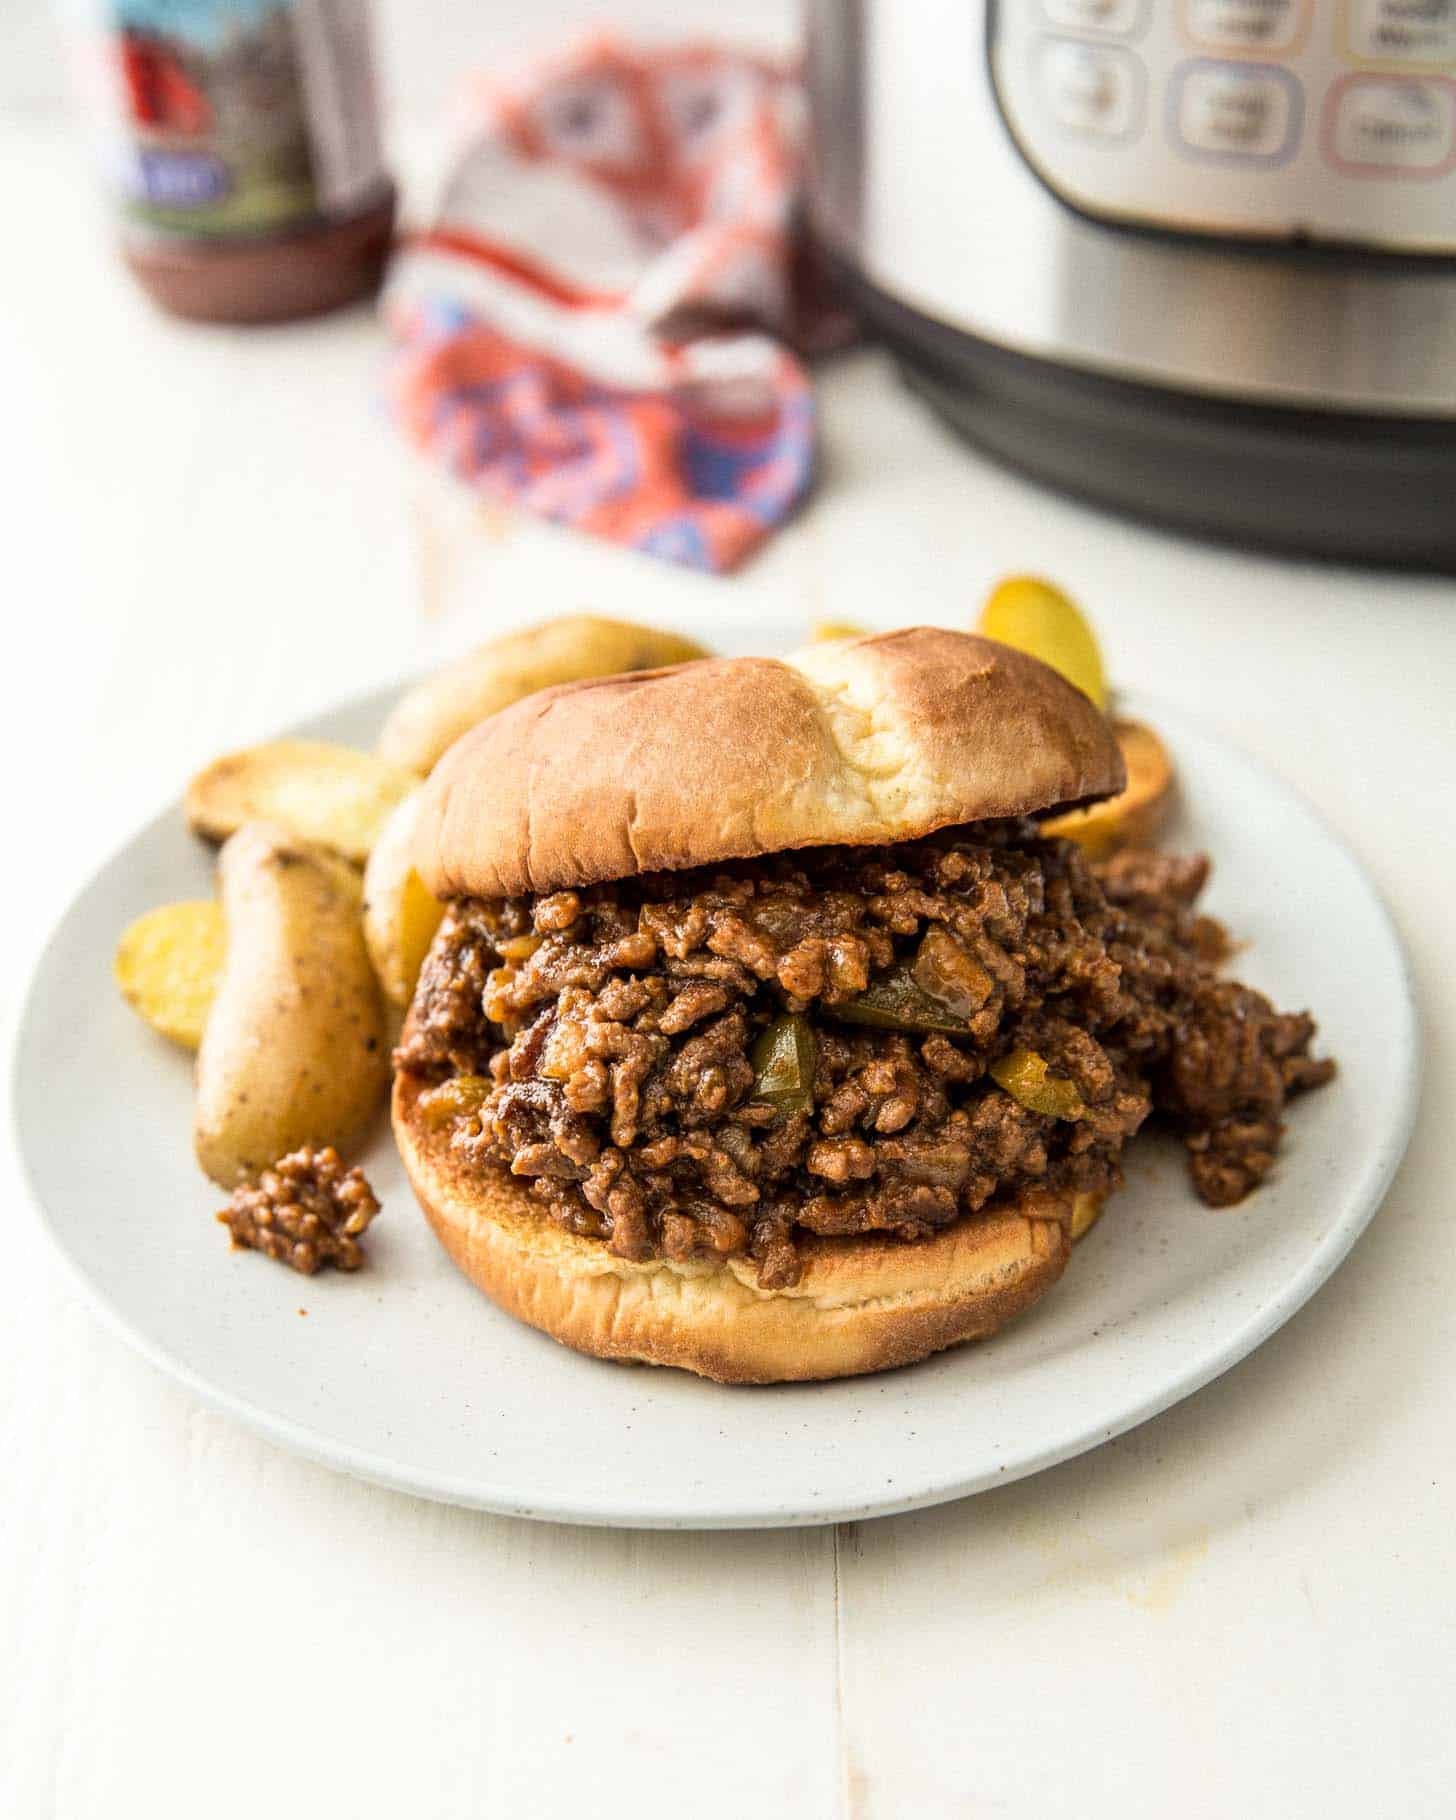
- Sloppy Joes with Home Fries (sloppy joes + ground beef + potatoes)
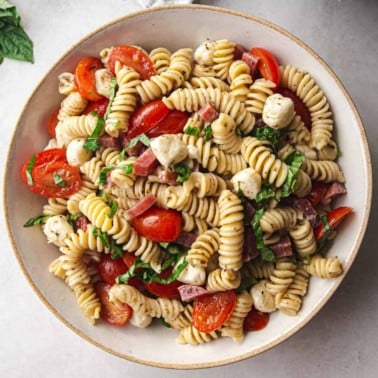
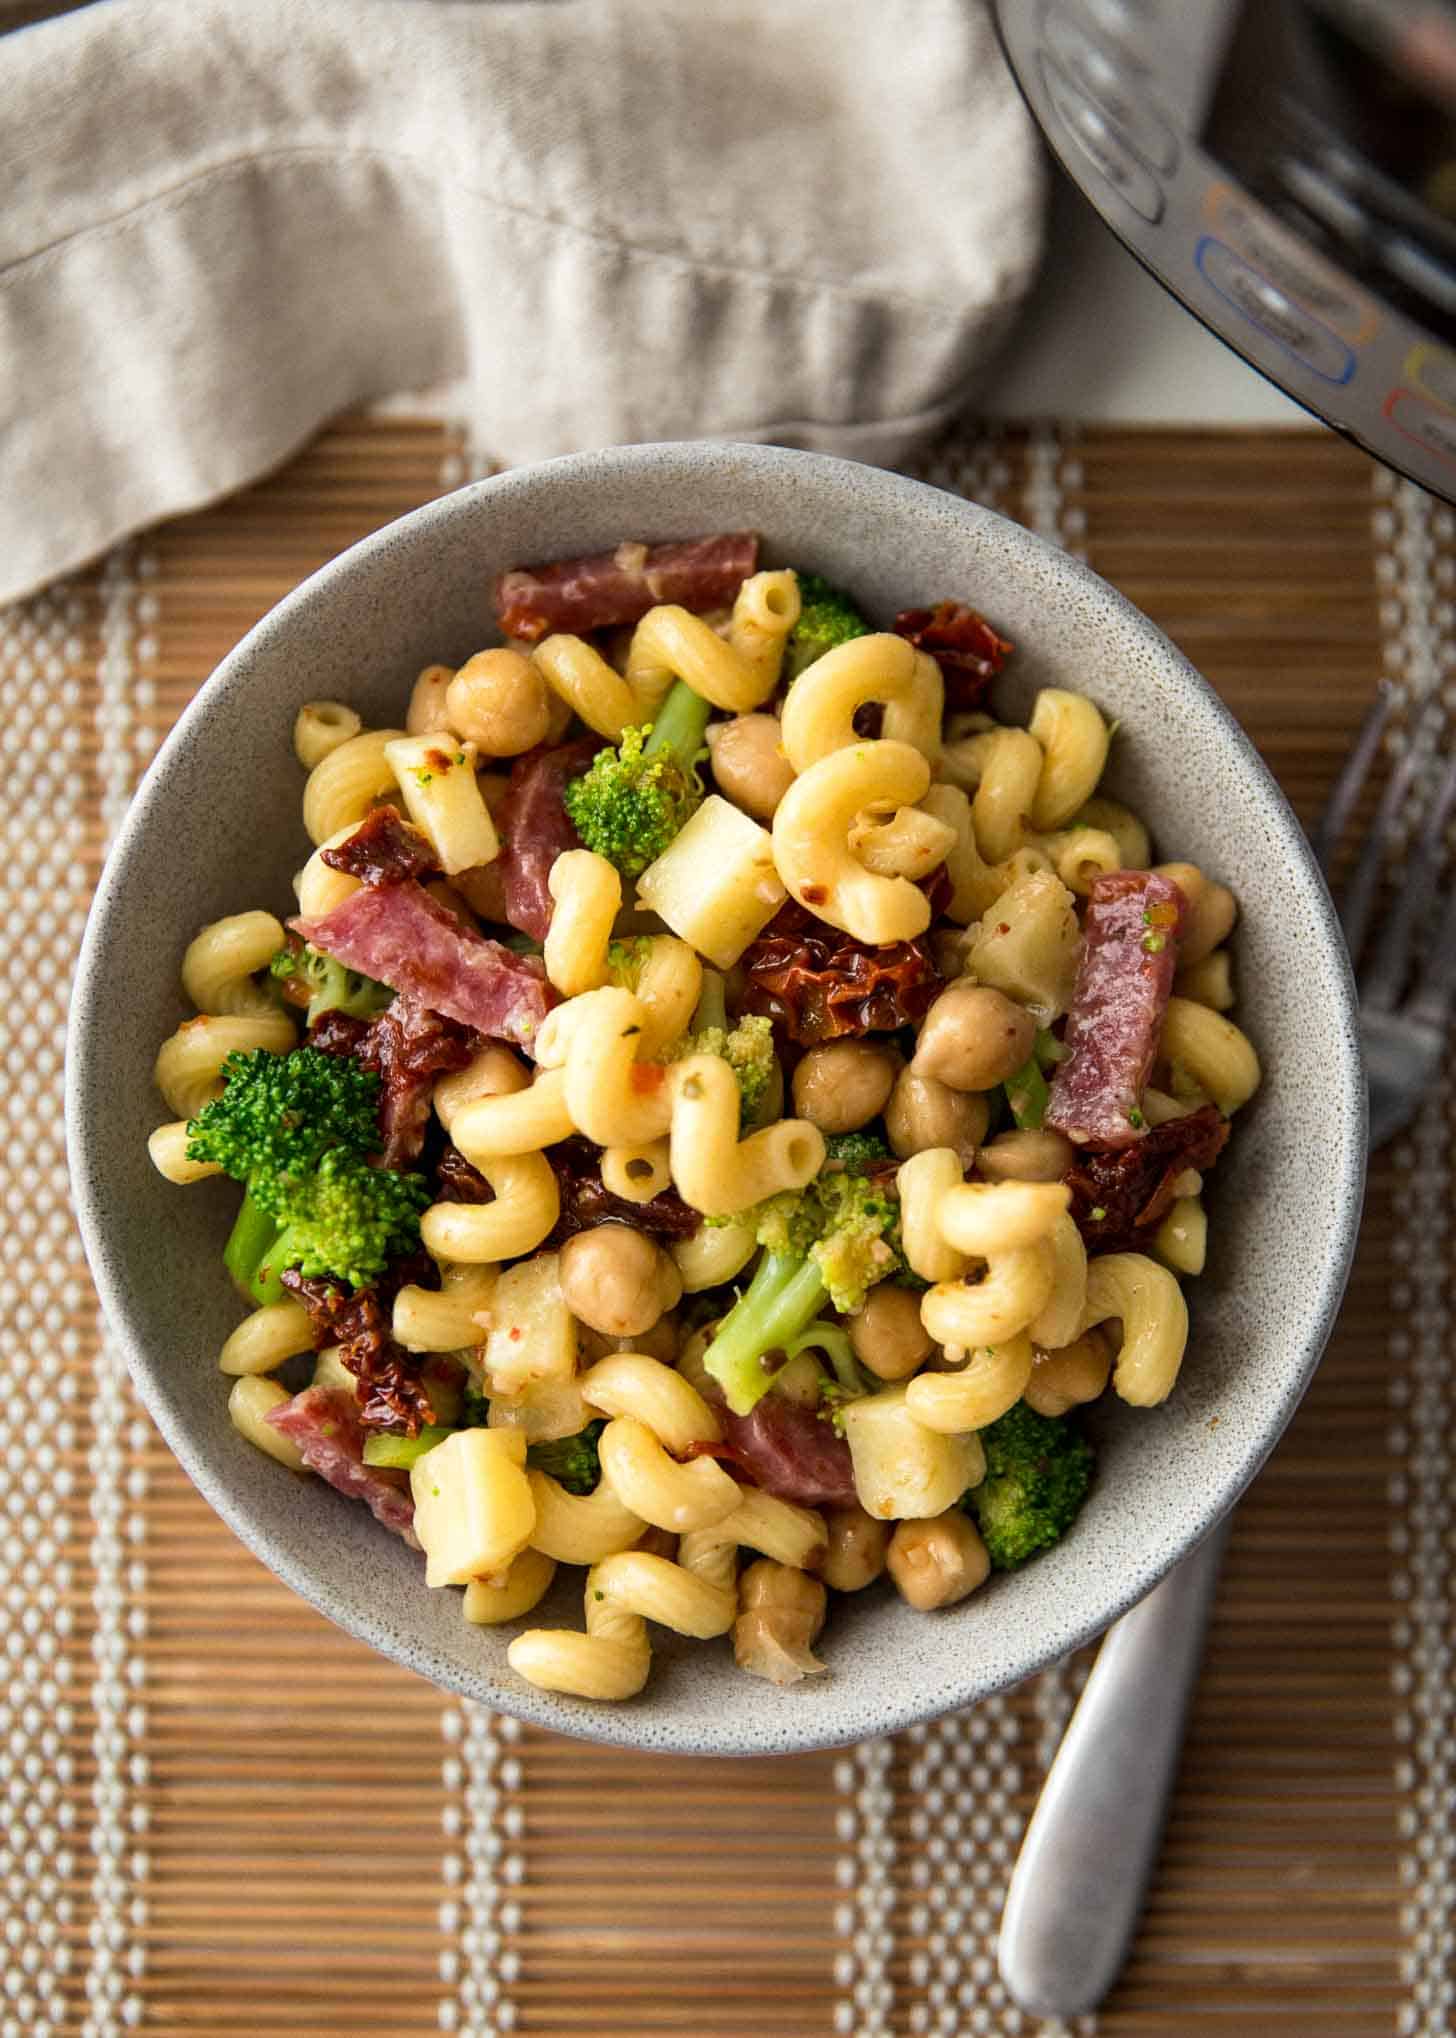
- Italian Pasta Salad (Italian vinaigrette + garbanzo beans + pasta)
Q: What size Instant Pot should I use?
These recipes were tested using the 6-Quart Instant Pot Duo. I cannot be sure that these will work in other types of pressure cookers or a larger Instant Pot, but I’d love to hear from you! If you make these in a different model or size, please let me know how it goes.
Q: My user manual says ___, but your recipe says ___. What should I do?
Always follow the directions that come in your user manual. For both safety and success, it’s important to follow those instructions above all others.
Q: What other tools do I need to make these recipes?
To make the basic recipes, all you need is an Instant Pot. To cook the Pot-in-Pot ingredients (rice, pasta, or potatoes), a few other tools help. For more details on cooking two items at once, check out this post on Pot-in-Pot Method.
- Instant Pot Rack – This 2-inch rack is just the right height to hold a bowl above the other ingredients.
- 7-Cup Round Pyrex Dish – I currently test any recipes using the pot-in-pot method using this oven-safe Pyrex dish. In earlier recipes you will find on this site, I used the medium sized bowl that came in this set of Anchor Glass Mixing Bowls which also worked well.
Q: Will this meal really be done in 6 minutes?
Not exactly. “6-Minute” refers to the high pressure setting. All of the variations take 10-15 minutes to prepare and load into the machine. The machine can then take anywhere from 5 to 20 minutes to come to full pressure. Then all of the meals also require a 10 minute natural release at the end. All told, give yourself about 45 minutes from start to finish to get these meals on the table (but almost all of that is hands off time while the Instant Pot works its magic).
Q: What’s the difference between garbanzo beans and chickpeas? Does it matter which kind I buy?
No difference – garbanzo beans an chickpeas are the same thing. In testing these recipes, I found that not all canned garbanzo beans / chickpeas are equal. Some store brands do not soften to tender even after 6 minutes of cooking at high pressure and are not as good. I now use Goya brand any time I buy them. If you like to buy dried garbanzo beans / chickpeas and prepare them yourself, that works too, but your finished dish may need some extra salt. (The canned ones have added include salt.)
Q: What if my rice isn’t cooking properly using the pot-in-pot method?
Rice can be finicky in the Instant Pot. With the cook times in this graphic, I get consistently tender long grain rice every time, but there could be a few factors that are affecting your result. First, be sure to rinse your rice really well before adding it to the machine. That will remove excess starch that can make the rice gummy when cooked. Also, make sure that when you combine the rice and water, all of the grains of rice are covered by water. If any are sticking out above the water, they may not cook properly.
If you still are not getting tender rice, you may have an old bag (this could be completely out of your control if the store had it sitting around). Try a new, fresh bag of rice.
It’s also worth adding that Basmati rice is my favorite to cook in the Instant Pot. I get the most consistent results and long, tender grains that are fluffy and separate. Try the Pot-in-Pot method with Basmati – you’ll be happy you did!
Q: I usually cook white rice for 4 minutes in the Instant Pot. Why do you cook it for 6 minutes?
When you use the Pot-in-Pot method to cook rice, you need to increase the cook time. The rice is not sitting on the bottom of the pan and, therefore, is not in direct contact with the heat source. If rice is raised above the heat source, it may not start to cook until the pressure builds and the machine is locked.
If using a different size or type of pressure cooker, different type bowl for the pot-in-pot method (like stainless steel instead of glass), or even a different type of rice, you may need to experiment a bit to find the exact right timing for your set-up. Once you know exactly how long it takes for your machine to cook the pot-in-pot ingredients, you can use any of the recipes with that adjusted time. (The main dish when cooked with chicken, ground beef, or garbanzo beans is very forgiving and should be fine if pressure cooked anywhere from a 4 to 8 minute timeframe. Just be sure to always use the 10 minute natural release.)
Q: What does the guide mean by “stock”? Can I use water instead?
“Stock” refers to any type of store-bought liquid labeled “stock” or “broth”. I usually keep chicken stock / broth on-hand, but vegetable stock or broth will work as well. Stock and Broth tend to be used interchangeably, although broth usually refers to a variety that has enough seasoning (salt) added that it could be sipped on its own like soup. In a pinch, you can definitely use water. Just taste the dish at the end – it might need a bit more salt.
Q: Can I add whole chicken breasts? Can I use chicken thighs?
One of the most time-consuming aspects of creating these recipes was figuring out the chicken versions! I knew we needed a solid chicken option, so I tested these recipes with whole chicken breasts (boneless and skinless), whole chicken thighs (boneless and skinless), and chopped chicken thighs. The strong winner was chopped chicken breast.
Chicken can go from tender to dry in no time in the Instant Pot. But chopped chicken breast had enough surface area that it absorbed all the flavorful sauce and stayed tender. I found it to be even more tender than whole chicken breasts which were bland and flavorless in the center and didn’t soak up enough sauce.
Whole chicken thighs took too long to cook to work with the side dishes (rice, pasta, potatoes) here. Chopped chicken thighs will certainly work, though I find them to release more fat and have a tendency to make the sauces seem a bit more oily. Chopped chicken breast was the clear winner.
Q: Why just 10 minutes of natural release? Can I let it completely naturally release?
The natural release function is how long it takes for the pressure that’s built up in the pot to naturally…well…release. When you manually release the pressure, you flip the valve to “venting” and quickly let out any remaining pressure in the pot. Natural release can take anywhere from a few minutes to up to 20 minutes, depending on the machine and its contents. All of these recipes call for letting the pressure release naturally (ie leaving the machine alone) for 10 minutes after cooking in order to give you consistent results across all variations. Set a timer to be sure you don’t leave the food in the machine for more than 10 minutes after cooking.
Q: Should I use the warm function during natural release?
Yes. Most machines, including the Instant Pot model used in testing these recipes, automatically switch to “Keep Warm” after the pressure cook time is complete. If your machine gives you a choice, be sure to set it to the warming setting during the 10 minute natural release time. In these recipes, the warm setting allows the ingredients (especially the pot-in-pot ingredients like rice, pasta, and potatoes) to gently continue cooking in the residual heat in the pan. This gentle heat right at the end prevents anything from being overcooked but is essential in getting everything tender.
Q: Why pasta that has a 10 to 12 minute recommended cook time?
It’s important to use the timeframe on the pasta you’re cooking as a guide to be sure you get al dente pasta that’s not over or under-cooked. Using the Pot-in-Pot method buys you extra time, but read this post about Pasta in the Instant Pot for more details on why it’s important to check the time listed on the pasta.
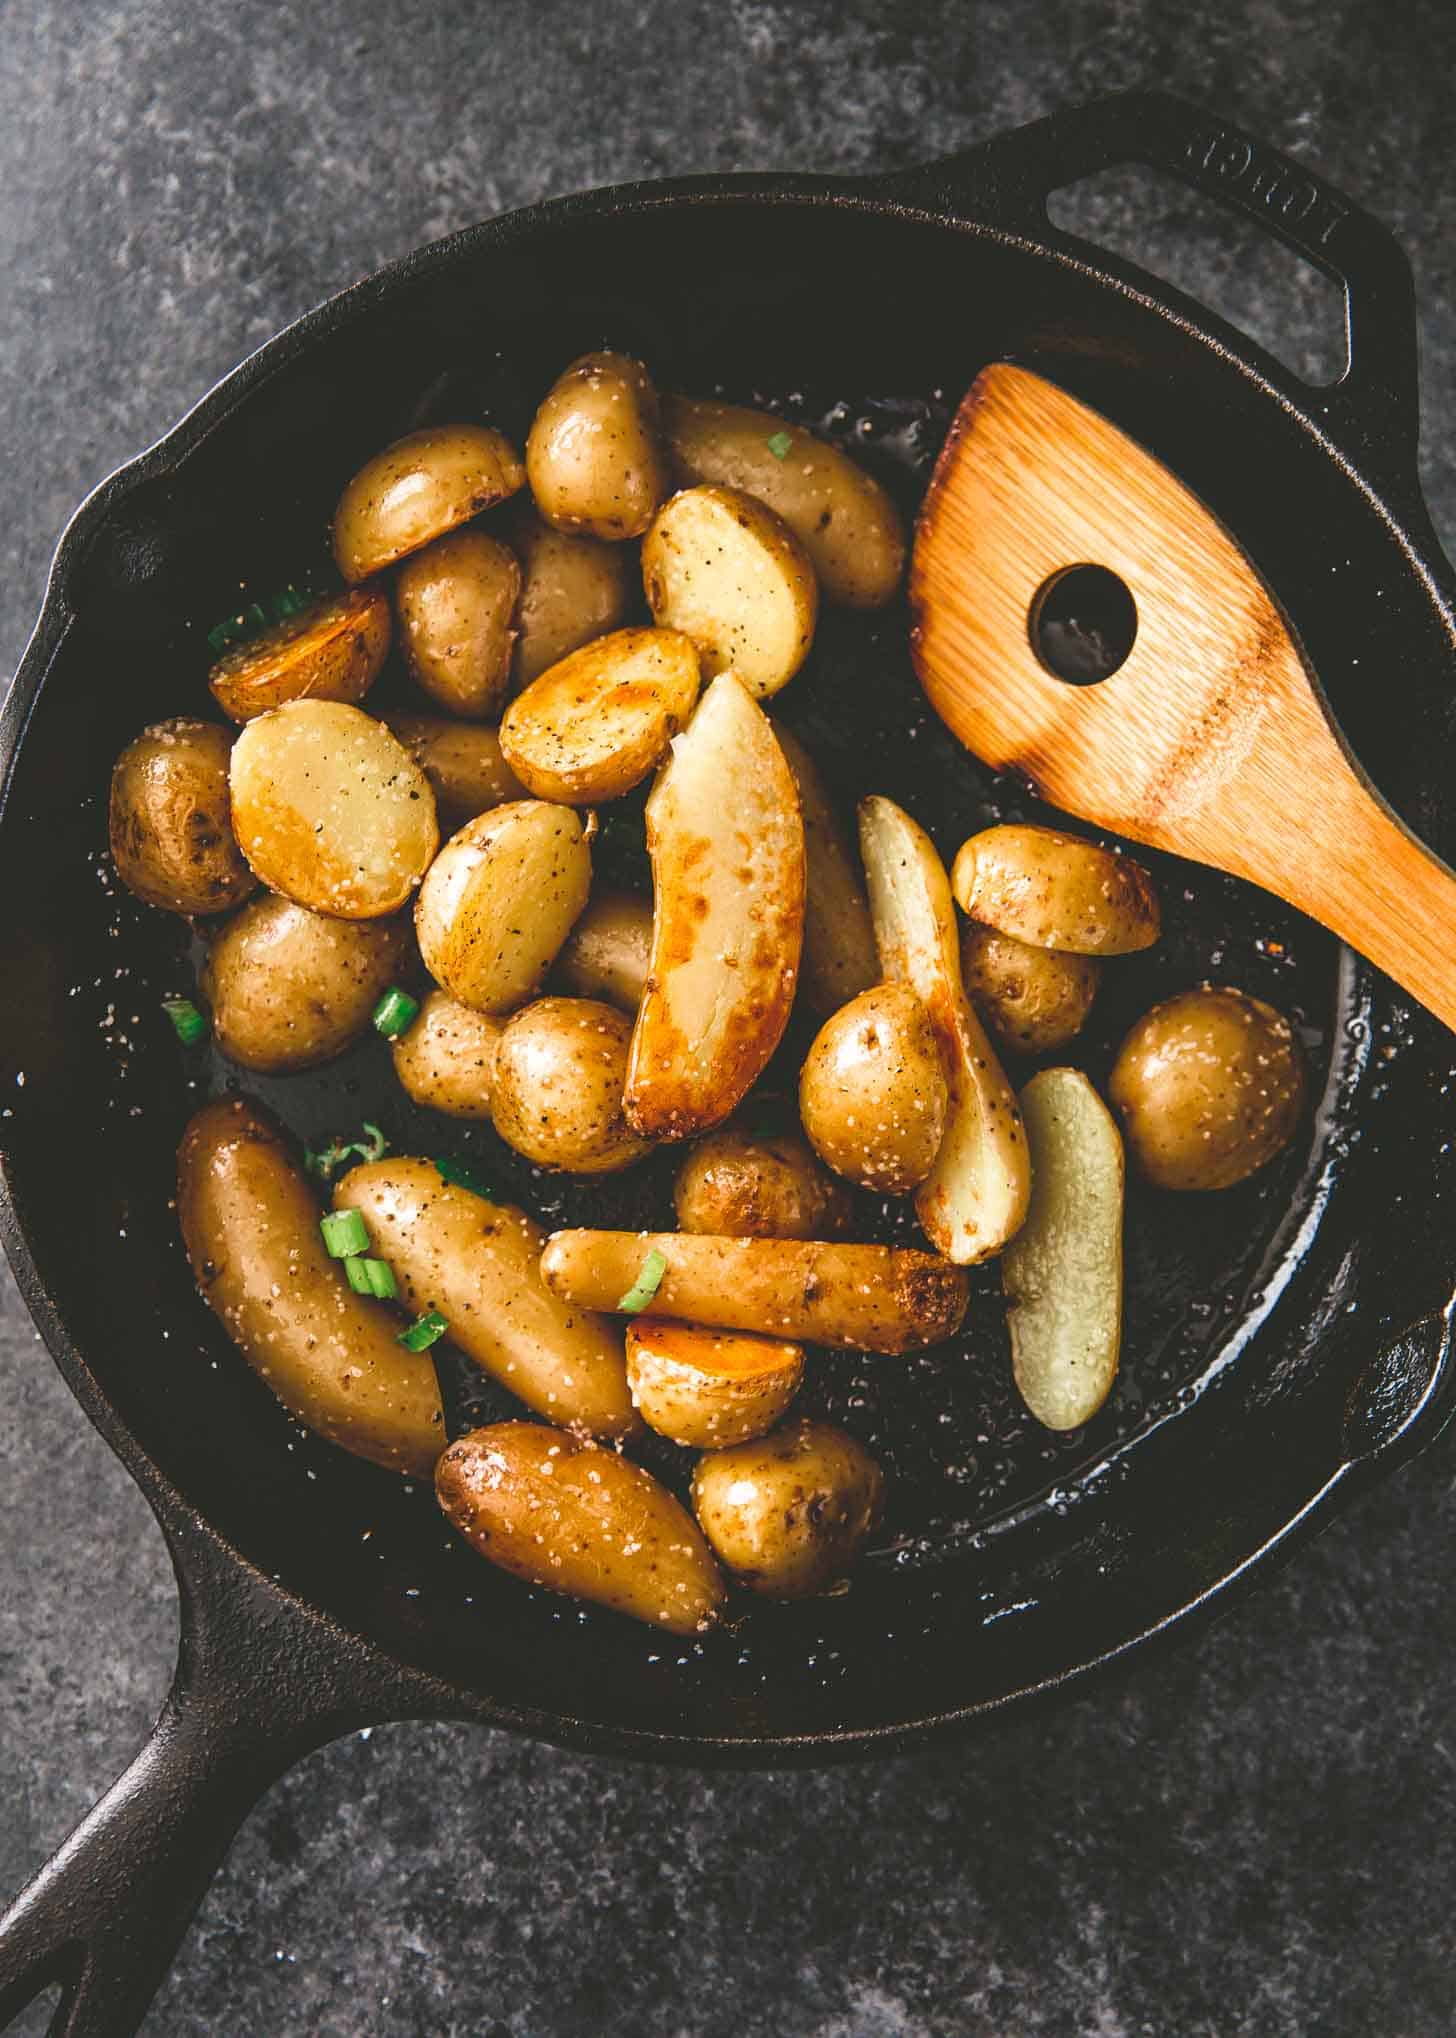
Q: What type of potatoes do I use?
The key for using potatoes in the pot-in-pot method is to use very small ones. As the guide says, baby, new, or fingerling potatoes all have a small diameter of 2 to 3 inches, but even smaller potatoes will work. These will cook to tender in the 6 minutes of pressure time listed.
Q: What do I do with the potatoes after cooking?
Finish the potatoes any way you might finish steamed or boiled potatoes. You can keep them simple and toss them with some olive oil, salt, and pepper. Add some fresh herbs and lemon juice for even more flavor. They can also be used to make a potato salad to serve warm or cold. OR, you can do my favorite thing – make home fries. It’s a little more work, but SO worth it. Slice the potatoes in half and fry them in a skillet in a tablespoon or two of oil for 5 to 7 minutes. Sprinkle them with salt as they cook. So. Darn. Good.
Q: I got the Burn Error message. Help!
Oh the dreaded burn error. This is a warning that the machine gives you if something is burning on the bottom of the pan. It’s a safety function and also serves to prevent you from burning your food. Preventing that message was a key thing I kept in mind while testing these recipes. Tomato-based sauces are particularly prone to causing the burn error message, so that is why you’ll see that the Red Sauce Italian recipe has added water. The other recipes never caused the burn error while I was testing them.
Two things can really help if you get the burn error:
- Make sure the bottom of the pot is clean. Any little browned bits stuck to the bottom of your pot are a burn error waiting to happen.
- Add water. Using enough liquid will help to prevent the burn warning. Unlike stovetop cooking, very little liquid is lost during pressure cooking (it’s all trapped inside the machine and can’t escape in the form of steam), so you only need to add a bit more liquid to help things along – ¼ cup should do it.
If you get the burn error message, you can turn it off, manually release the pressure, vigorously scrape the bottom of the pan, stir in ¼ cup water, and re-start the machine. Most likely this will solve the problem. (Unfortunately, if you’re cooking something in the pot-in-pot method, the rice, pasta, or potatoes may have already started cooking and may get overcooked if you have to start the machine over again.)
Want more??
Check out The Ultimate Guide to 6-Minute Instant Pot Meals {Takeout Favorites} to make General Tso’s, Indian Butter Curry, and Thai Red Curry! Enough meals to keep your Instant Pot going and your dinner table happy for weeks!
*This post contains affiliate links*