On Making Stock and Slowing Down
Ingredients
- 4 lbs. chicken carcasses (from about 2 small chickens)
- 3 Tbsp. olive oil
- 2 shallots, cut in half
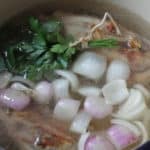
- 1 onion, cut into quarters
- small bunch of fresh Italian parsley
Instructions
- In a large dutch oven, brown chickens on all sides in olive oil. I find that this takes about 15 minutes, turning the chickens when each side is finished browning. The olive oil will sputter and spit all over the counter while this is going on, so it's a good idea to leave the lid on but ajar, minimizing the amount of counter cleaning you'll have to do later.
- When the chickens are thoroughly browned on all sides, carefully pour off the liquid and oil that resulted from the browning process. (This helps to insure that the finished product will be rich and chickeny rather than greasy.) Put the pot back on the heat. Push the chickens to one side and cook the shallot and onion on the bottom of the pot until they begin to brown lightly in spots. Pour enough water into the pot to come to about 2 inches over the top of the chicken. Tie the parsely with a piece of kitchen twine and add it to the pot. Bring the liquid to a low simmer and then reduce the heat a bit so that the liquid is barely bubbling. (To minimize the amount of fat in the finished stock, the liquid should bubble only slightly and should stay at a temperature that keeps it at an extremely low simmer.) Return the lid to the pan and leave it slightly ajar while the stock cooks at this temperature for 3 hours. Check the liquid about halfway through to insure it has not reduced more than an inch or so. If it has, add just enough water to cover the top of the chicken.
- After 3 hours of gentle cooking, remove the pan from the heat and allow to cool to room temperature. Line a colandar with several layers of cheesecloth and place over a large bowl. Gently pour the liquid through the cheesecloth, straining out all of the solids. Discard solids. Allow the resulting liquid to rest in the refrigerator overnight. Skim off any fat that rose to the top overnight. Use broth within a couple days or store in small batches in the freezer.
Notes
Note on chicken: I make this stock out of raw chicken carcasses that I buy from my local grocer. These are inexpensive and still have some of the more flavorful pieces of meat on them after the butcher has cut off the more commonly-used pieces. I find that I like the stock better this way because it gets flavor from all of the browning you can do to the raw carcass rather than the more mild flavor I find comes from using the remains of a roasted chicken.
Note on salt: You may notice that I do not add salt to my stock. This is a relatively new twist that I've picked up in my cooking classes in Thailand, and I find that I now prefer this method. Many of my Thai instructors (who, like most Thai cooks I've come across, are gifted at the art of seasoning food) prefer to add salt only after the stock has been added to a dish. This strikes me as profoundly reasonable. Using an un-salted stock allows for flexibility in cooking. Even with a brothy soup, I love starting out with this un-salted stock, seasoning the soup only after tasting all of its components together. The broth below tastes fairly bland and purely chicken-y when it's done, but all the flavor comes pouring out once I season it in whatever I'm cooking.